Appearance
Managing Affiliates
In FluentAffiliate, managing your affiliates is easy and organized. The Affiliates page is your central hub to see a complete overview of all your affiliates, check their performance, manage their status, and even add new affiliates manually.
In this guide, we'll walk you through what you can do on the Affiliates page.
Affiliates Dashboard Overview
First, go to the Affiliates tab from the FluentAffiliate menu. There, you'll see the affiliate dashboard with all your site's affiliate details.
Here's what you'll find in the Affiliates section:
Adding a New Affiliate
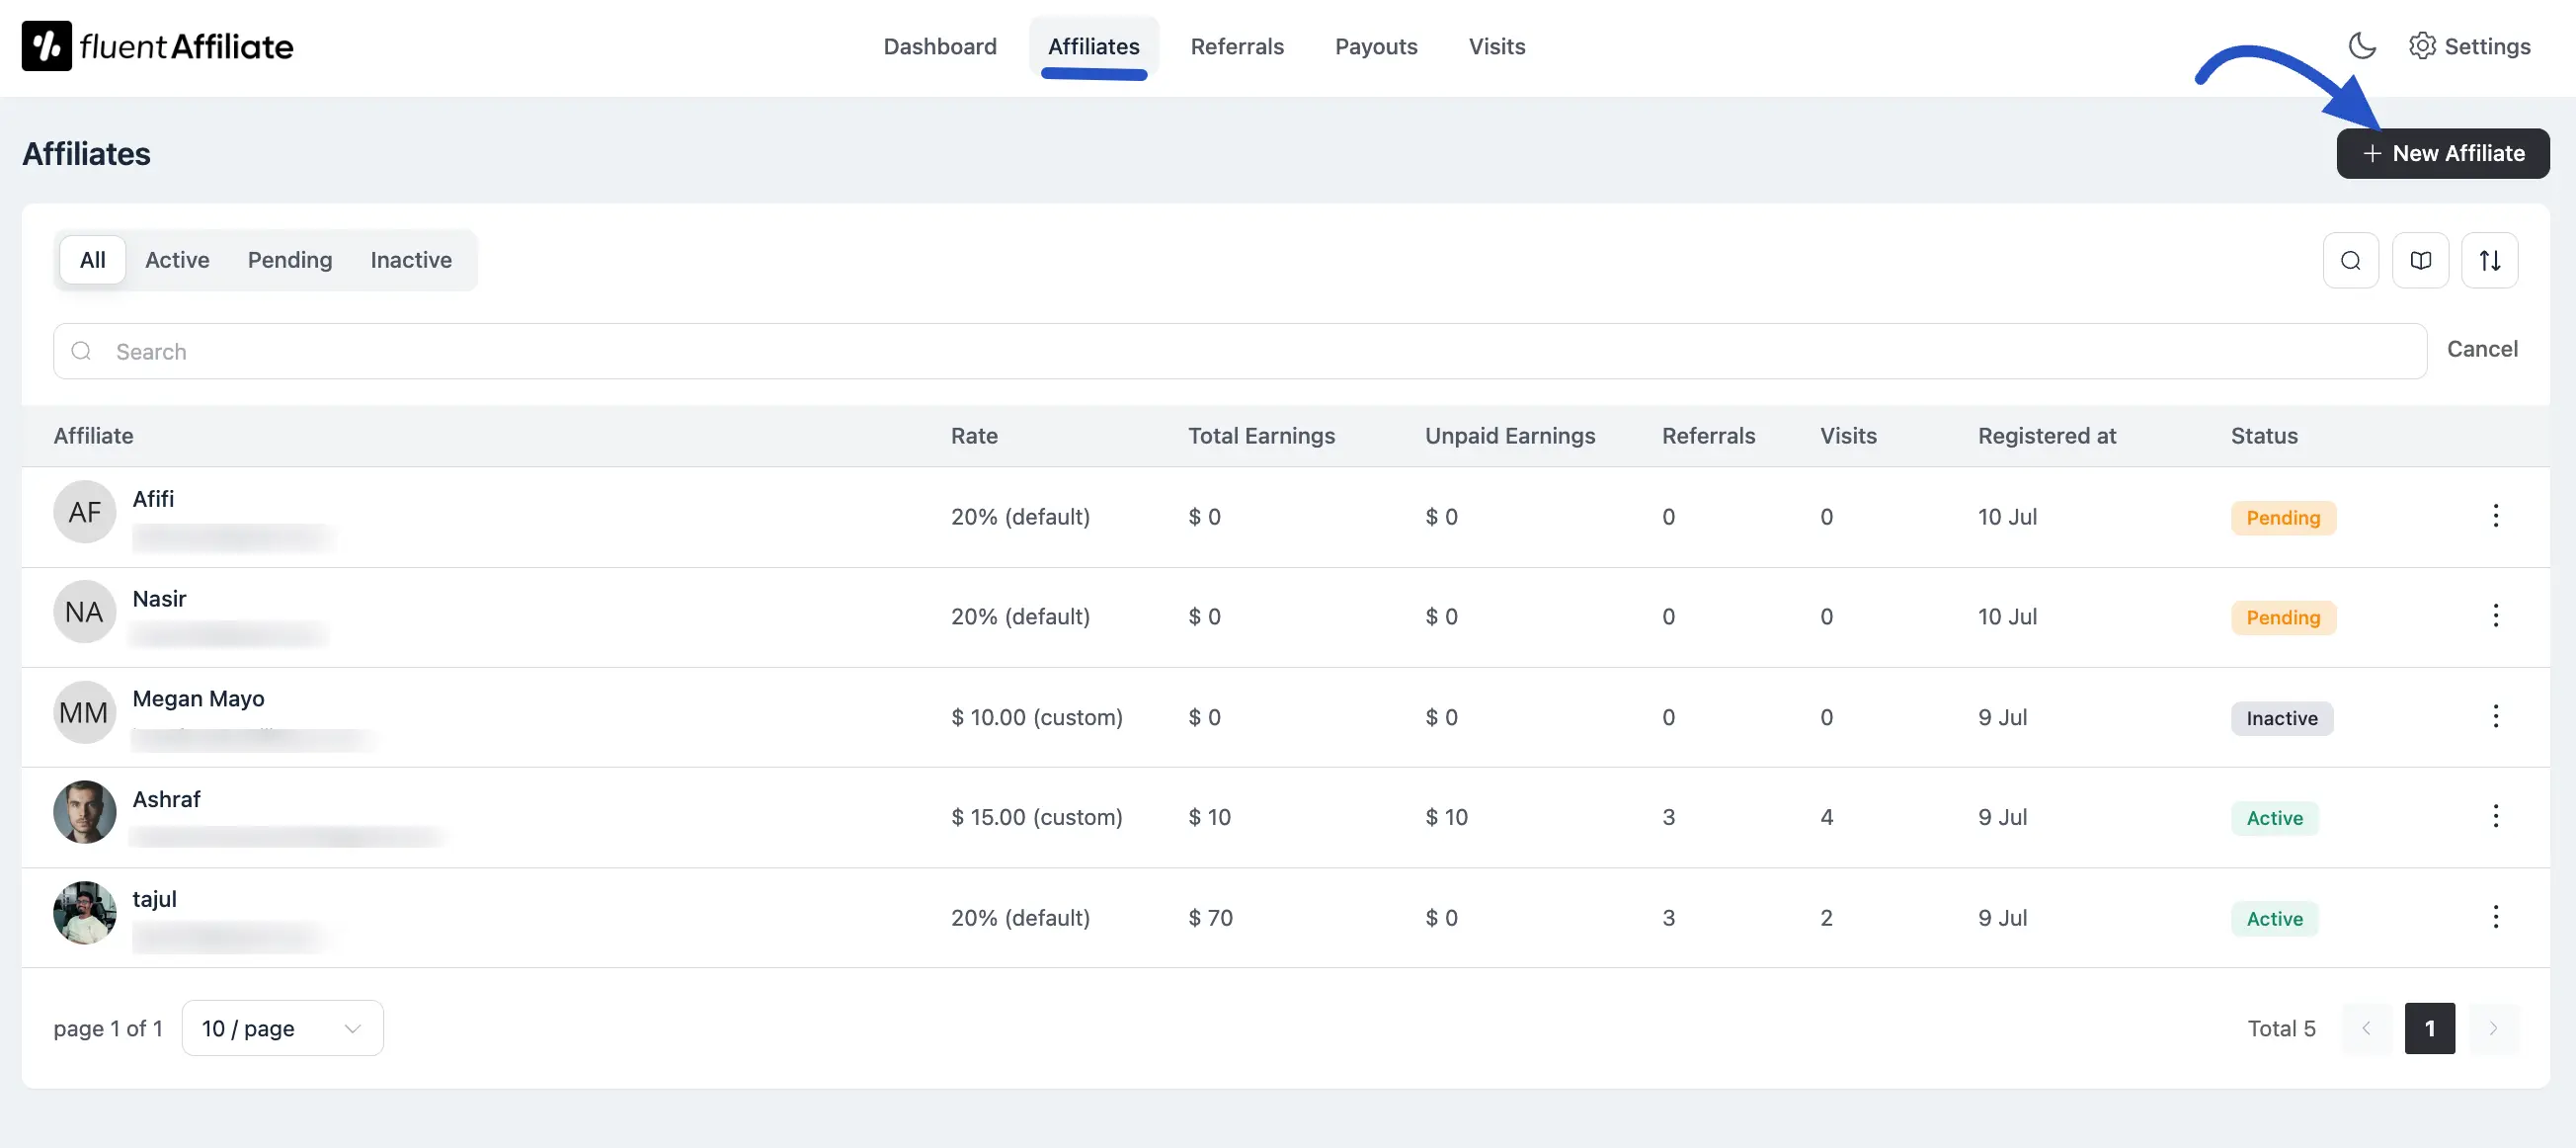
At the top right corner, you'll find the + New Affiliate button. Click this to manually add a new affiliate to your program without requiring them to sign up themselves. (We'll show you how to do that later in this guide.) If you want affiliates to register themselves, see How to Register as an Affiliate.
Filtering Your Affiliates
Just below the page title, you'll see filter tabs that let you quickly segment your list:
- All: Shows every affiliate in your program.
- Active: Shows only approved and active affiliates.
- Pending: Shows affiliates who have registered but are awaiting your approval.
- Inactive: Shows affiliates who have been deactivated.
Affiliates Details Table
This is the heart of the page, where every affiliate is listed with their key performance details. This gives you a clear and immediate picture of how each partner is doing. The columns include:
- ID: A unique number assigned to each affiliate for easy identification.
- Affiliate: The name and email address of the affiliate.
- Rate: Their specific commission rate.
- Total Earnings: The total commissions they have ever earned.
- Unpaid Earnings: The approved earnings that are waiting to be paid out.
- Referrals: The total number of successful referrals they've made.
- Visits: The total number of clicks their links have received.
- Registered at: The date they joined your affiliate program.
- Status: Their current account status (e.g., Active, Pending, Inactive).
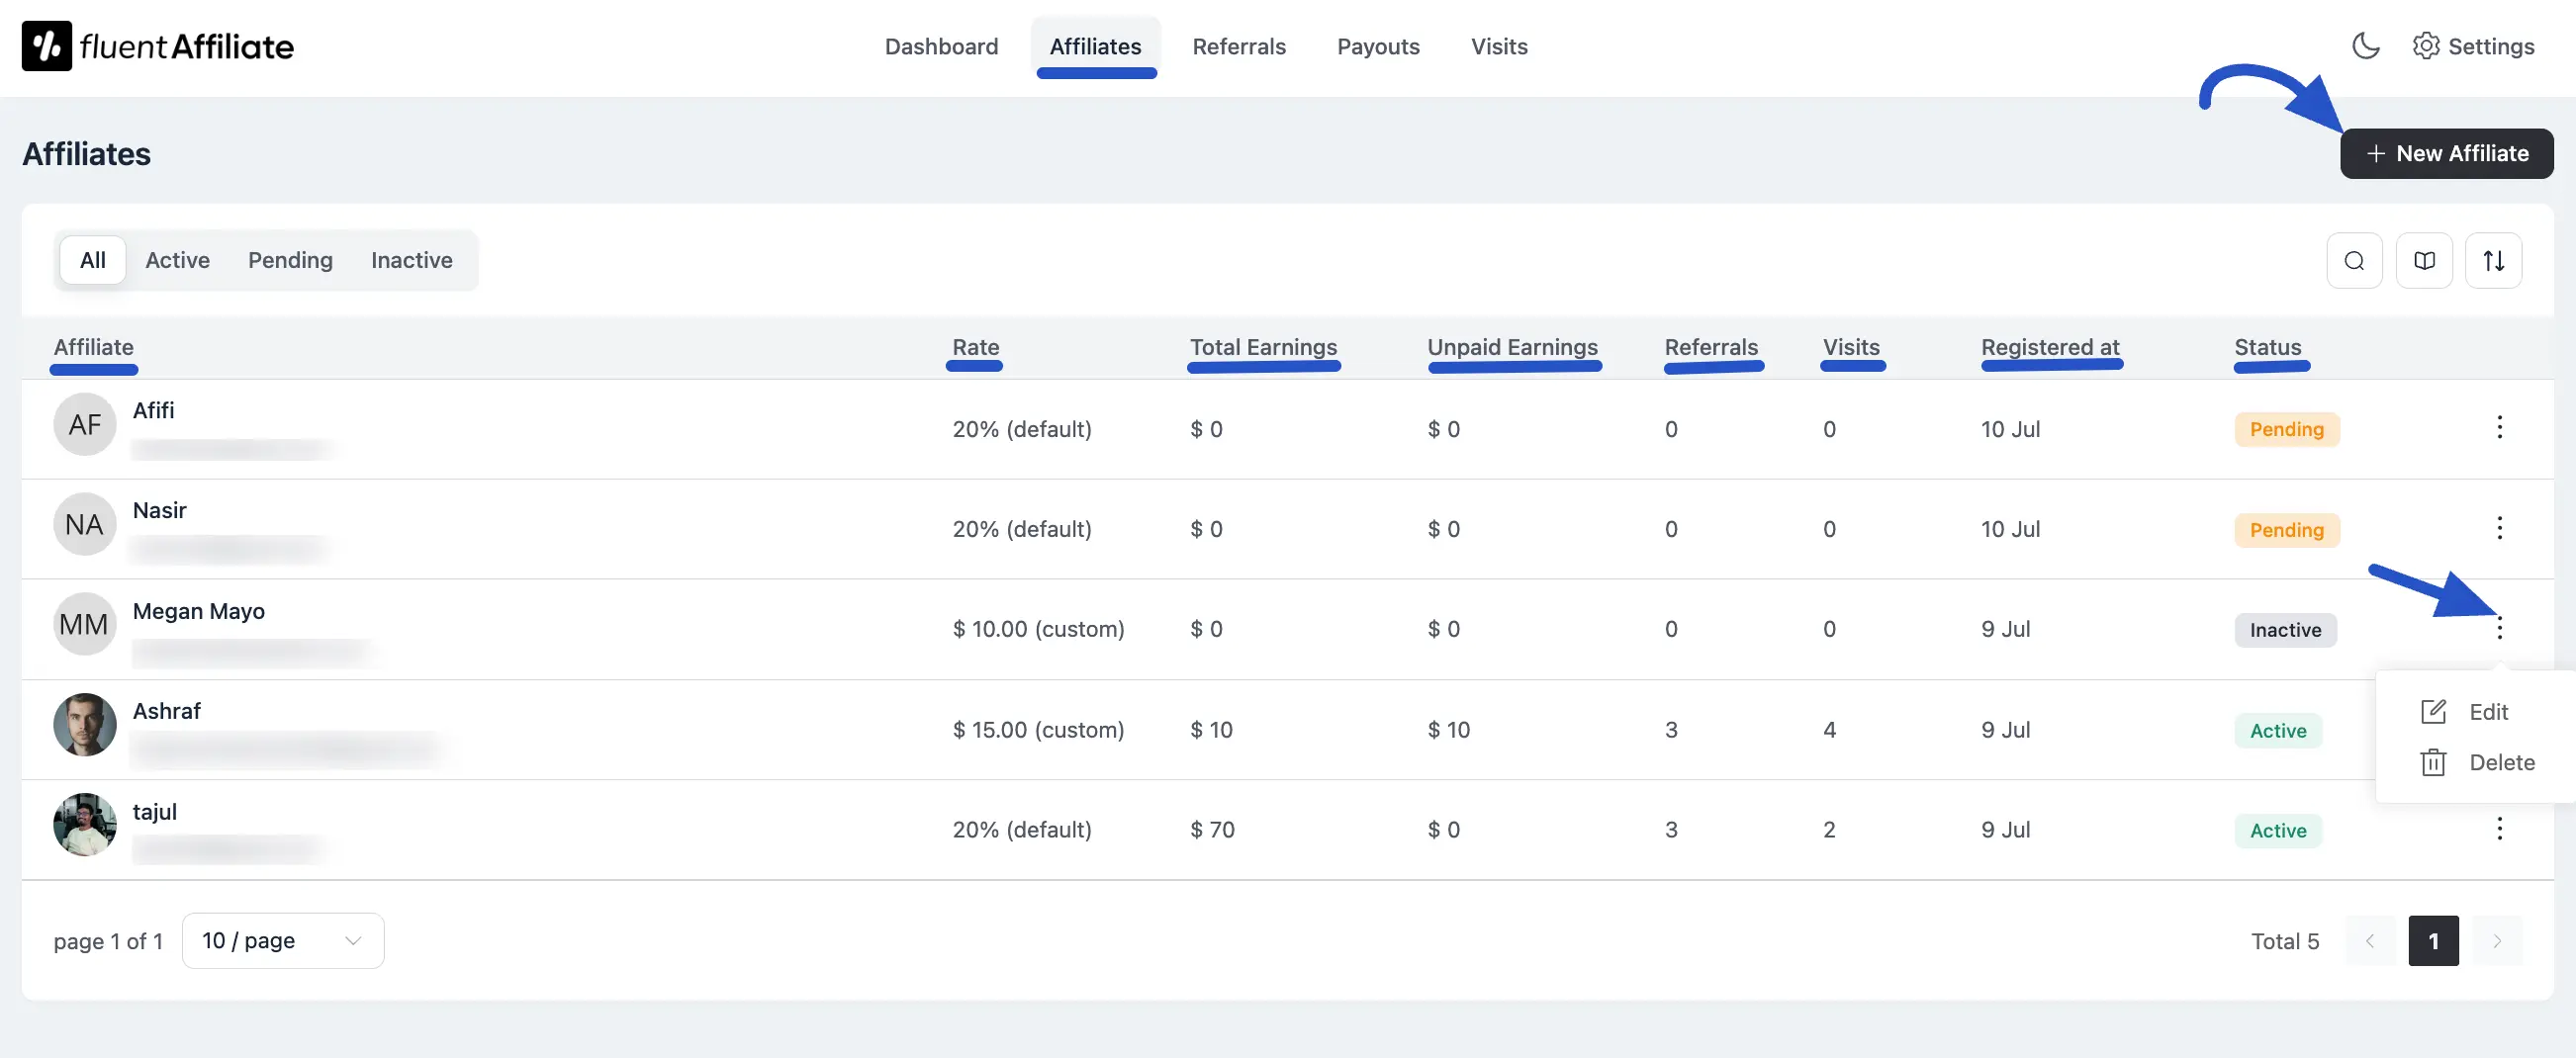
Managing Individual Affiliates
At the end of each affiliate's row, you'll see a three-dot menu. Clicking this opens a list of actions you can take for that specific affiliate:
- Edit: Opens a panel where you can update the affiliate's details, such as their status or commission rate.
- Delete: Permanently removes the affiliate from your program.
Pagination Buttons
If you have a large number of affiliates, the controls at the bottom of the page help you navigate your list easily. You can set the number of affiliates to show per page and use the arrow buttons to move between pages. You can also type a page number directly into the box and hit Enter to jump straight to that page.
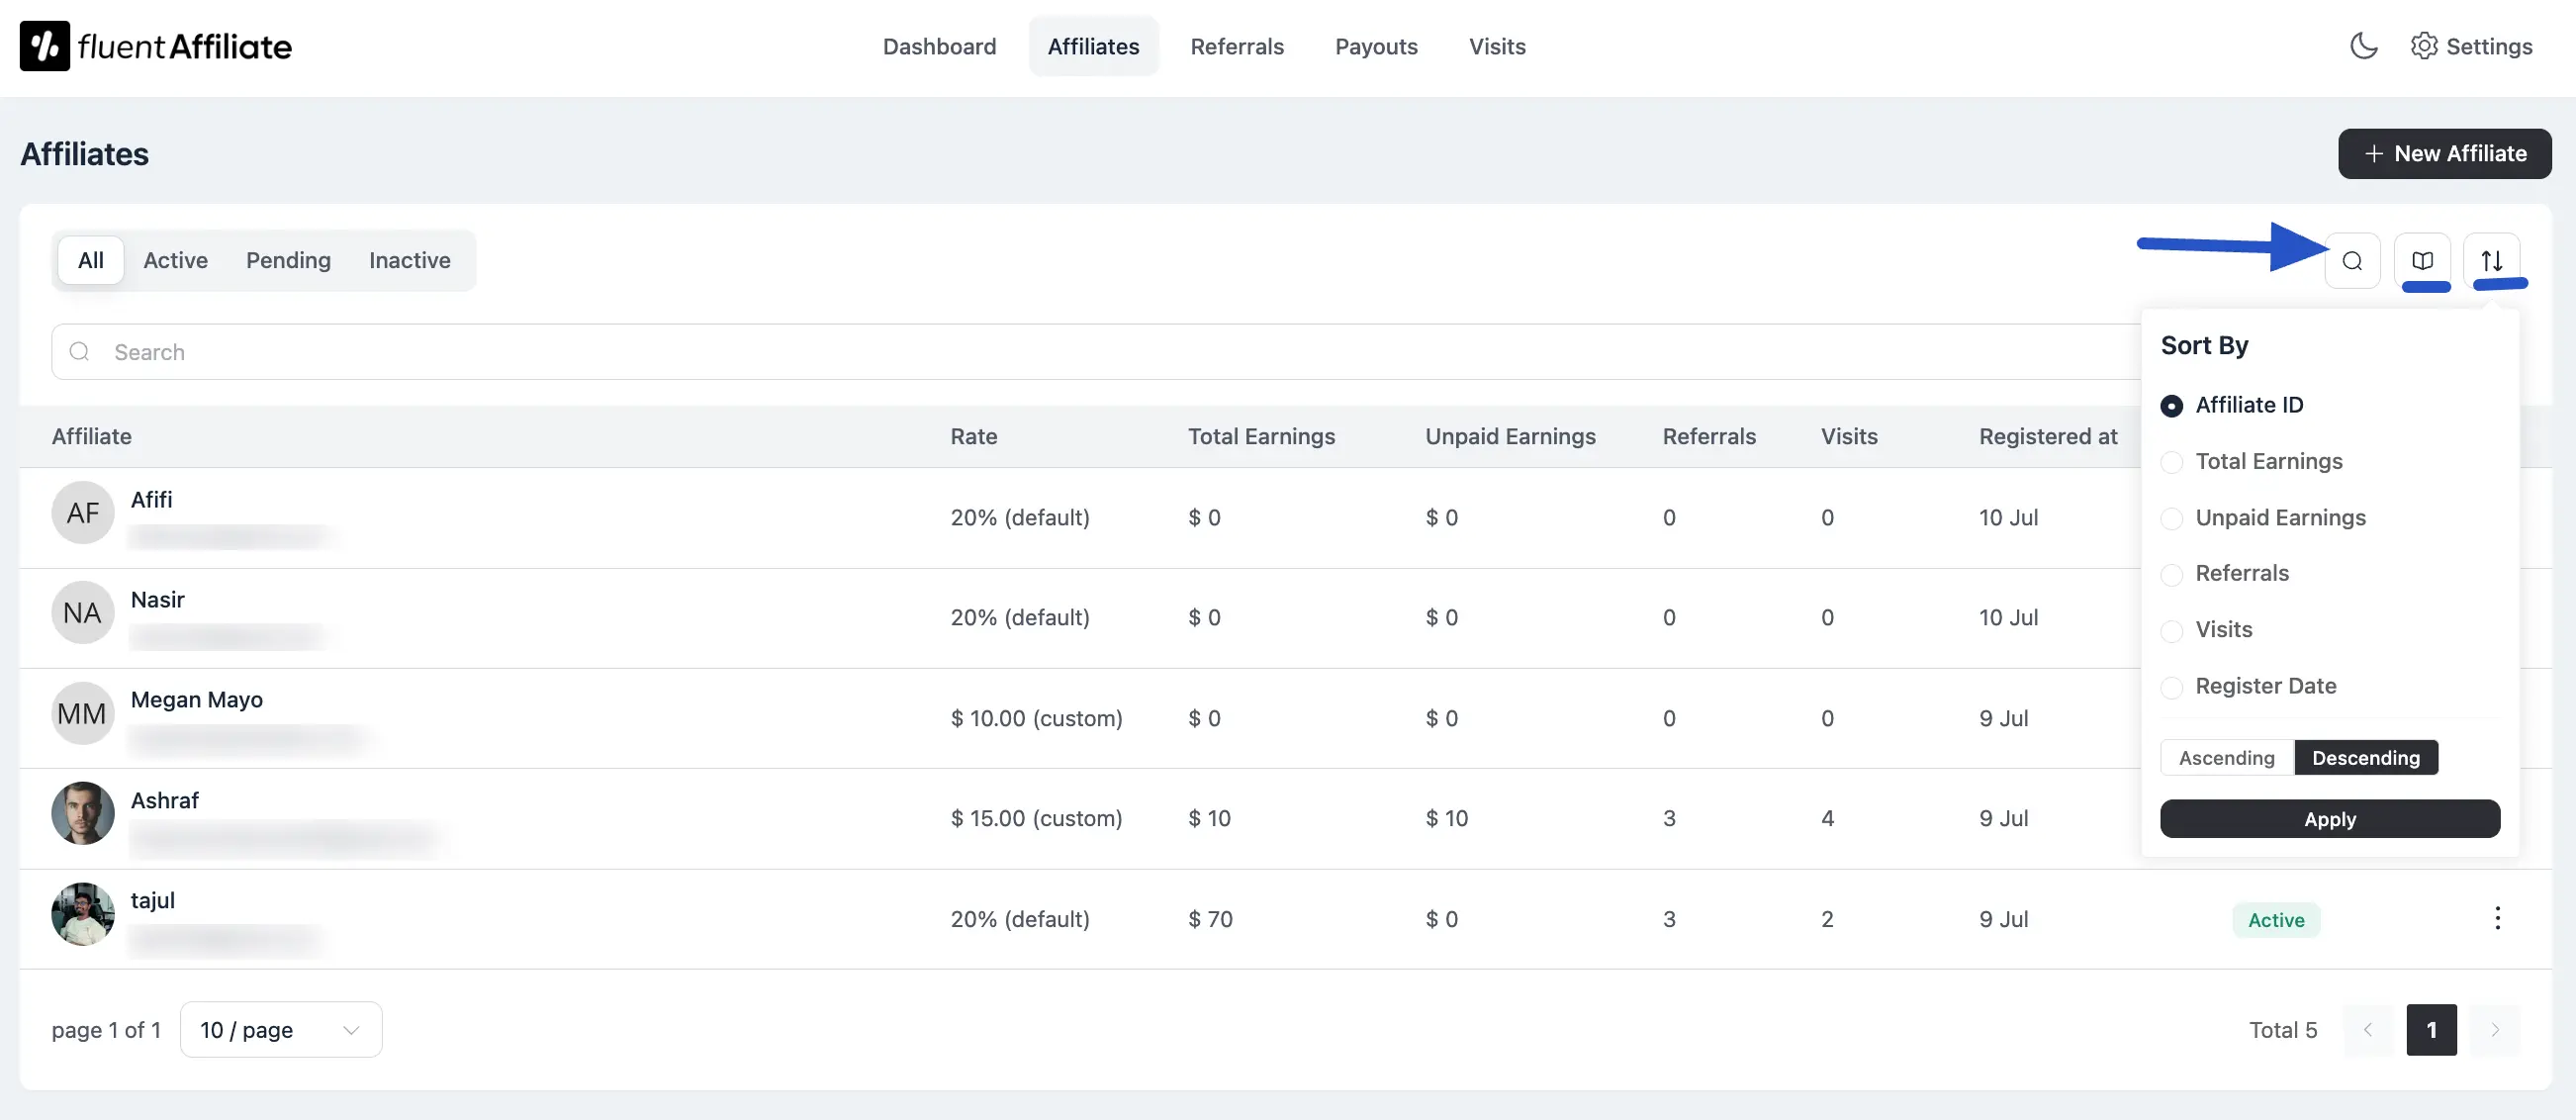
Search and Sort Tools
To the top-right of the table, you'll find icons to help you organize your view:
- Search Bar: Quickly find a specific affiliate by typing their name, email address, or Affiliate ID.
- Column Selector: Customize your table view using the Columns button. Check or uncheck columns based on what info you want to display.
- Sort Options: Sort affiliates by ID, Total Earnings, Unpaid Earnings, Referrals, Visits, or Registration Date. You can also choose between ascending or descending order, then click Apply to update.
Add a New Affiliate
Want to manually add an affiliate to your site? Here's how:
Click the New Affiliate button. A form will slide in from the right side of your screen.
Fill in the following fields:
- Select User: Select the user you want to turn into an affiliate.
- Rate Type: Choose how they'll earn (fixed or percentage).
- Status: Set the affiliate status (approved, pending, or rejected).
- Payment Email: Enter their PayPal or preferred payment email.
- Note: (Optional) Add any notes for internal use.
Hit the Create Affiliate button to create a new affiliate.
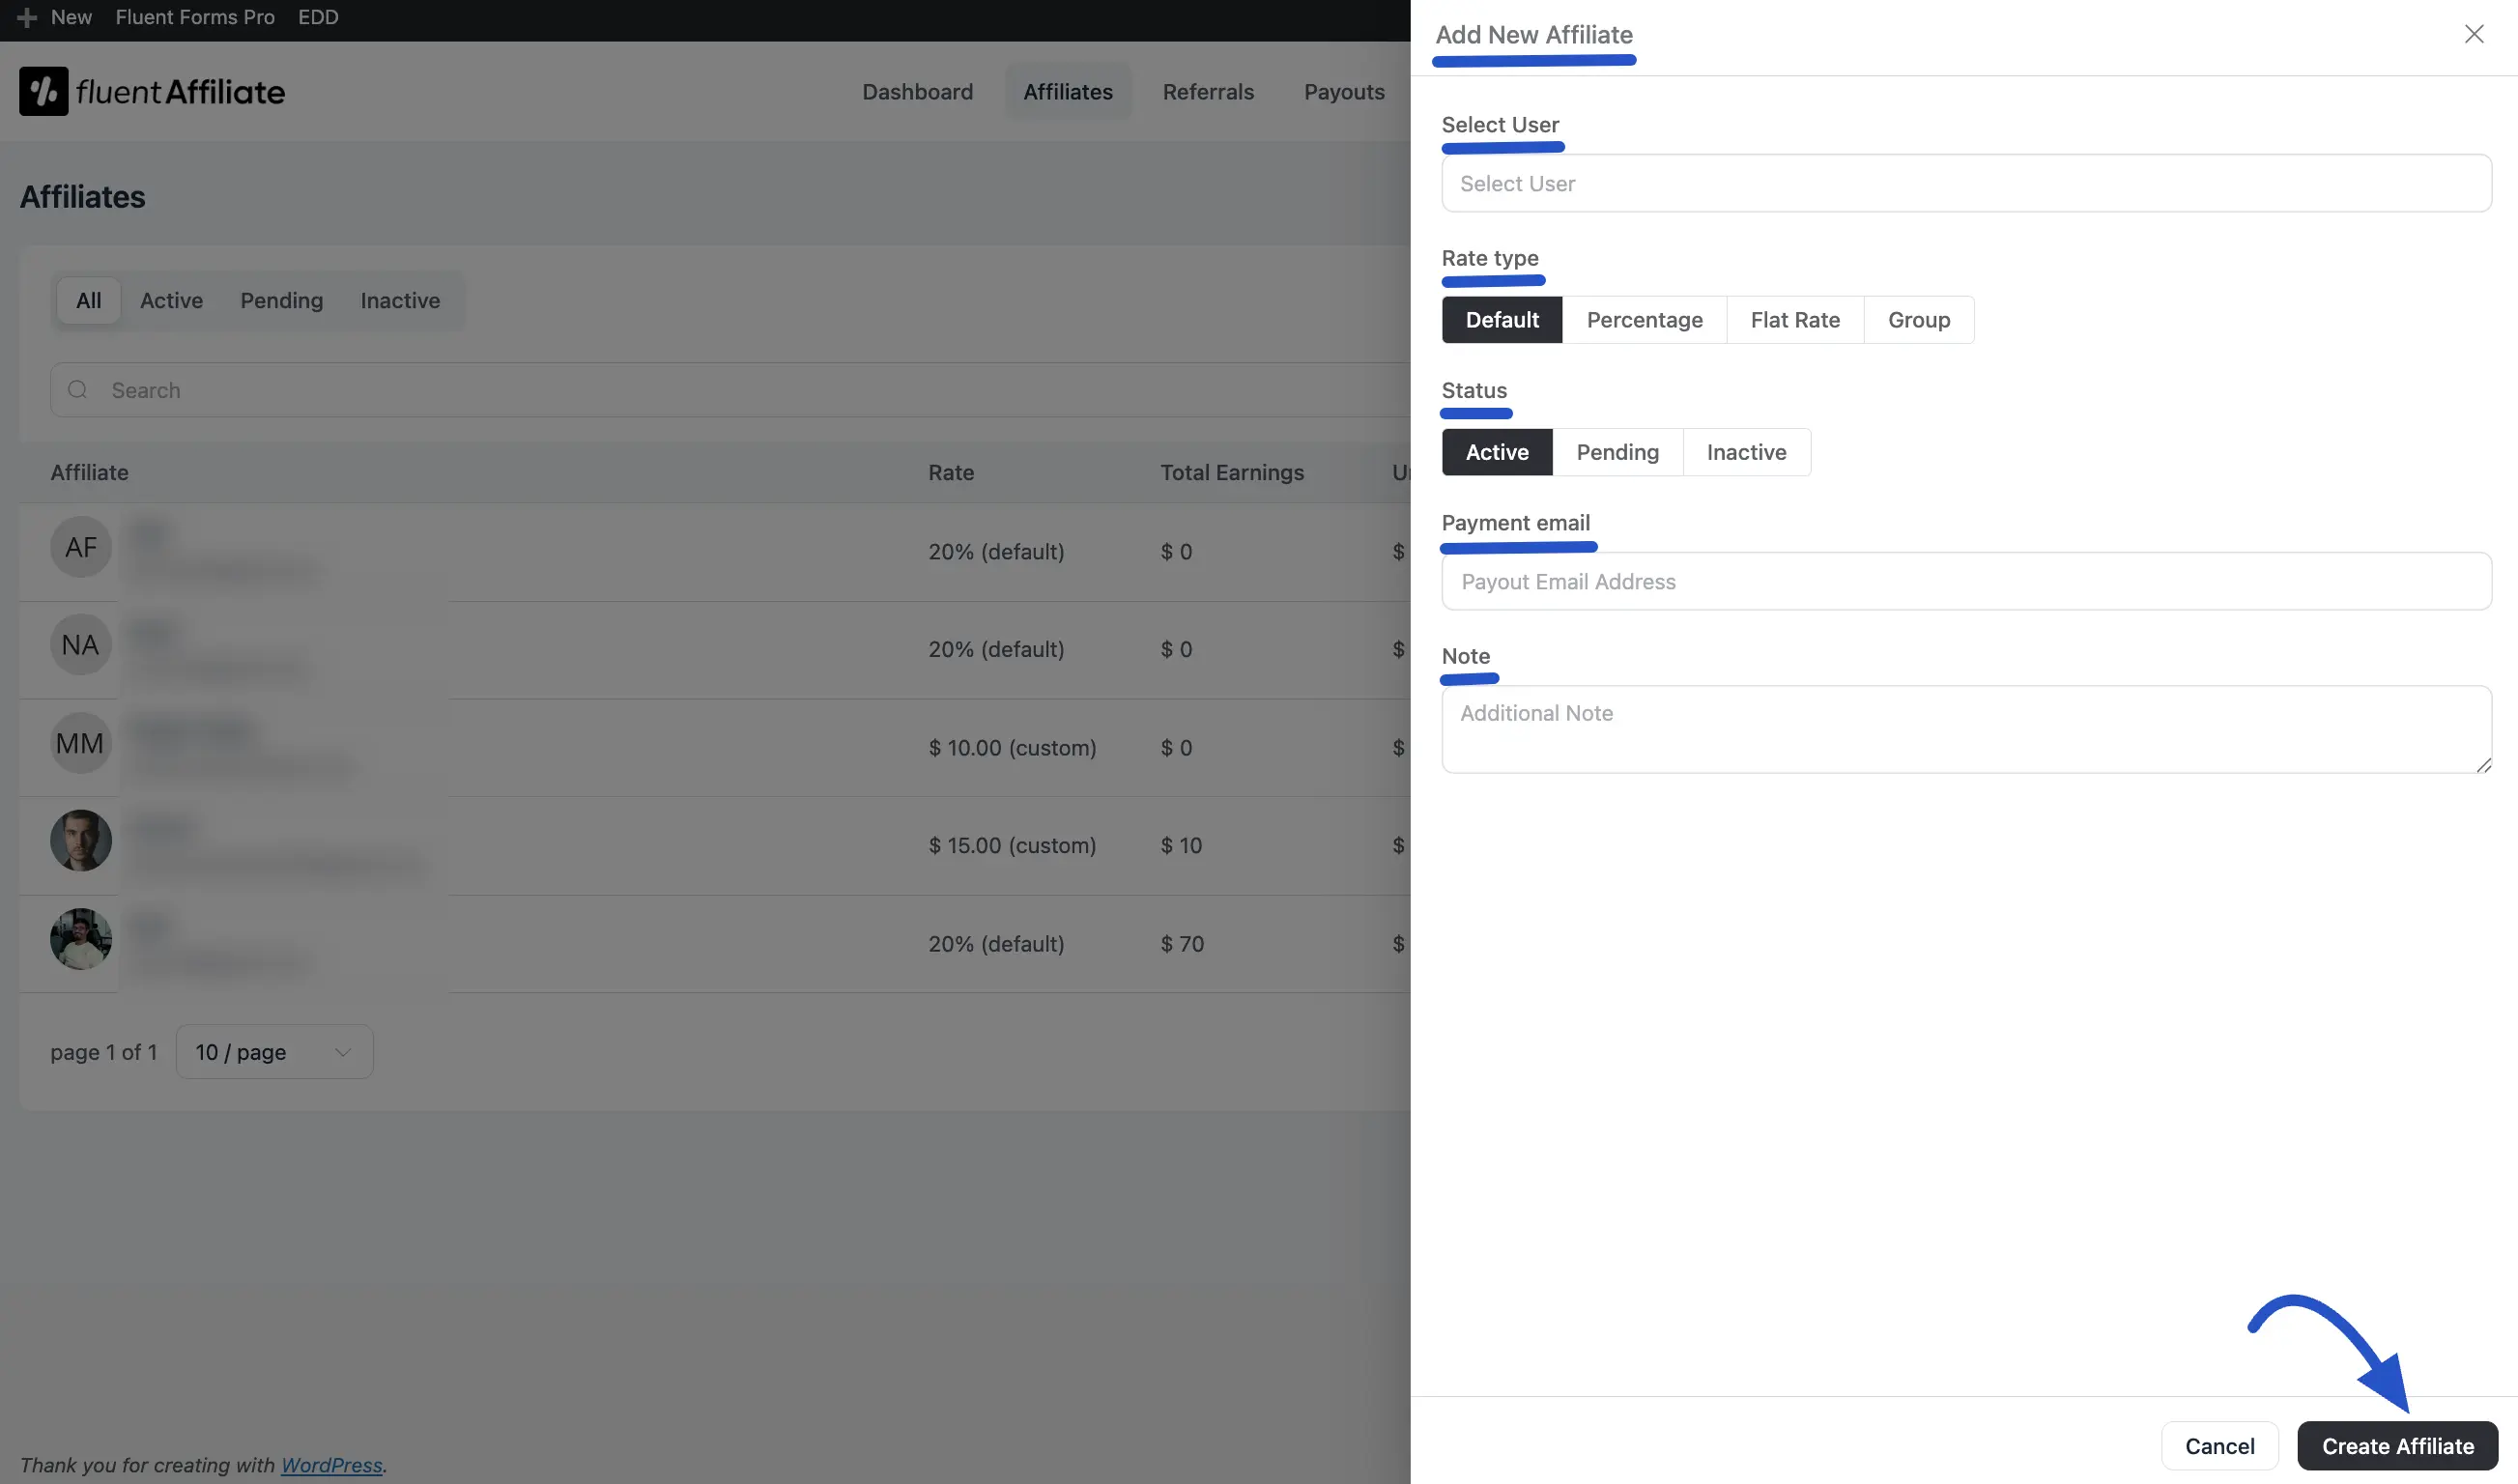
That's it! Your new affiliate will now appear in the list.