Appearance
FluentBooking Integration with FluentAffiliate
FluentBooking is a powerful booking and scheduling plugin for WordPress. With FluentAffiliate, you can manage your booking commissions easily.
In this guide, we'll walk you through how to connect FluentBooking with FluentAffiliate step by step.
NOTE
To get started, you must first install and activate the FluentBooking Pro plugin on your WordPress website.
Enable FluentBooking in FluentAffiliate
Once both plugins are active, the first step is to enable the integration from your FluentAffiliate dashboard.
Go to the FluentAffiliate Dashboard.
From there, click on the Settings tab in the top menu.
On the left sidebar, select the Integration Settings option.
Inside Integration Settings, find FluentBooking in the list of available integrations.
Click on the toggle button to enable the integration.
Your FluentBooking integration with FluentAffiliate is now active. To customize how commissions work, click the Manage button.

Configure FluentBooking Settings
After clicking Manage, you can configure how affiliate commissions are handled for your booking events.
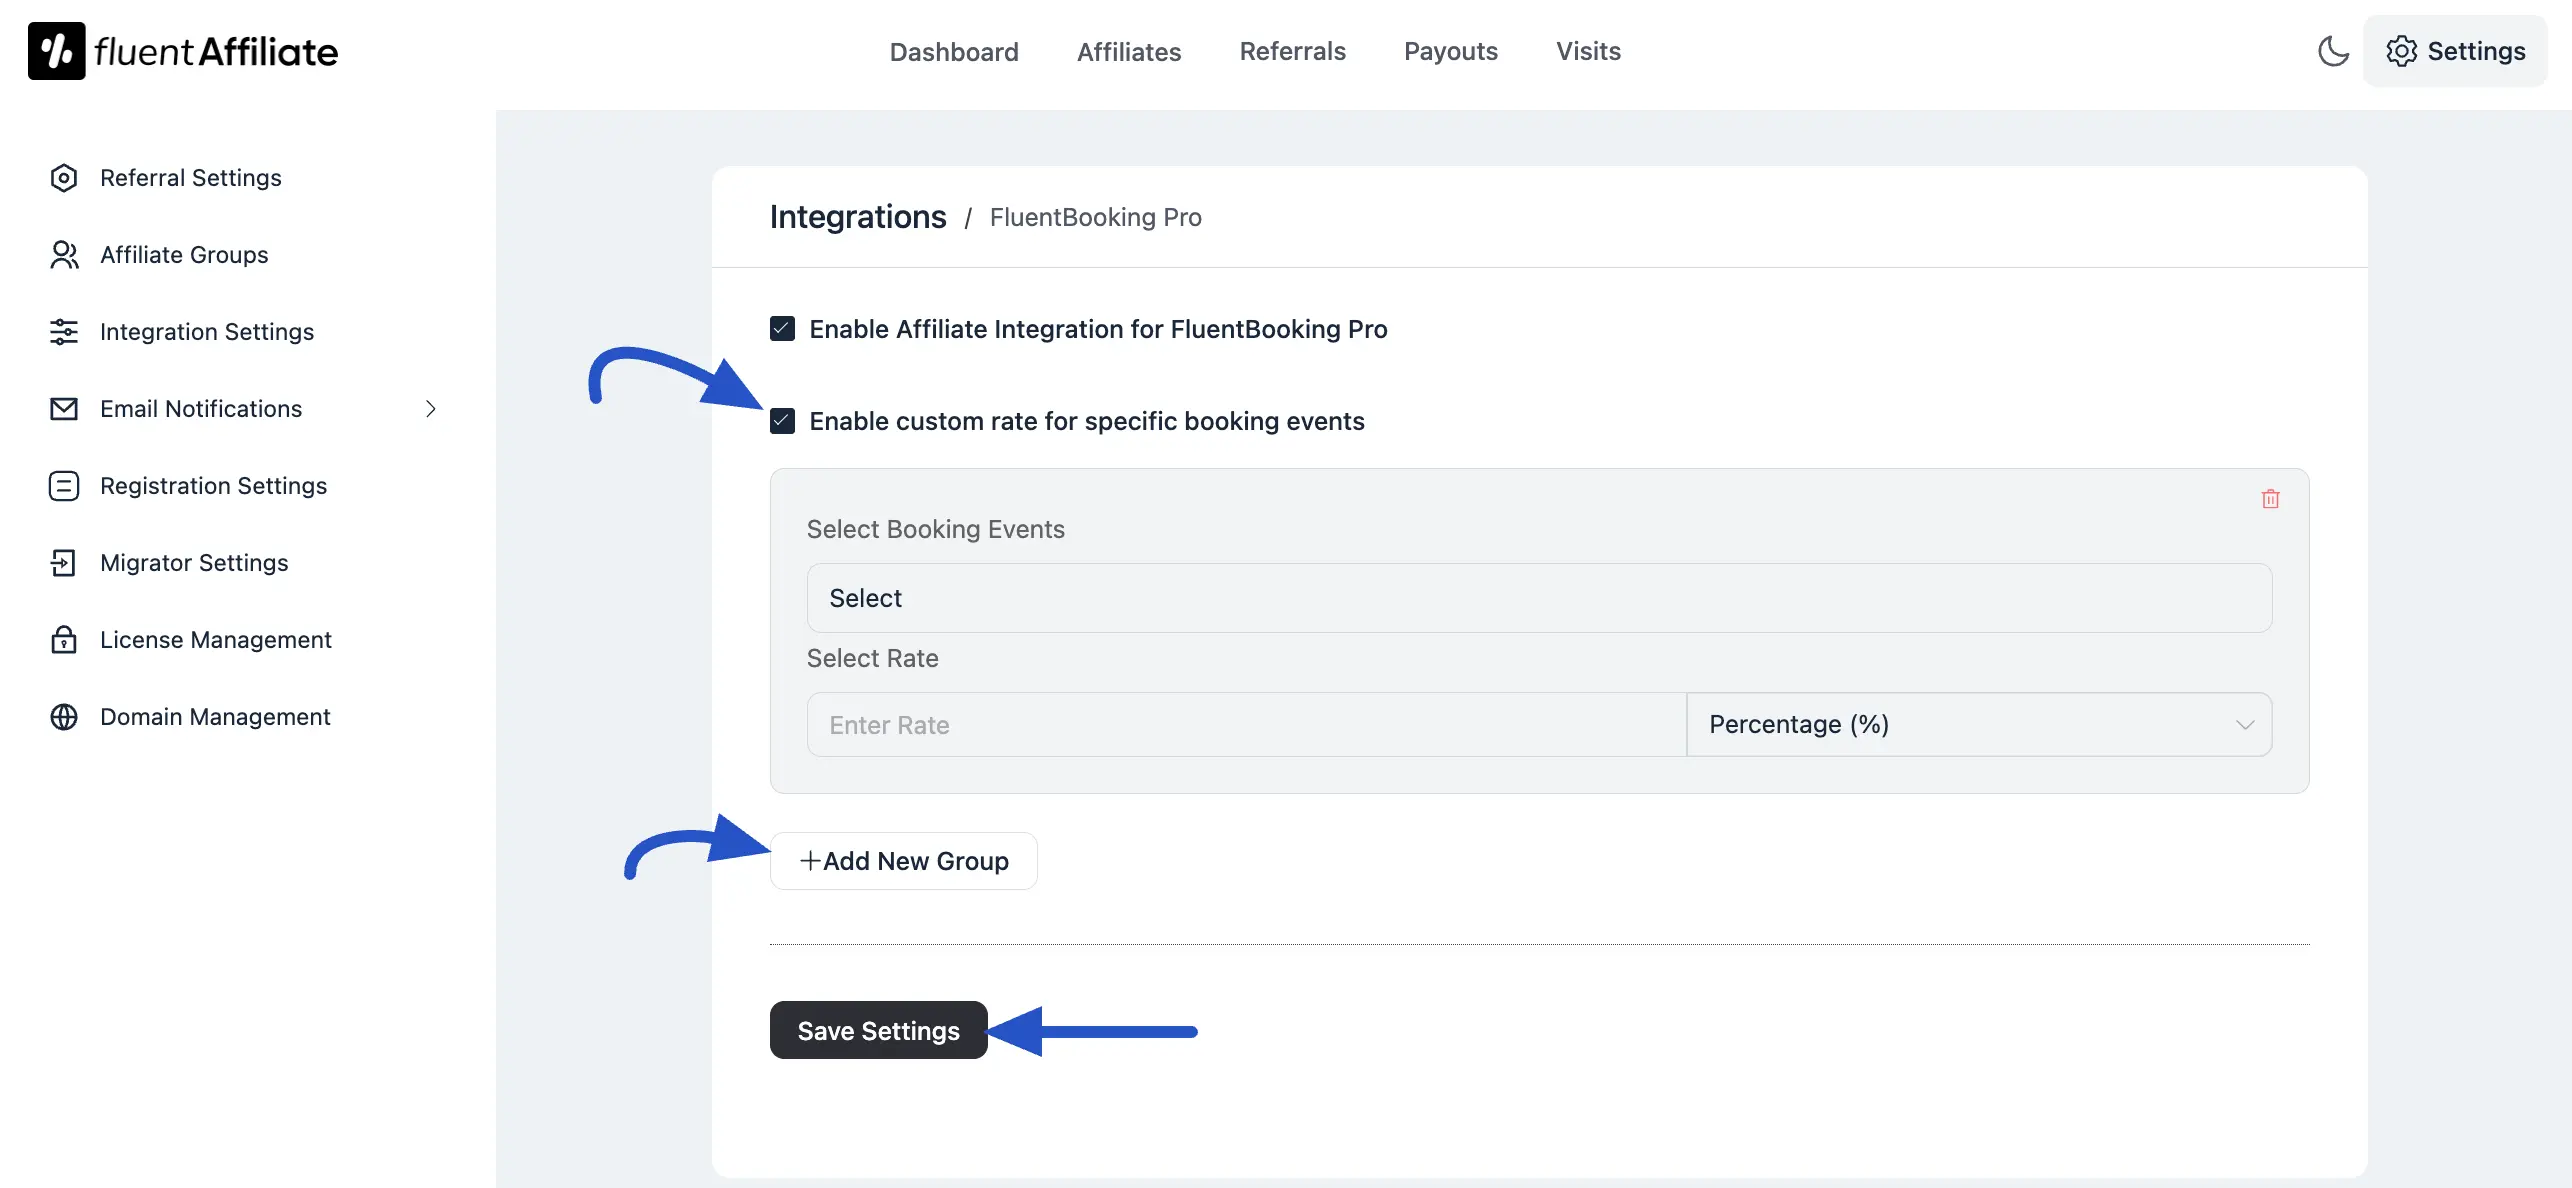
Enable Affiliate integration for FluentBooking: You must check this box to activate commission tracking for your booking sales.
Enable custom rate for specific booking events: Check this box if you want to override the default commission rate and set special rates for different booking events.
Custom Affiliate Rate Configuration
Once the Enable custom rate option is checked, you can define specific commission structures for your individual booking events. This is ideal if you want to offer different commission rates for different services or events.
Click on the +Add New Group button to get started.
- Select Booking Events: Use this field to search for and select the specific booking event to which the custom rate will apply.
- Select Rate: Set the commission rate for the selected event. Enter a numerical value to set the commission amount.
- Rate Type Selector: Click the dropdown menu to choose between a Percentage (%) of the sale or a Fixed amount.
- Add More Rates: You can click the +Add New Group button again to create more custom commission rules for any specific booking events. To remove a rule, click the delete icon on the right.
After configuring your custom rates, click the Save Settings button.
Set up an Affiliate for Specific Events
You can set up affiliate commissions for specific events you've created in FluentBooking.
- Go to the FluentBooking Dashboard and navigate to the Calendars section.
- Here, you’ll see a list of your events. Select the event for which you want to set up a commission.
- Next, copy the URL of the page where the booking event is embedded. This is the link your affiliates will use to generate the referral links.
NOTE
Make sure the event you choose has a payment option enabled. Without it, affiliate commissions won’t work for that booking.

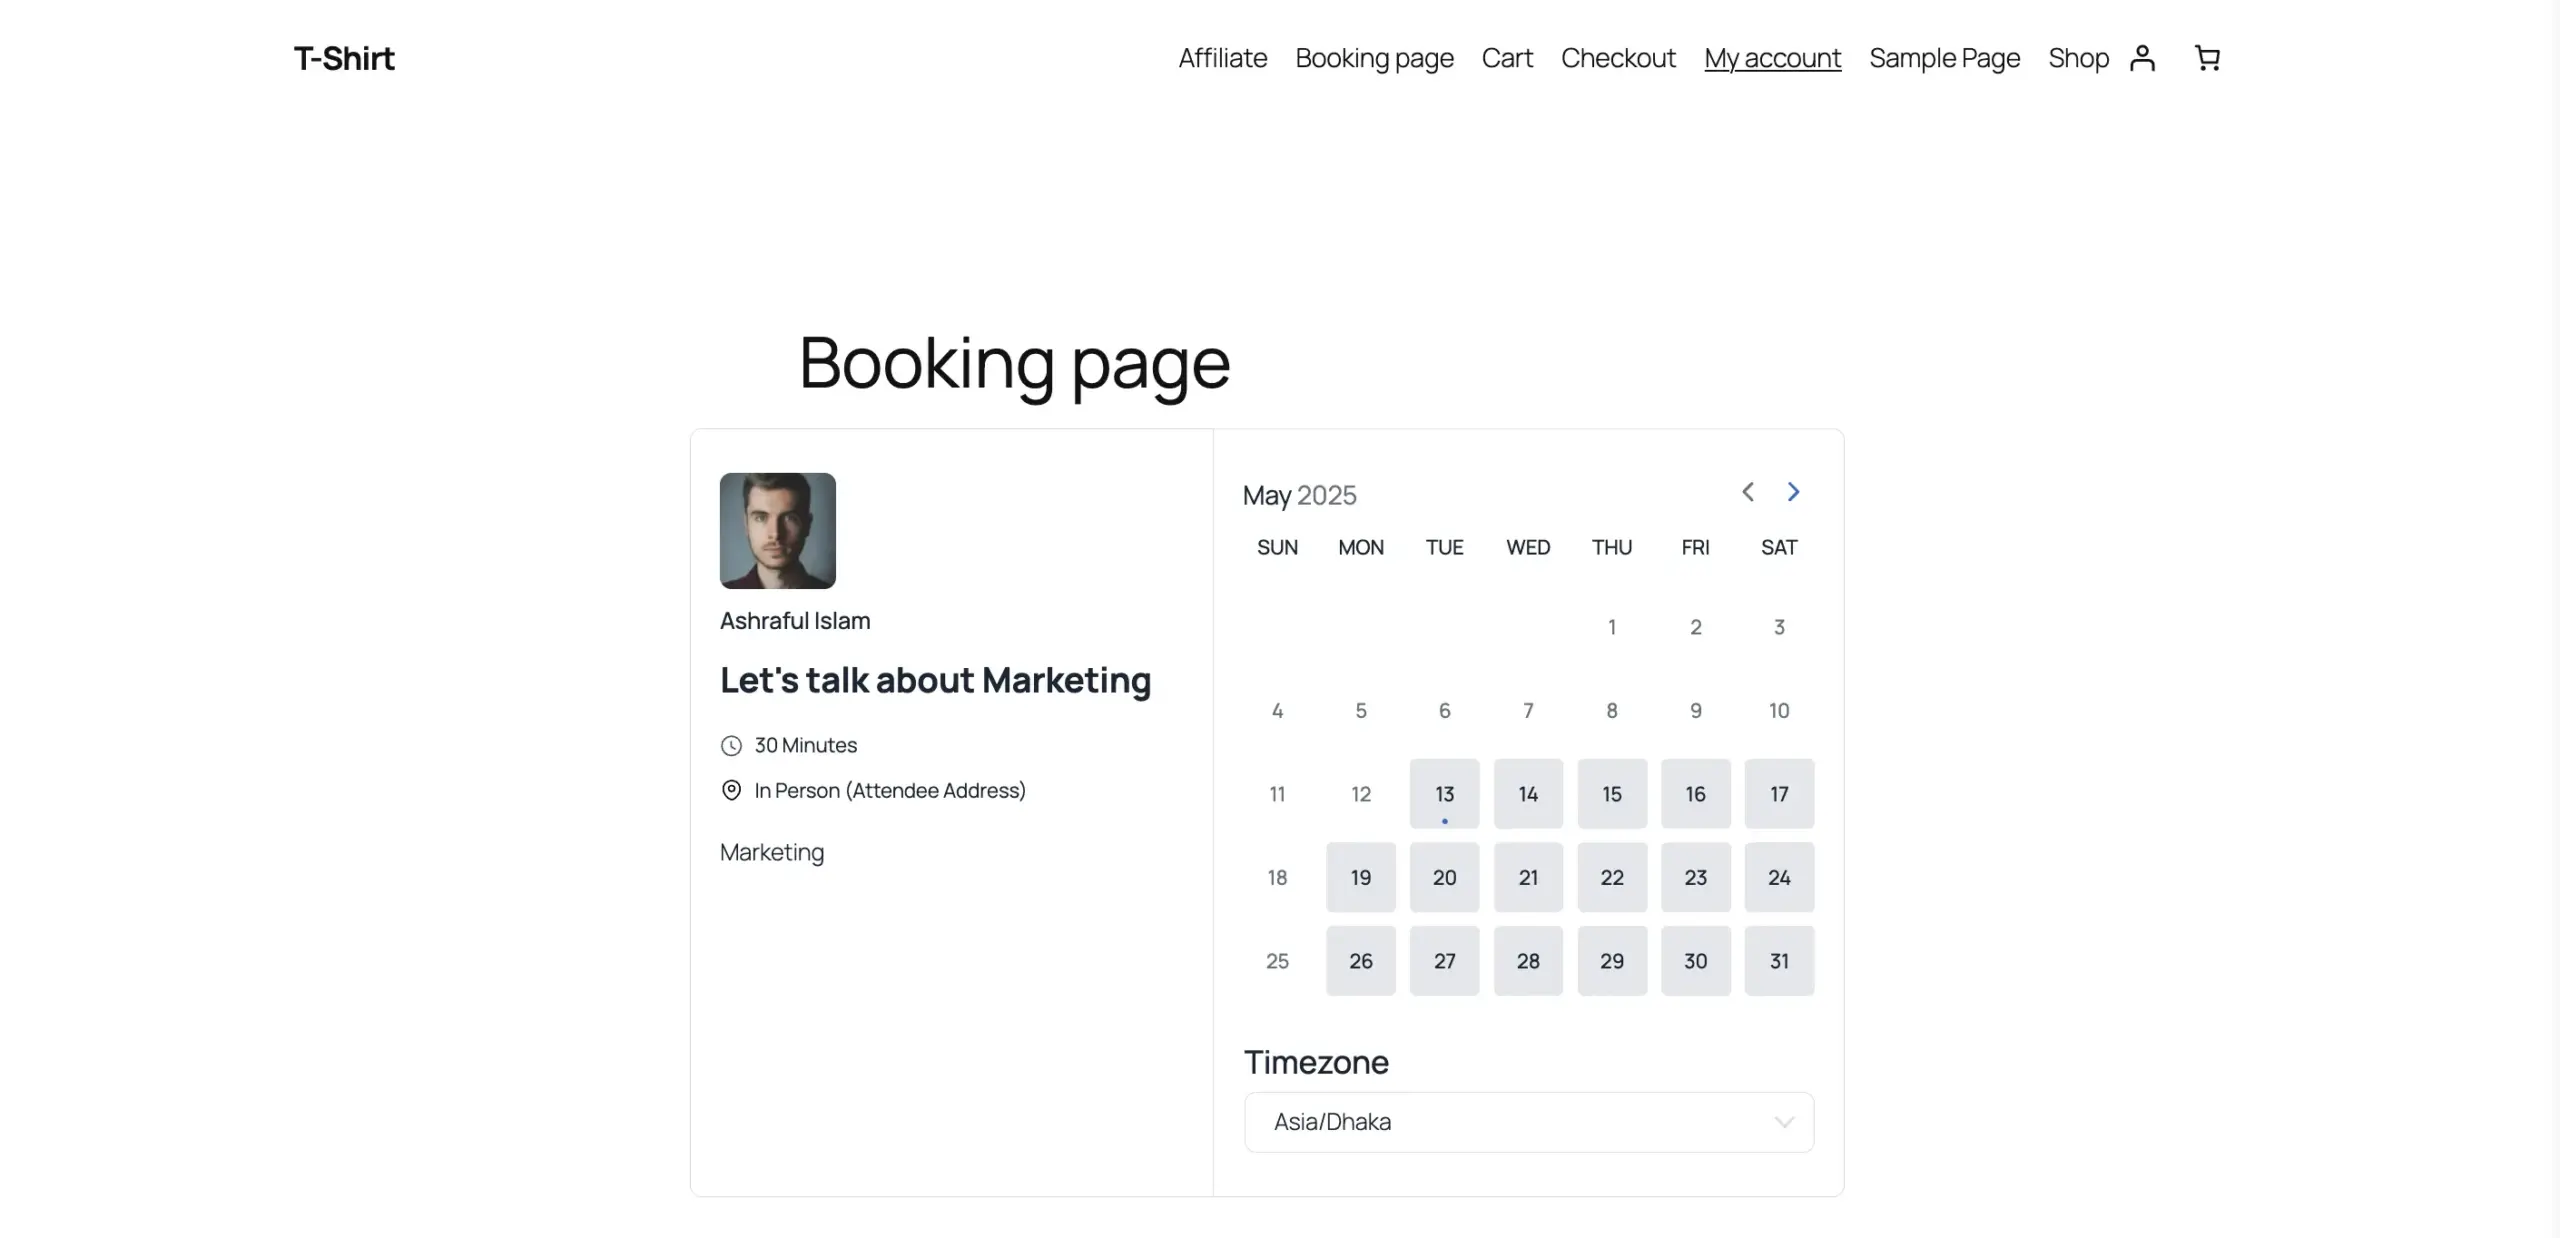
Generate an Affiliate Link
After you've configured the settings, your affiliates can start promoting your booking pages. To learn more about how can generate your affiliate link, read this article.
If someone clicks on your link, they’ll be directed to the event booking page, just like shown in the screenshot.
Track Referrals
When a user books the event through your affiliate link, your Referral commission will be tracked and added automatically.

Troubleshooting Common Issues
Here are solutions to common issues you might encounter:
- Booking Page Not Tracking: Make sure the booking page URL is correctly set up in the affiliate link generator.
And that's it. This is an easy process to integrate FluentBooking with FluentAffiliate.