Appearance
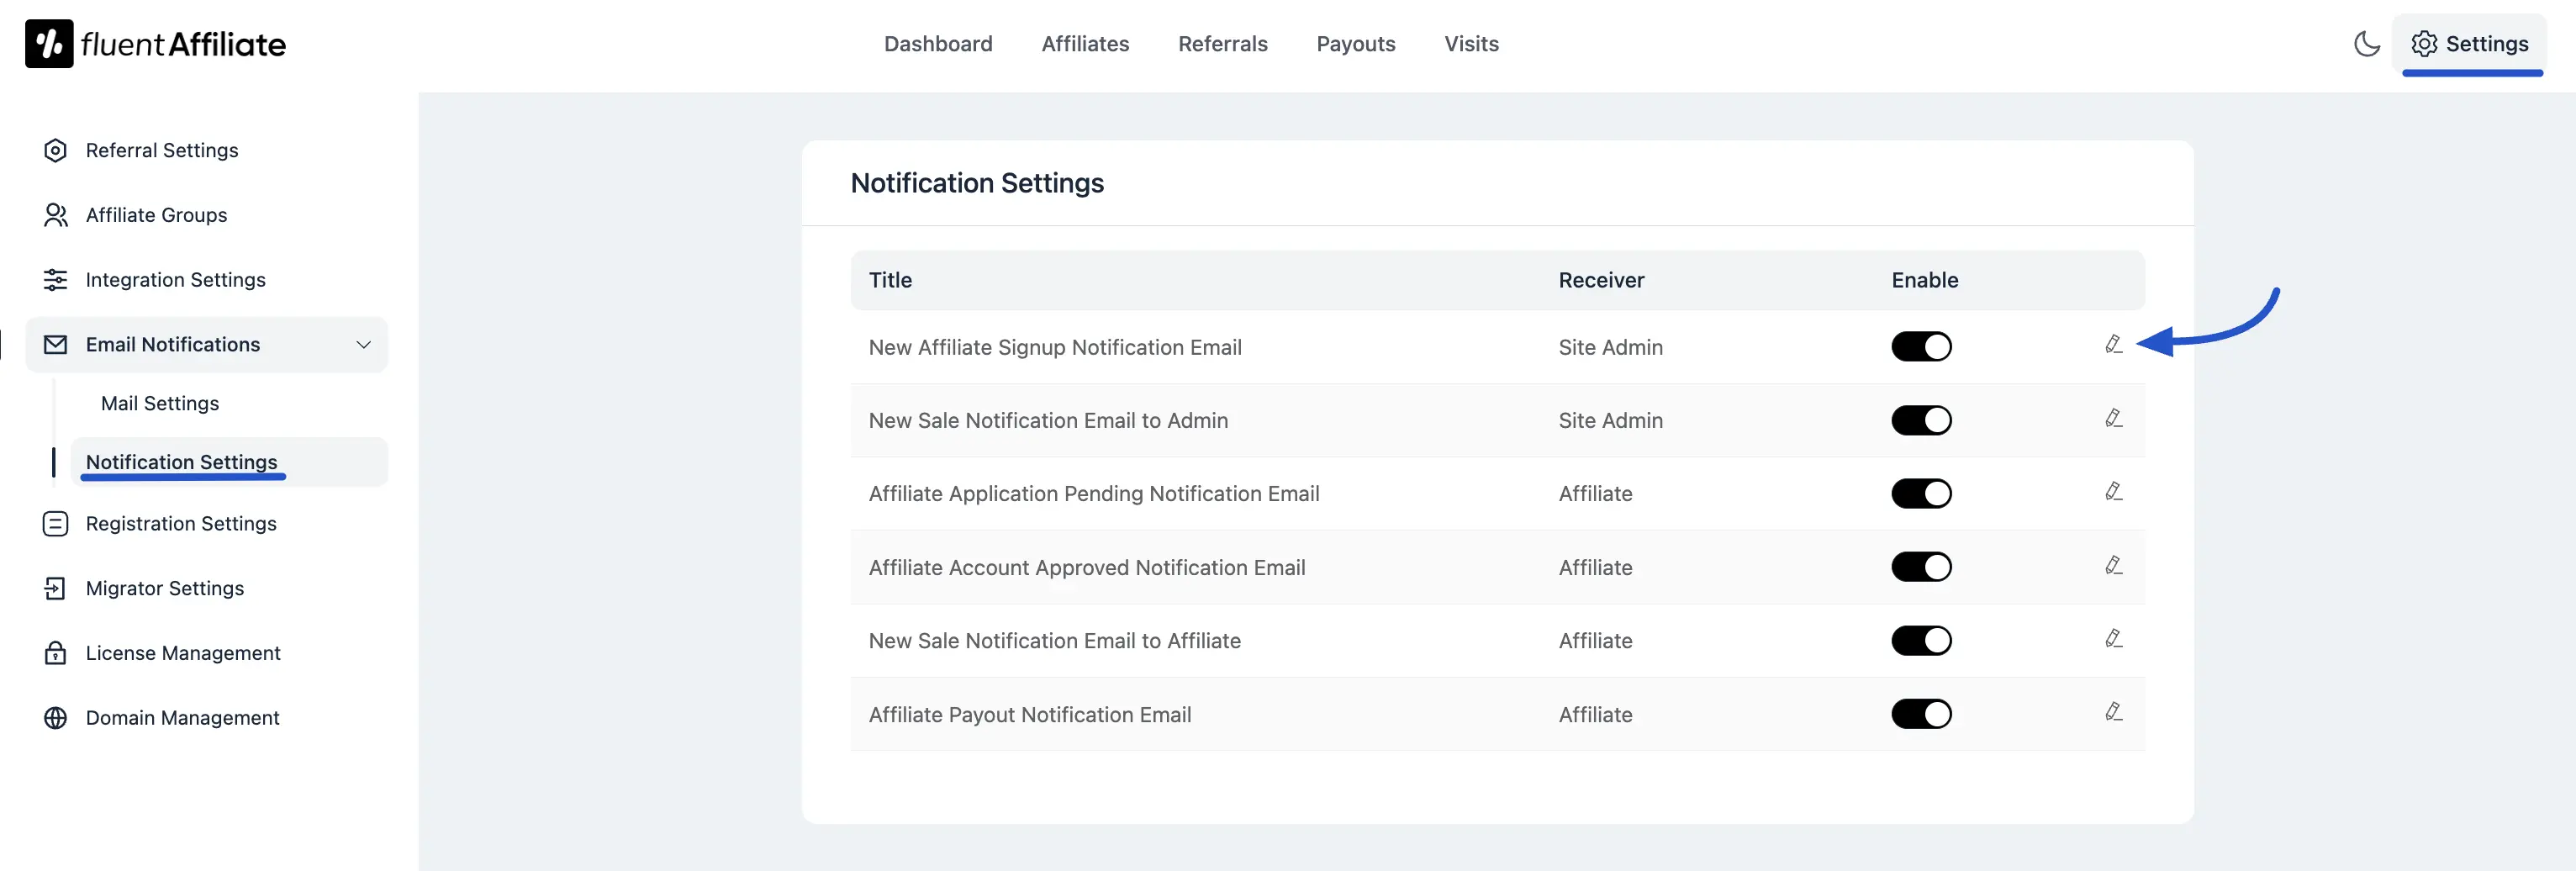
Notification Settings
The Notification Settings section provides granular control over the automated emails sent from FluentAffiliate. Here, you can enable, disable, and fully customize the content of emails for various events that occur within your affiliate program, ensuring both admins and affiliates stay informed.
Accessing Notification Settings
To begin managing your email notifications, navigate from your WordPress dashboard to FluentAffiliate → Settings → Email Notifications → Notification Settings.
Managing the Notification List
The main screen displays a list of all available automated emails. The notifications available include:
- New Affiliate Signup Notification Email
- New Sale Notification Email to Admin
- Affiliate Application Pending Notification Email
- Affiliate Account Approved Notification Email
- New Sale Notification Email to Affiliate
- Affiliate Payout Notification Email
For each notification, you can see its Title, the intended Receiver (either "Site Admin" or "Affiliate"), and an Enable toggle to quickly activate or deactivate it.
To modify a specific email, click the pencil icon on the right.
Customizing an Email Notification
Clicking the pencil icon opens the Update Email Notification pop-up, where you can tailor the email's subject and body.
- Enable this email notification: At the top of the pop-up, this checkbox allows you to enable or disable the specific email you are editing.
- Email Subject: You can customize the subject line of the email. Dynamic information can be added here by using SmartCodes.
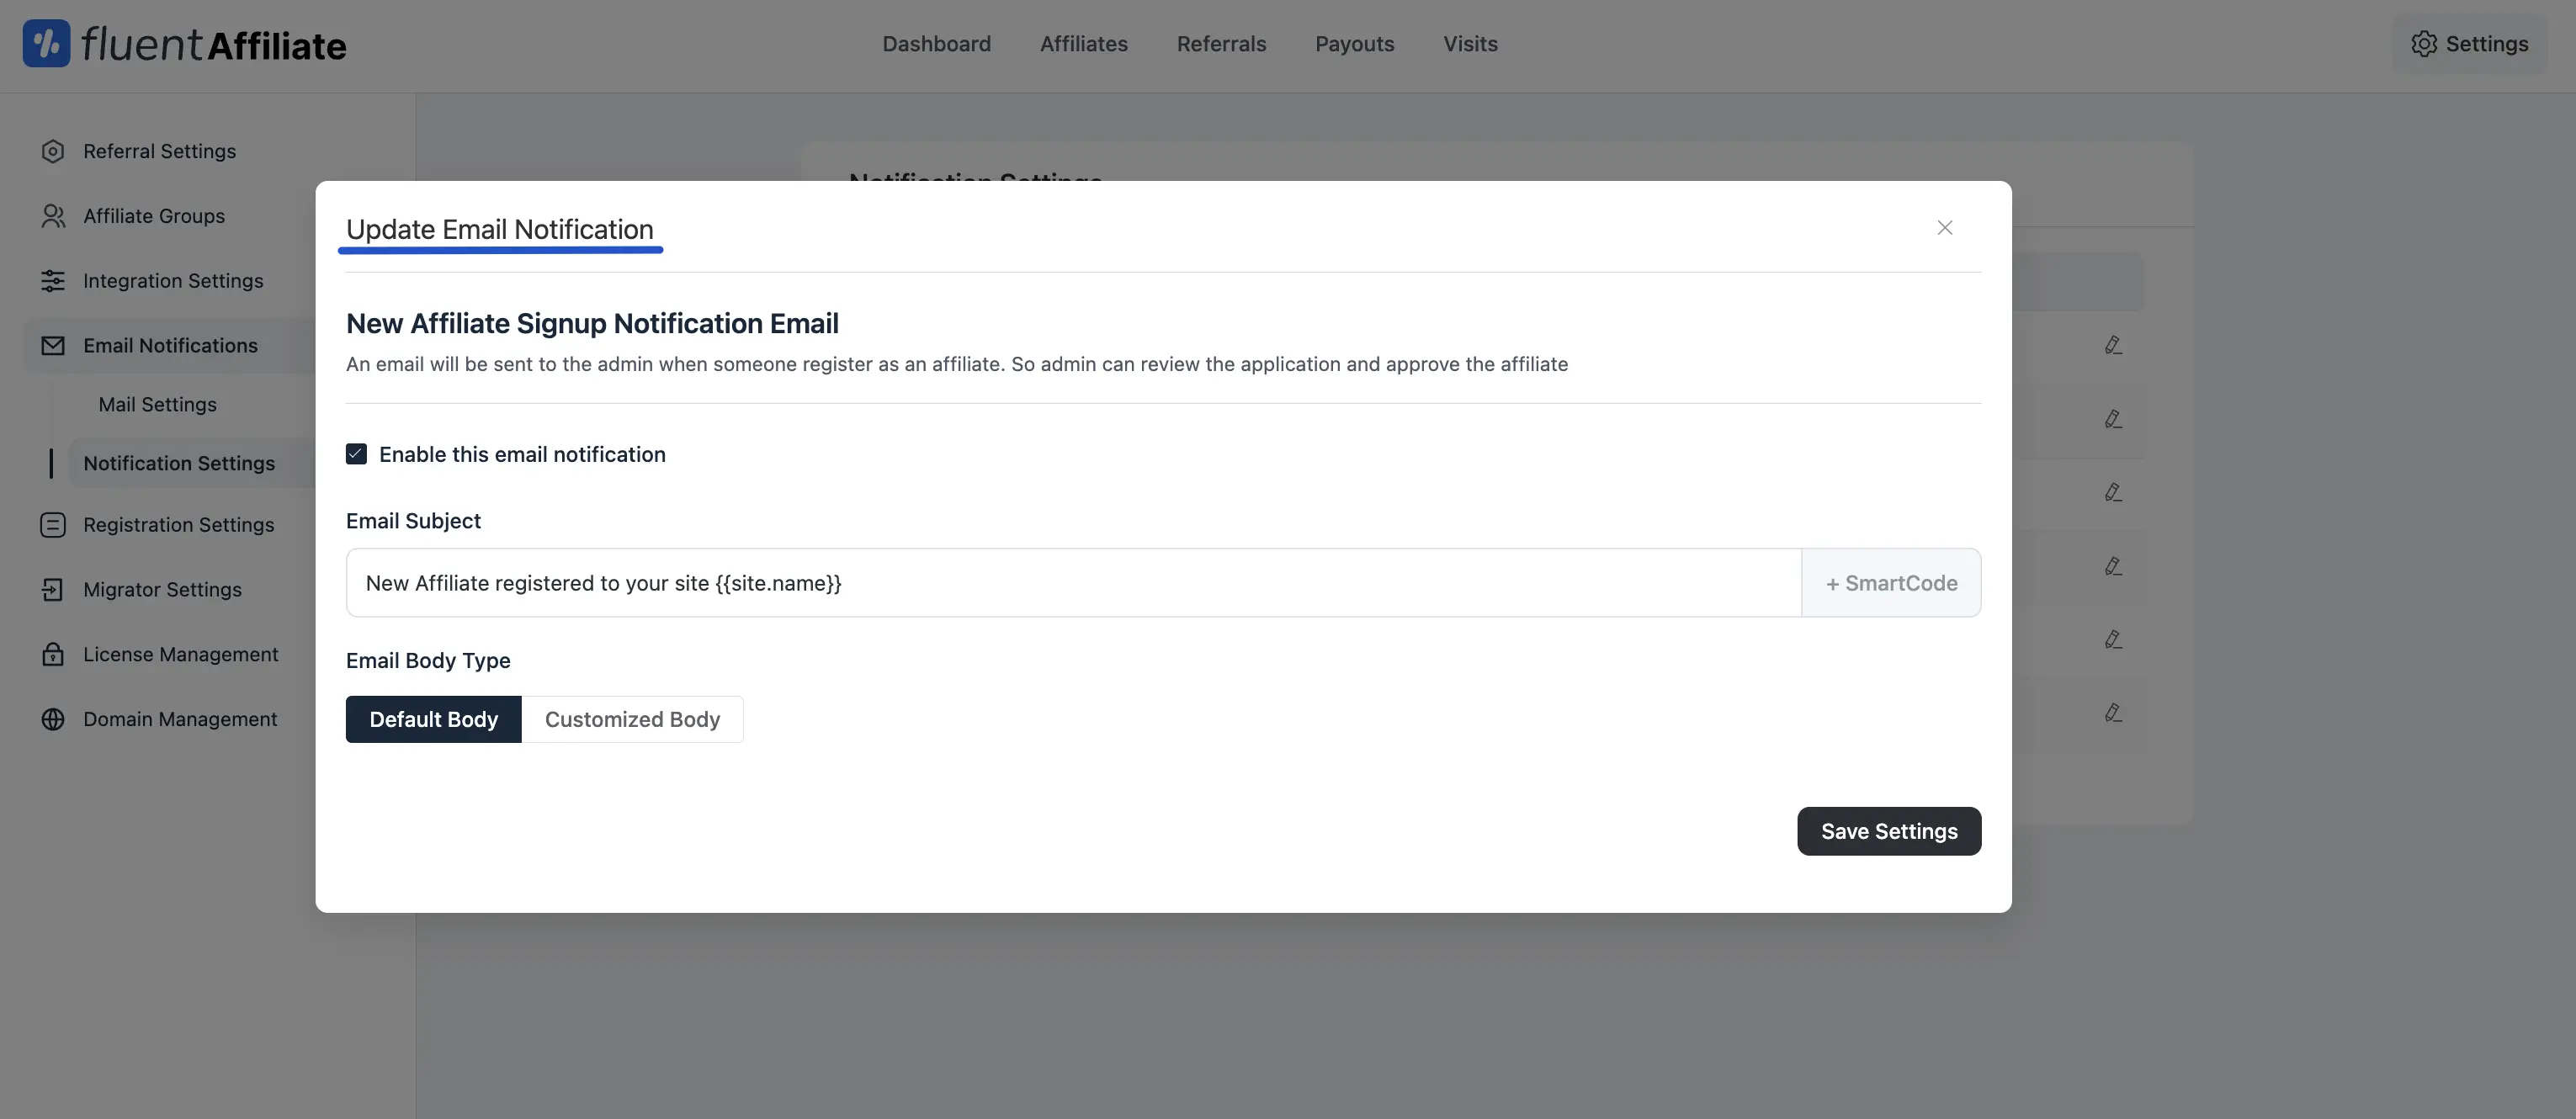
Email Body Type
You have two options for the email's content:
- Default Body: This option uses a standard, pre-written template for the email notification.
- Customized Body: Selecting this option reveals a rich text editor, allowing you to create a completely custom email body from scratch. The editor includes standard formatting tools, an "Add media" button, and "Visual" and "Code" tabs.
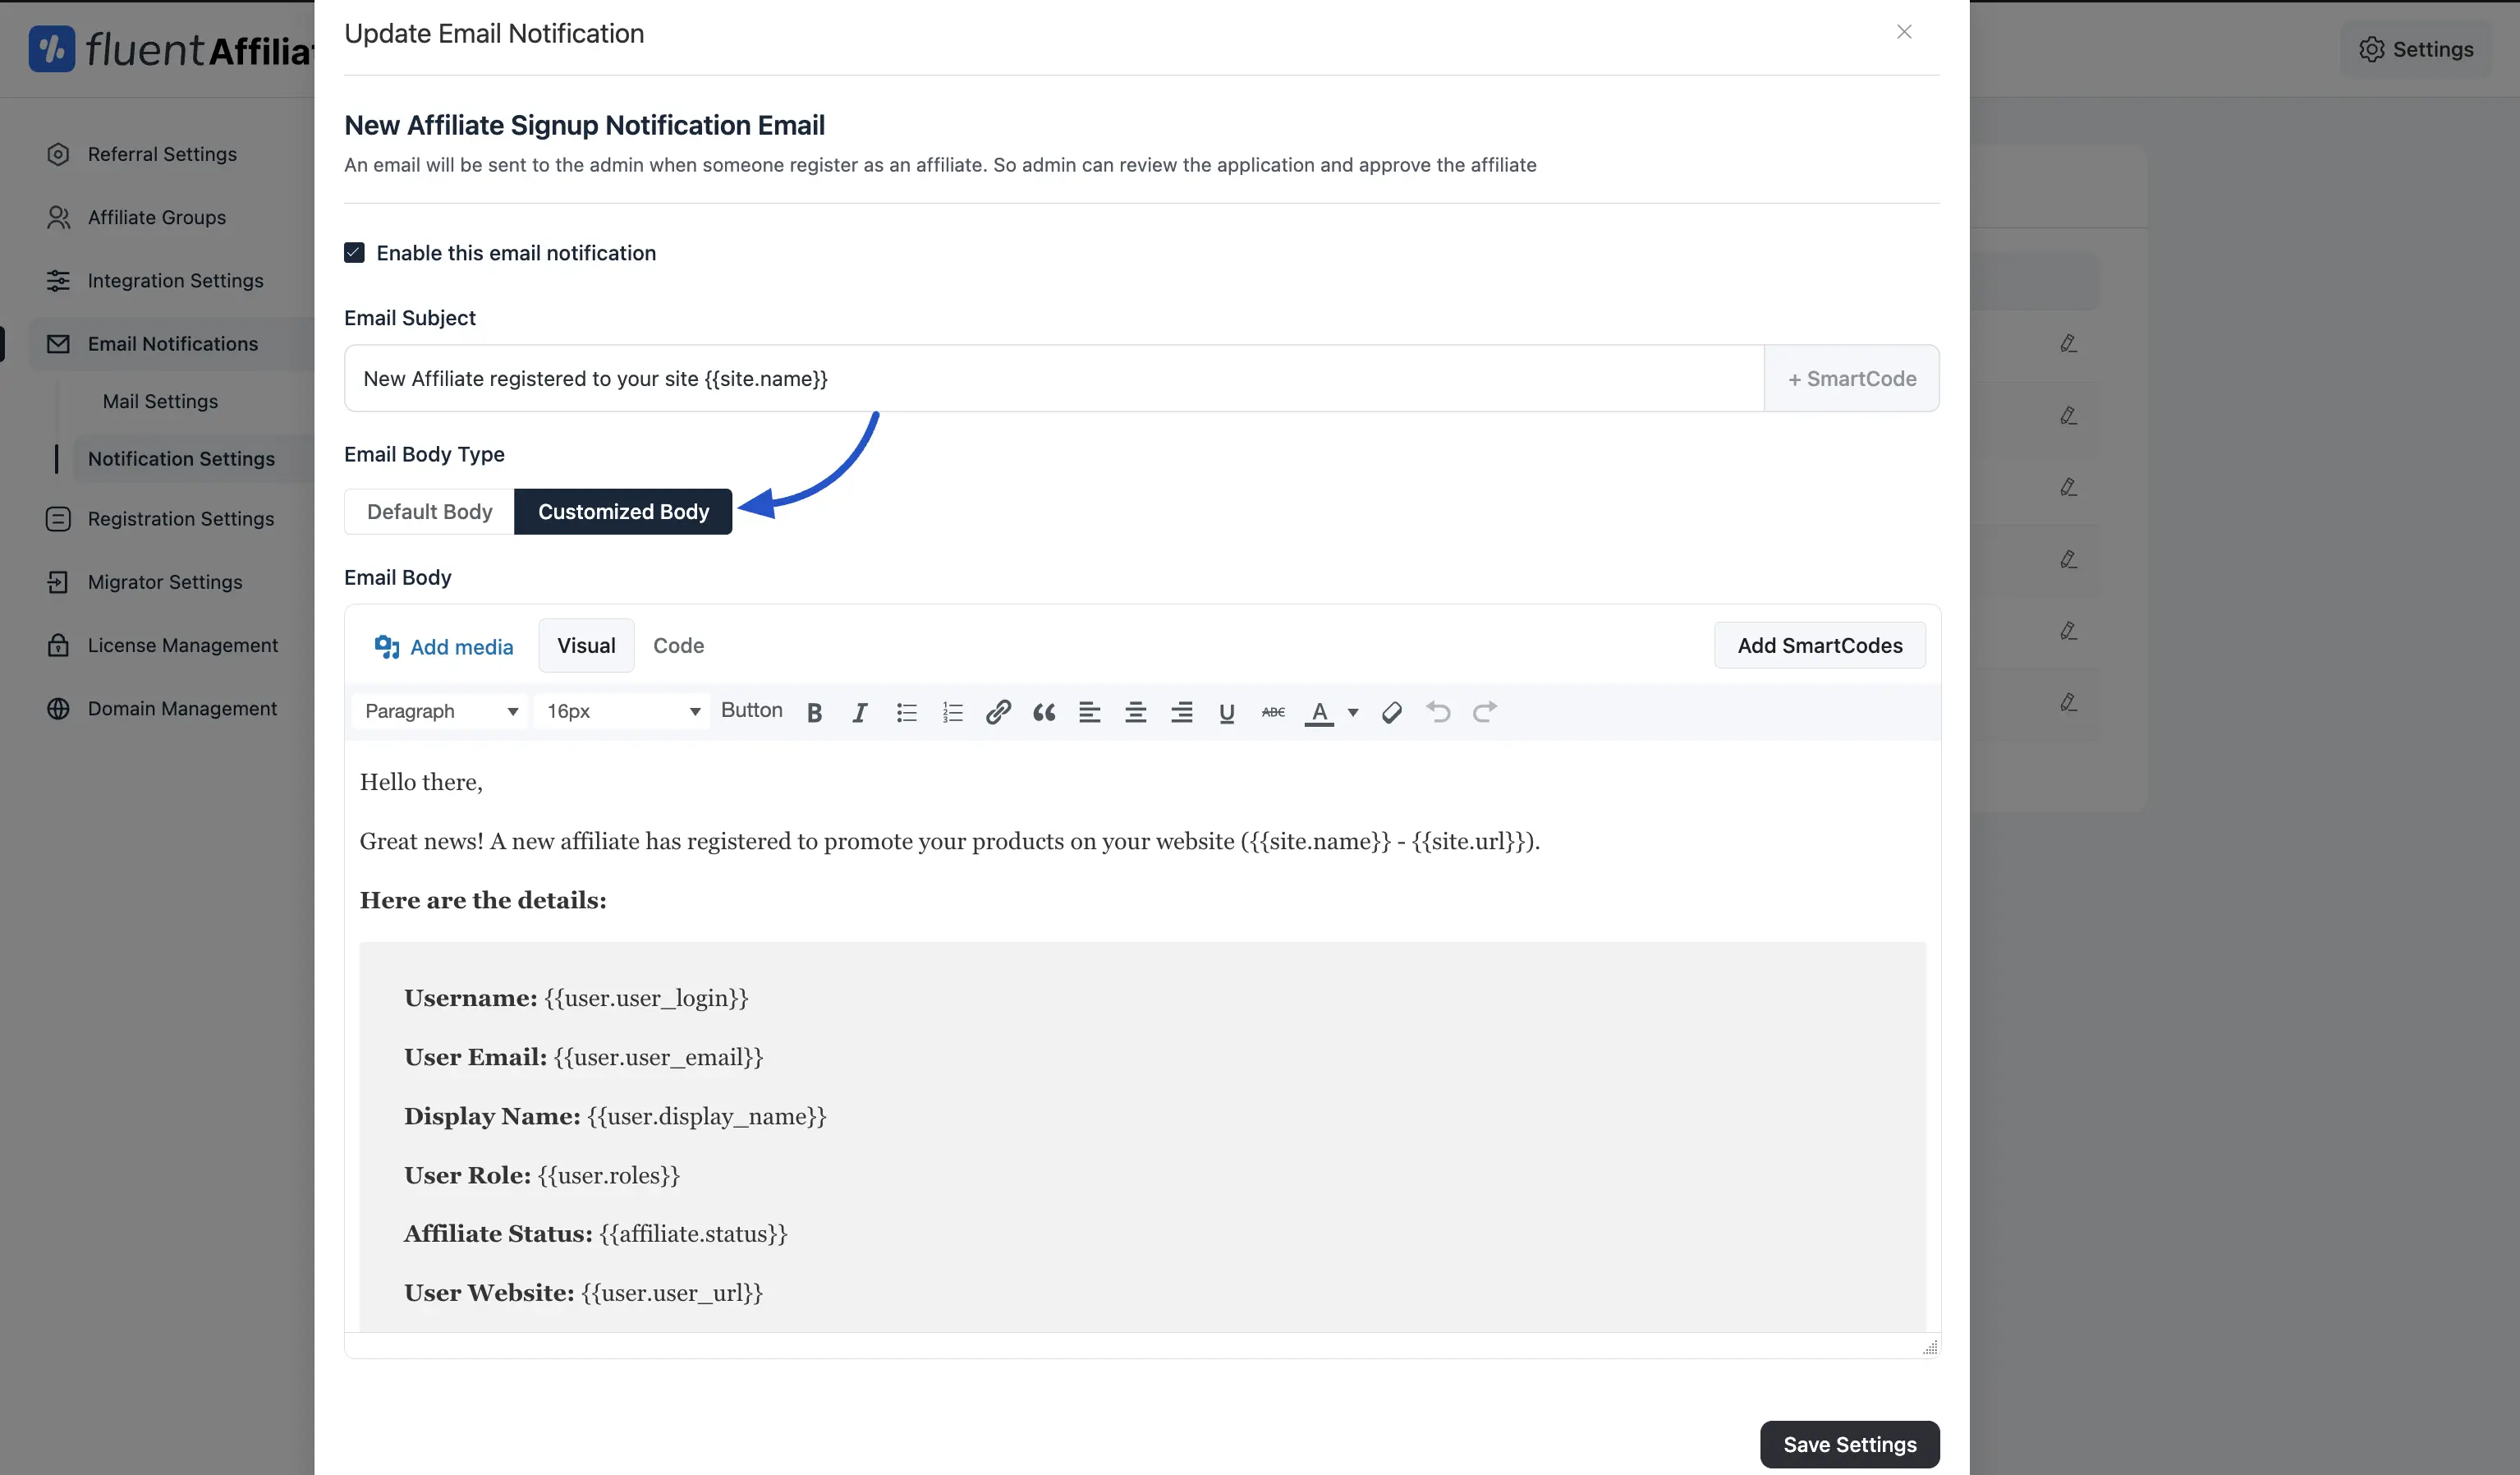
Using SmartCodes
To create dynamic and personalized emails, you can use SmartCodes to insert information like user names or affiliate stats directly into the Email Subject and the Customized Body.
- Click the + SmartCode or Add SmartCodes button to reveal a list of available codes.
- Simply click a SmartCode from the list to insert it into your email content.

After you have finished customizing the notification, click the Save Settings button to apply your changes.