Appearance
Group Settings
Managing a growing affiliate program means realizing that not all affiliates are the same. Some partners bring in more sales, while others might be part of a special promotional team. Instead of manually changing commission rates for every single person, you can use Affiliate Groups to keep things organized.
Affiliate Groups let you bundle your partners into tiers - like a VIP tier or an onboarding tier—and give each group its own special commission rules.
Accessing Affiliate Groups
Setting up groups is simple and only takes a few steps from your site's backend:
- Log in to your WordPress Dashboard.
- Go to FluentAffiliate → Settings from the left-hand menu.
- Click on Affiliate Groups from the left sidebar panel.
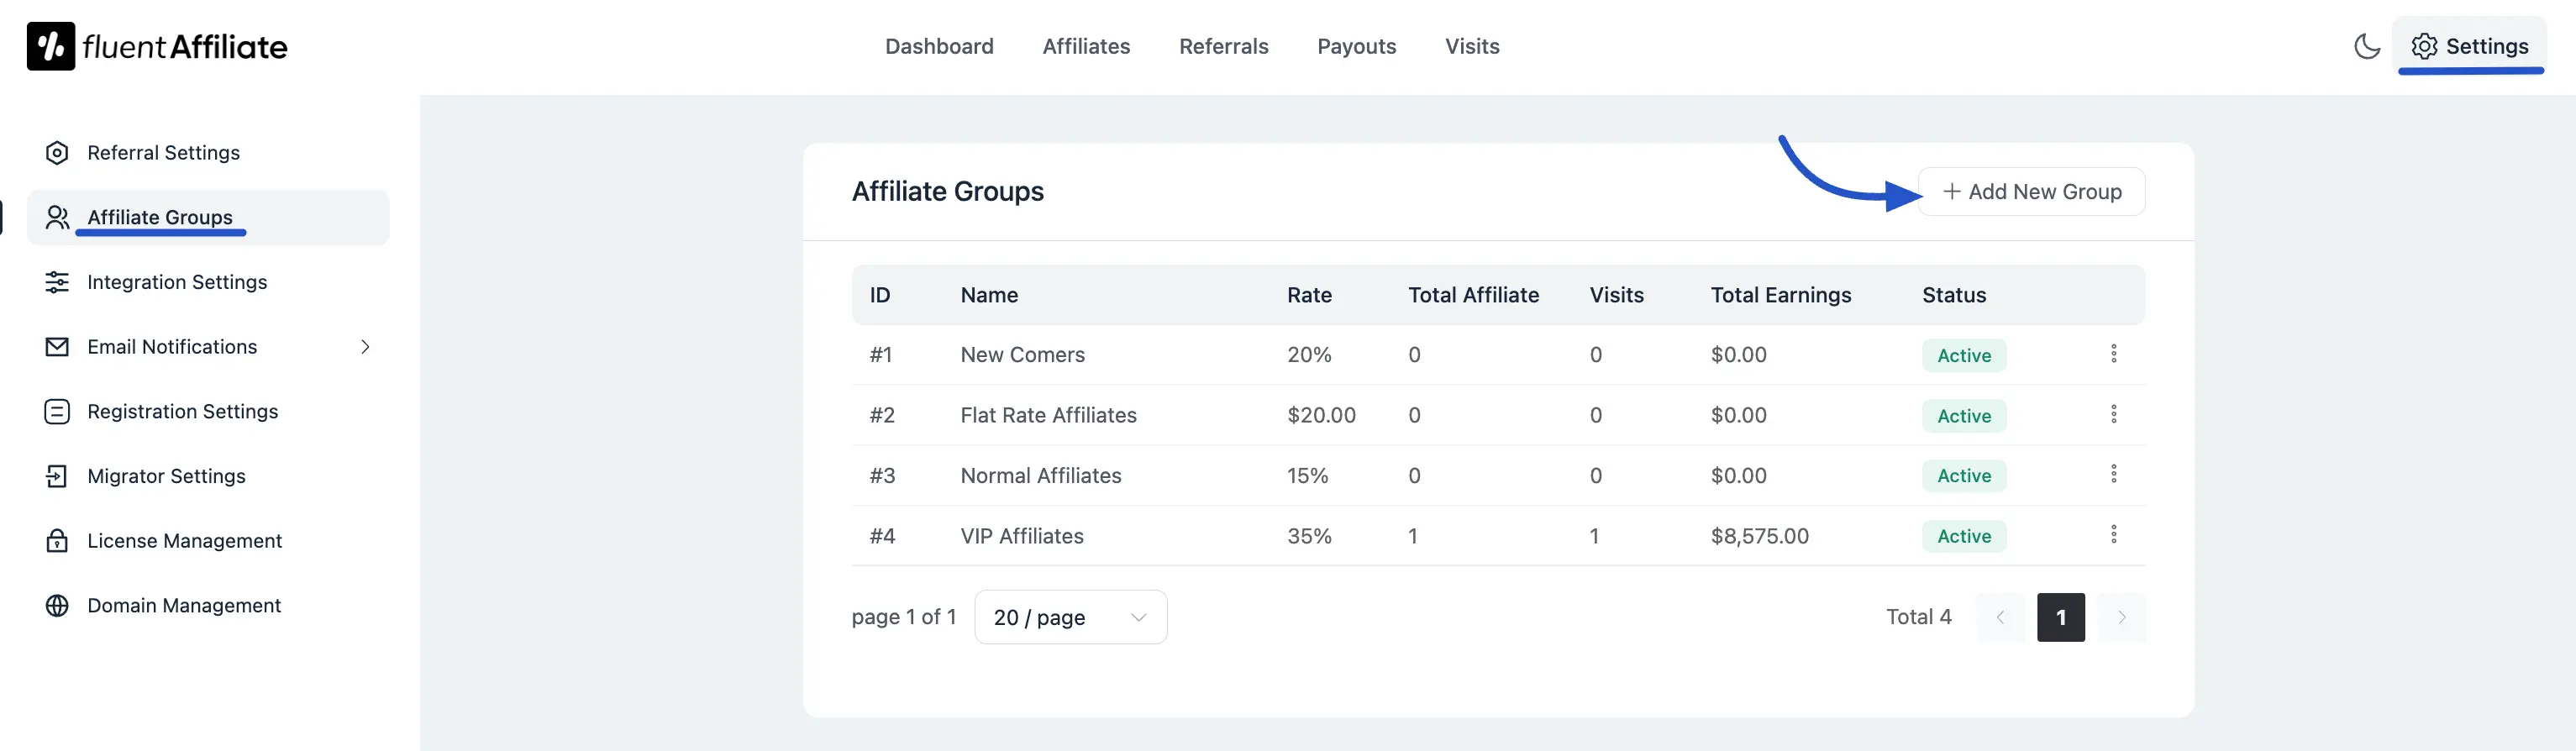
Creating a New Affiliate Group
If you want to build a new tier for your partners, follow these quick steps:
- Click the Add New Group button on your Affiliate Groups dashboard.
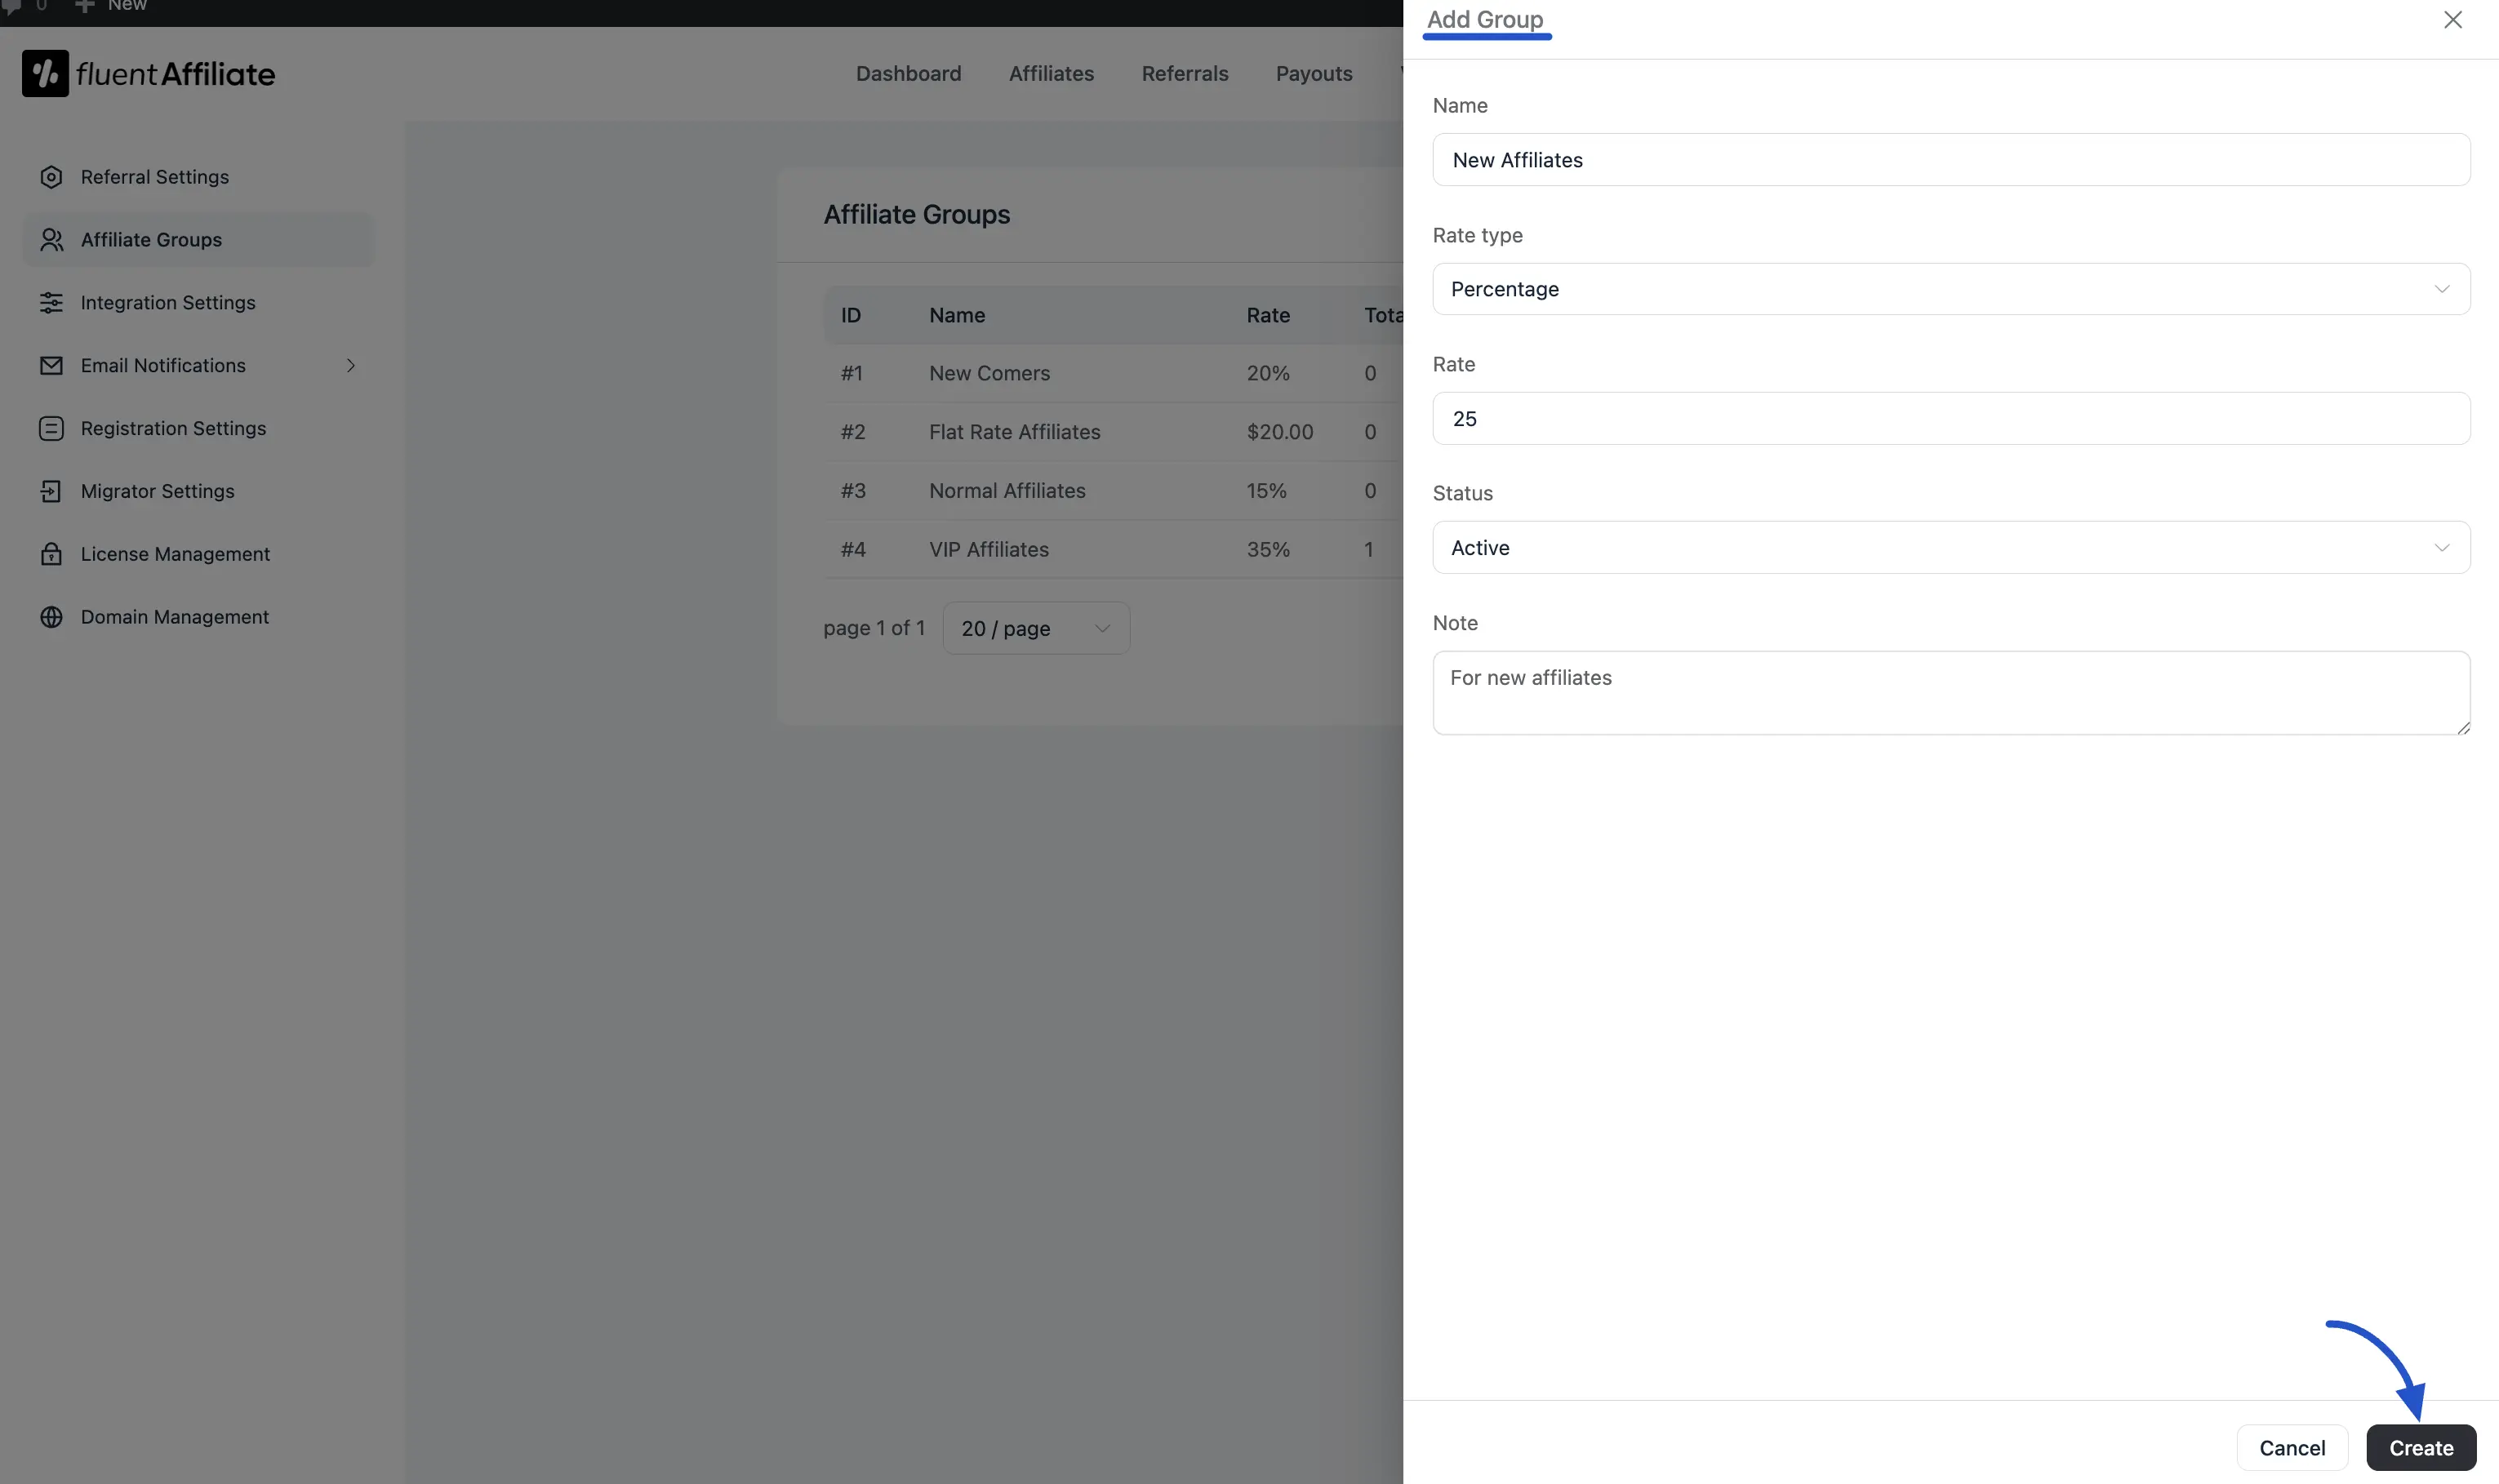
- A form panel will slide in from the right side of your screen. Fill out the following options:
- Name: Enter a clear name for your group so you can recognize it later (e.g., "VIP High Rollers" or "First Group").
- Rate Type: Choose how the affiliates in this group will be rewarded. You can pick a Flat amount or a Percentage.
- Rate: Type the numerical commission value based on the rate type you picked (e.g., enter 10 for a flat $10 payout or 10% rate).
- Status: Set the starting status of this group. You can choose from Active, Pending, Cancelled, or Rejected.
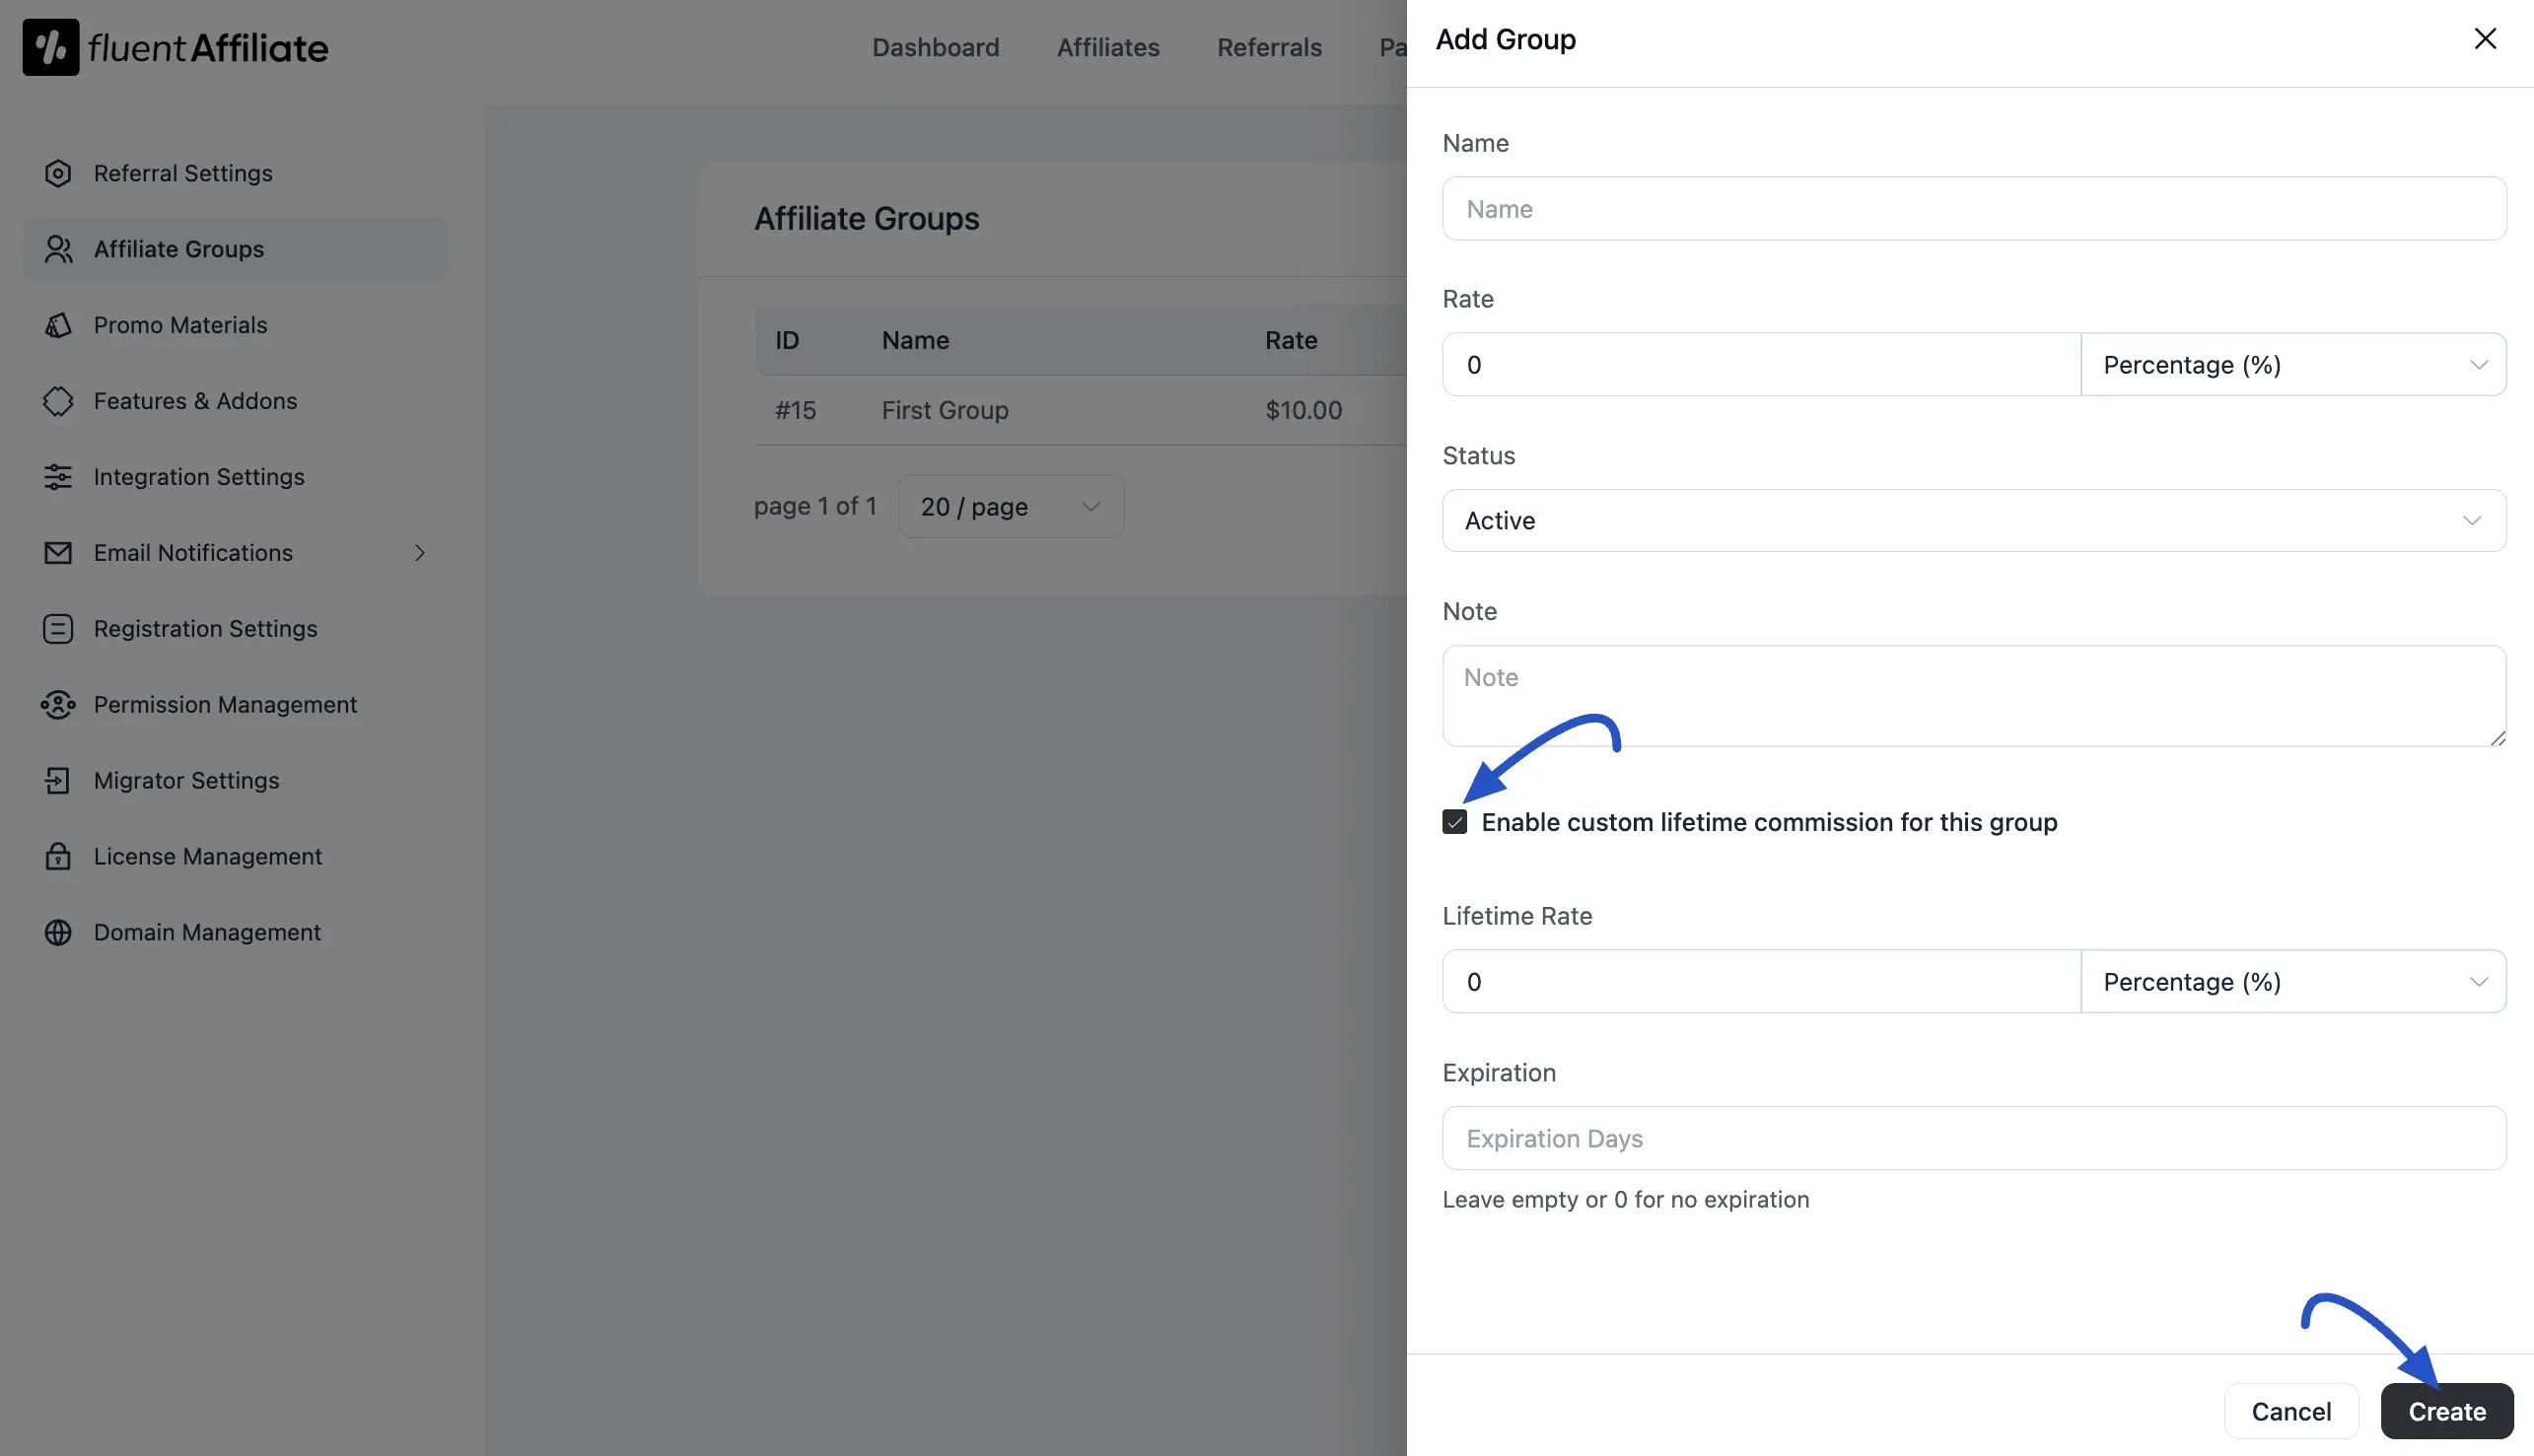
Custom Lifetime Commissions for Groups
If you want members of this specific group to get rewarded for future direct purchases made by customers they originally brought in, scroll down to the custom section:
Check the box for "Enable custom lifetime commission for this group".
Lifetime Rate: Set the specific reward value (Percentage or Fixed amount) for any repeat purchases made by their referred customers without a link.
Expiration: Enter the number of days this lifetime relationship should stick around before resetting. If you leave this field empty or type
0, the connection never expires!
Once you are done adjusting all the fields, click the Create button to save your new group.
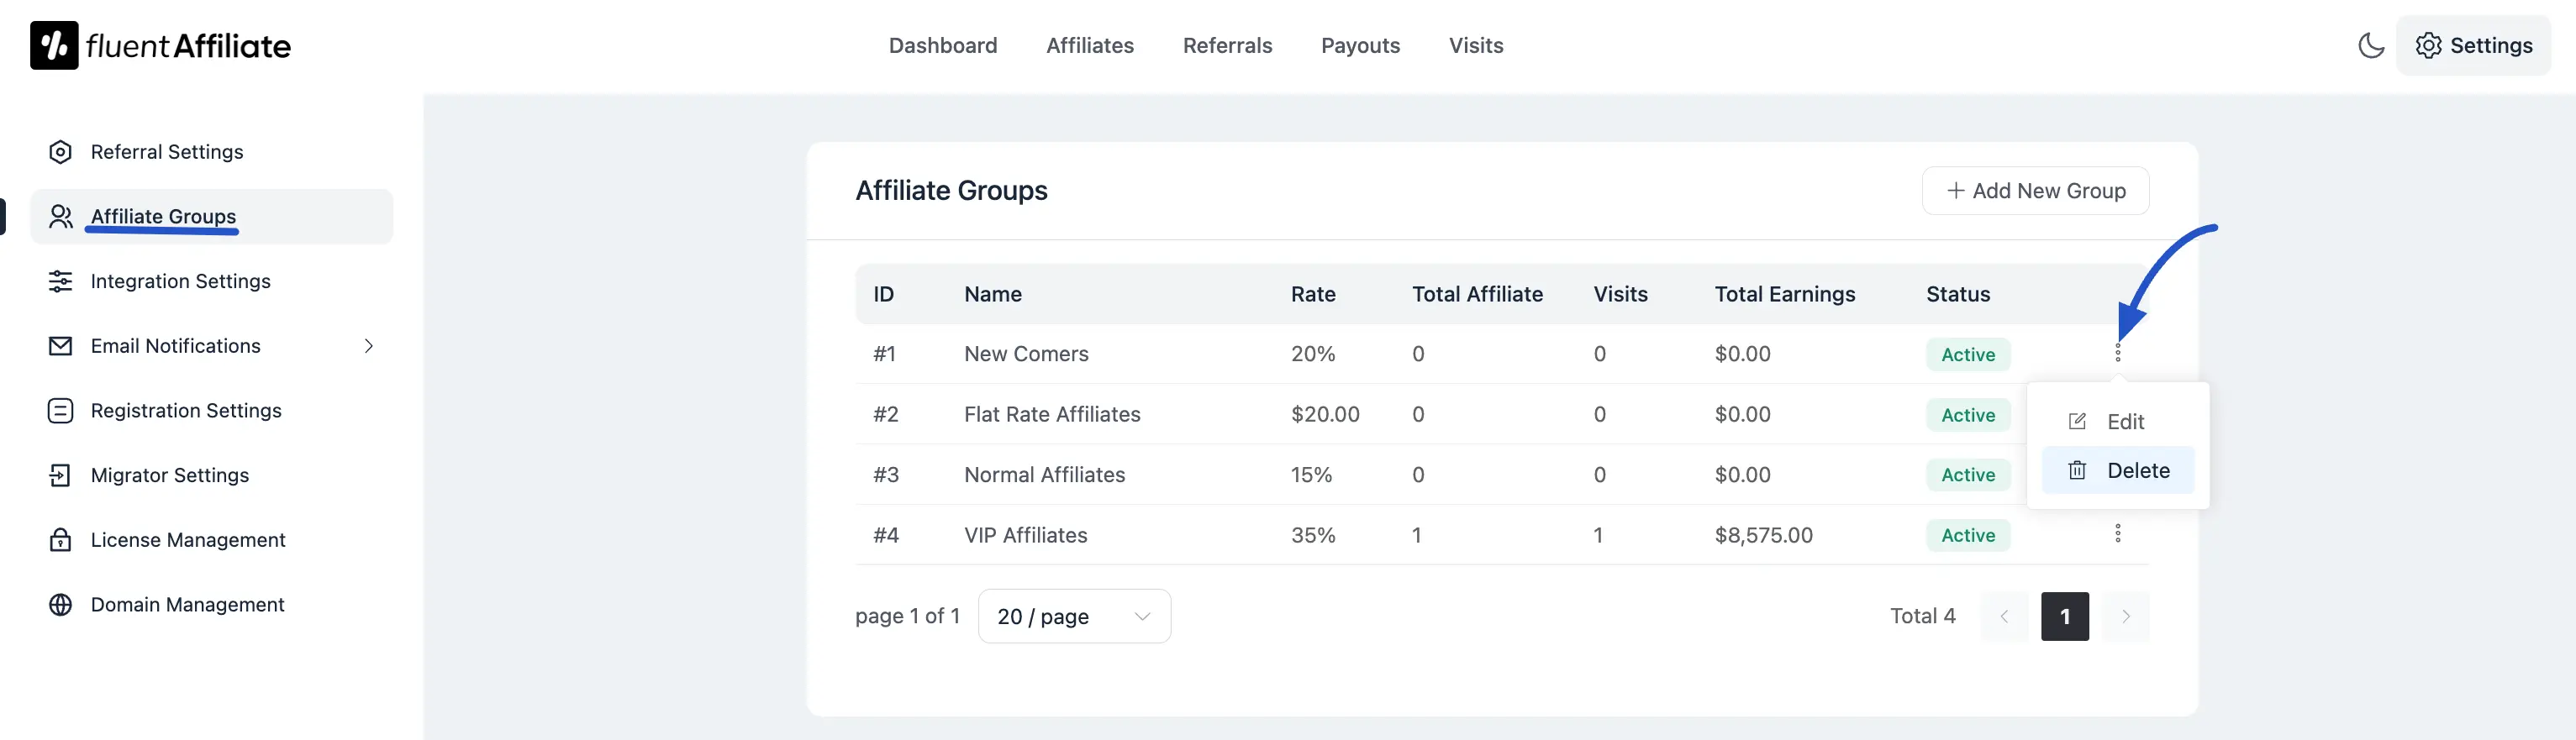
Managing and Assigning Groups
After hitting save, your newly created tier will appear in a neat list on your main Affiliate Groups section.
- Editing or Deleting Tiers: If you want to change a group's rate or remove it completely? Just click the three-dot action menu next to the group name to select Edit or Delete.
- Putting Affiliates Into Groups: When you are creating a new affiliate profile or editing an existing user, just find the Affiliate Type dropdown field and choose your group from the menu. The group's custom payout rules will automatically replace your global site rates for that specific partner!
Assigning a Group to an Affiliate
When creating a new affiliate or editing an existing one, you can assign them to a group:
- In the affiliate's profile, look for the Rate Type field.
- Select the desired group from the dropdown menu.
The selected group's commission rate will automatically apply to that affiliate.