Appearance
Fluent Forms Integration with FluentAffiliate
Fluent Forms is a powerful, lightweight, and user-friendly form builder for WordPress. When you connect it with FluentAffiliate, you can unlock two powerful capabilities: tracking affiliate commissions on your paid form submissions and creating custom affiliate registration forms.
This guide will show you how to set up both, starting with the simple way to track commissions.
NOTE
Before you begin, ensure that you have both the Fluent Forms and FluentAffiliate plugins installed and activated on your website.
Enable Fluent Forms in FluentAffiliate
First, you need to activate the integration module in FluentAffiliate.
- Go to the FluentAffiliate Dashboard.
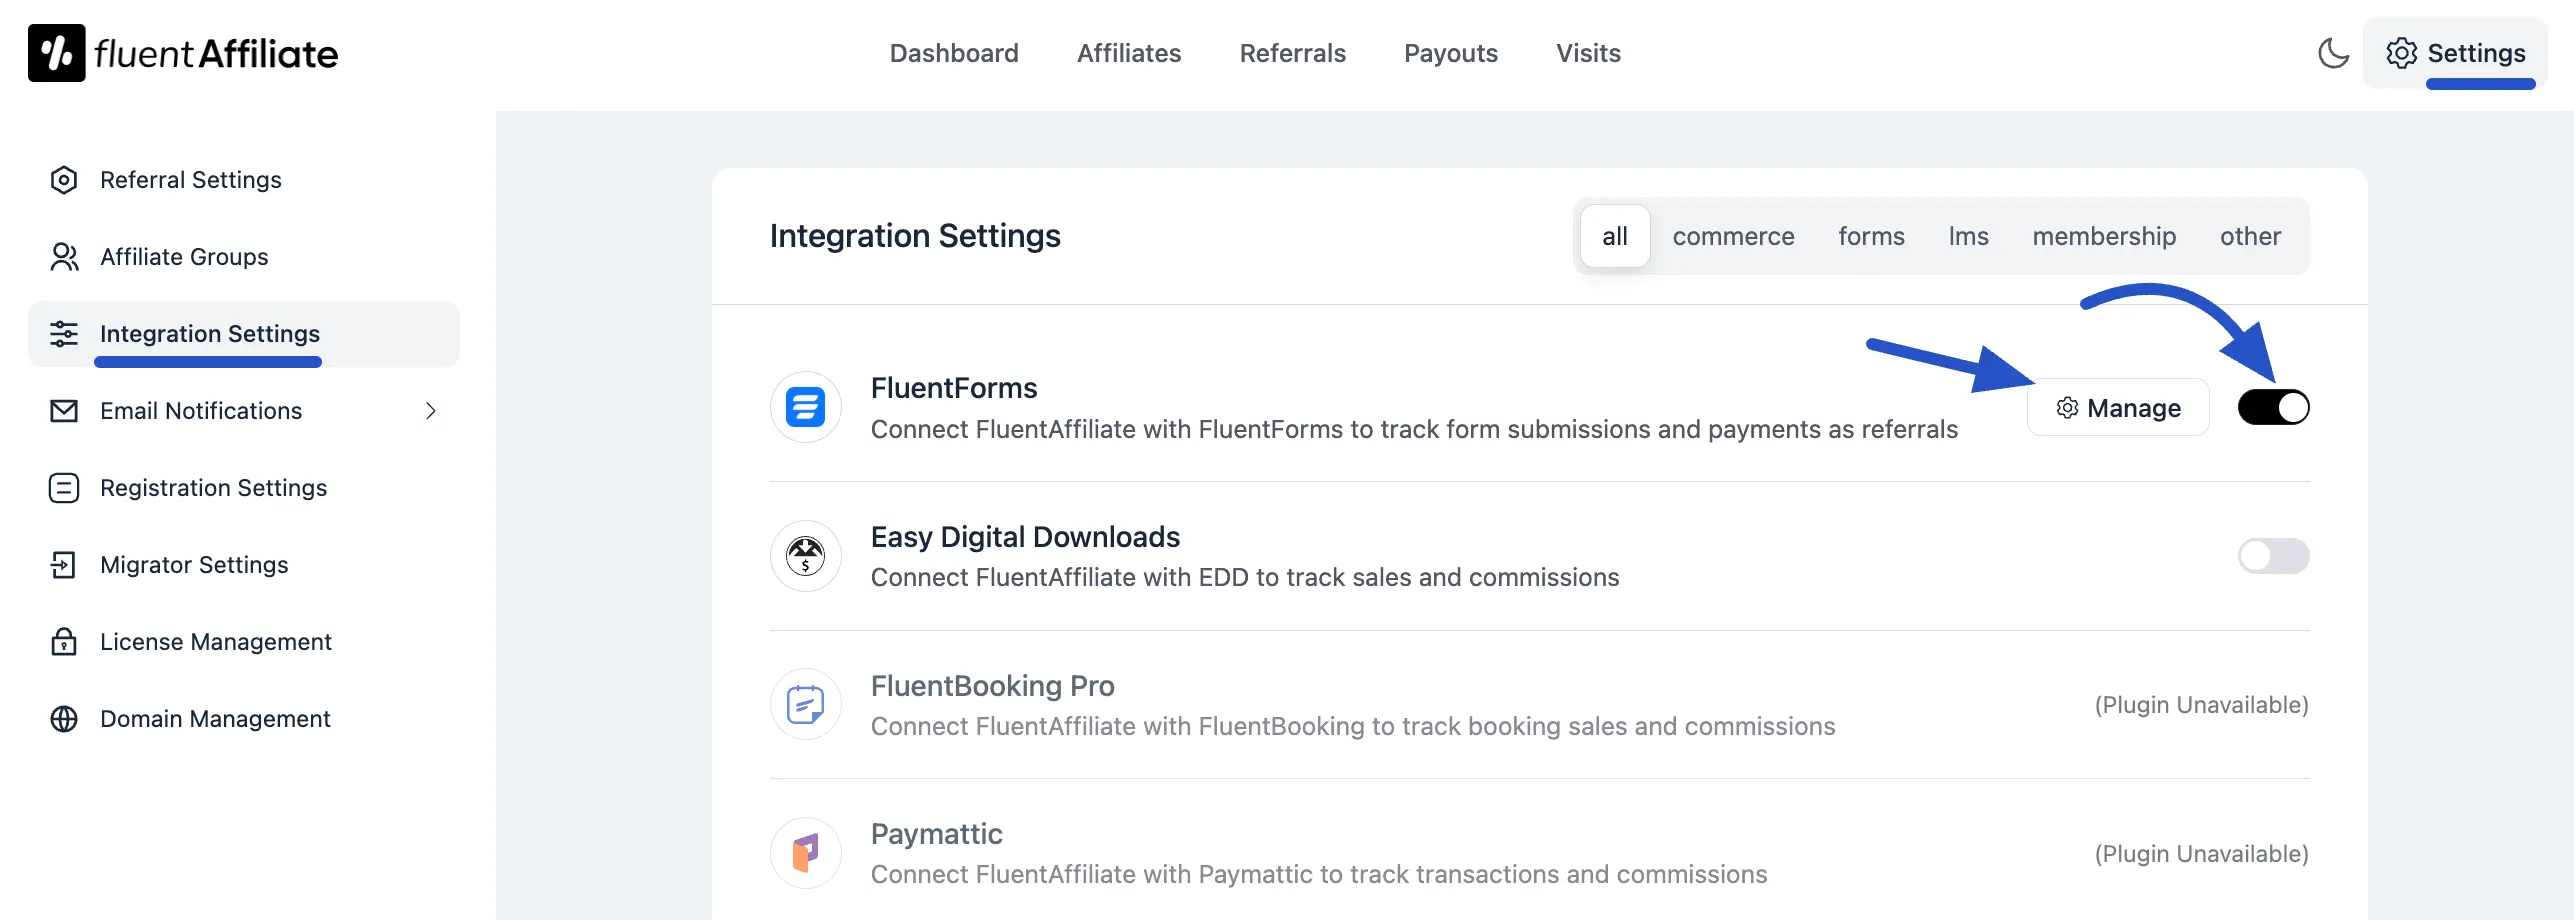
- From the top menu, click on Settings, and from the left sidebar, select the Integration Settings option.
- You will see a list of available integrations. Look for Fluent Forms in this list. To enable the integration, click on the toggle button next to Fluent Forms.
Your Fluent Forms integration with FluentAffiliate is now active, allowing you to create affiliate registration forms and track form submissions.
In the Manage section, you'll find additional settings to customize how the integration works.
Configure Fluent Forms Settings
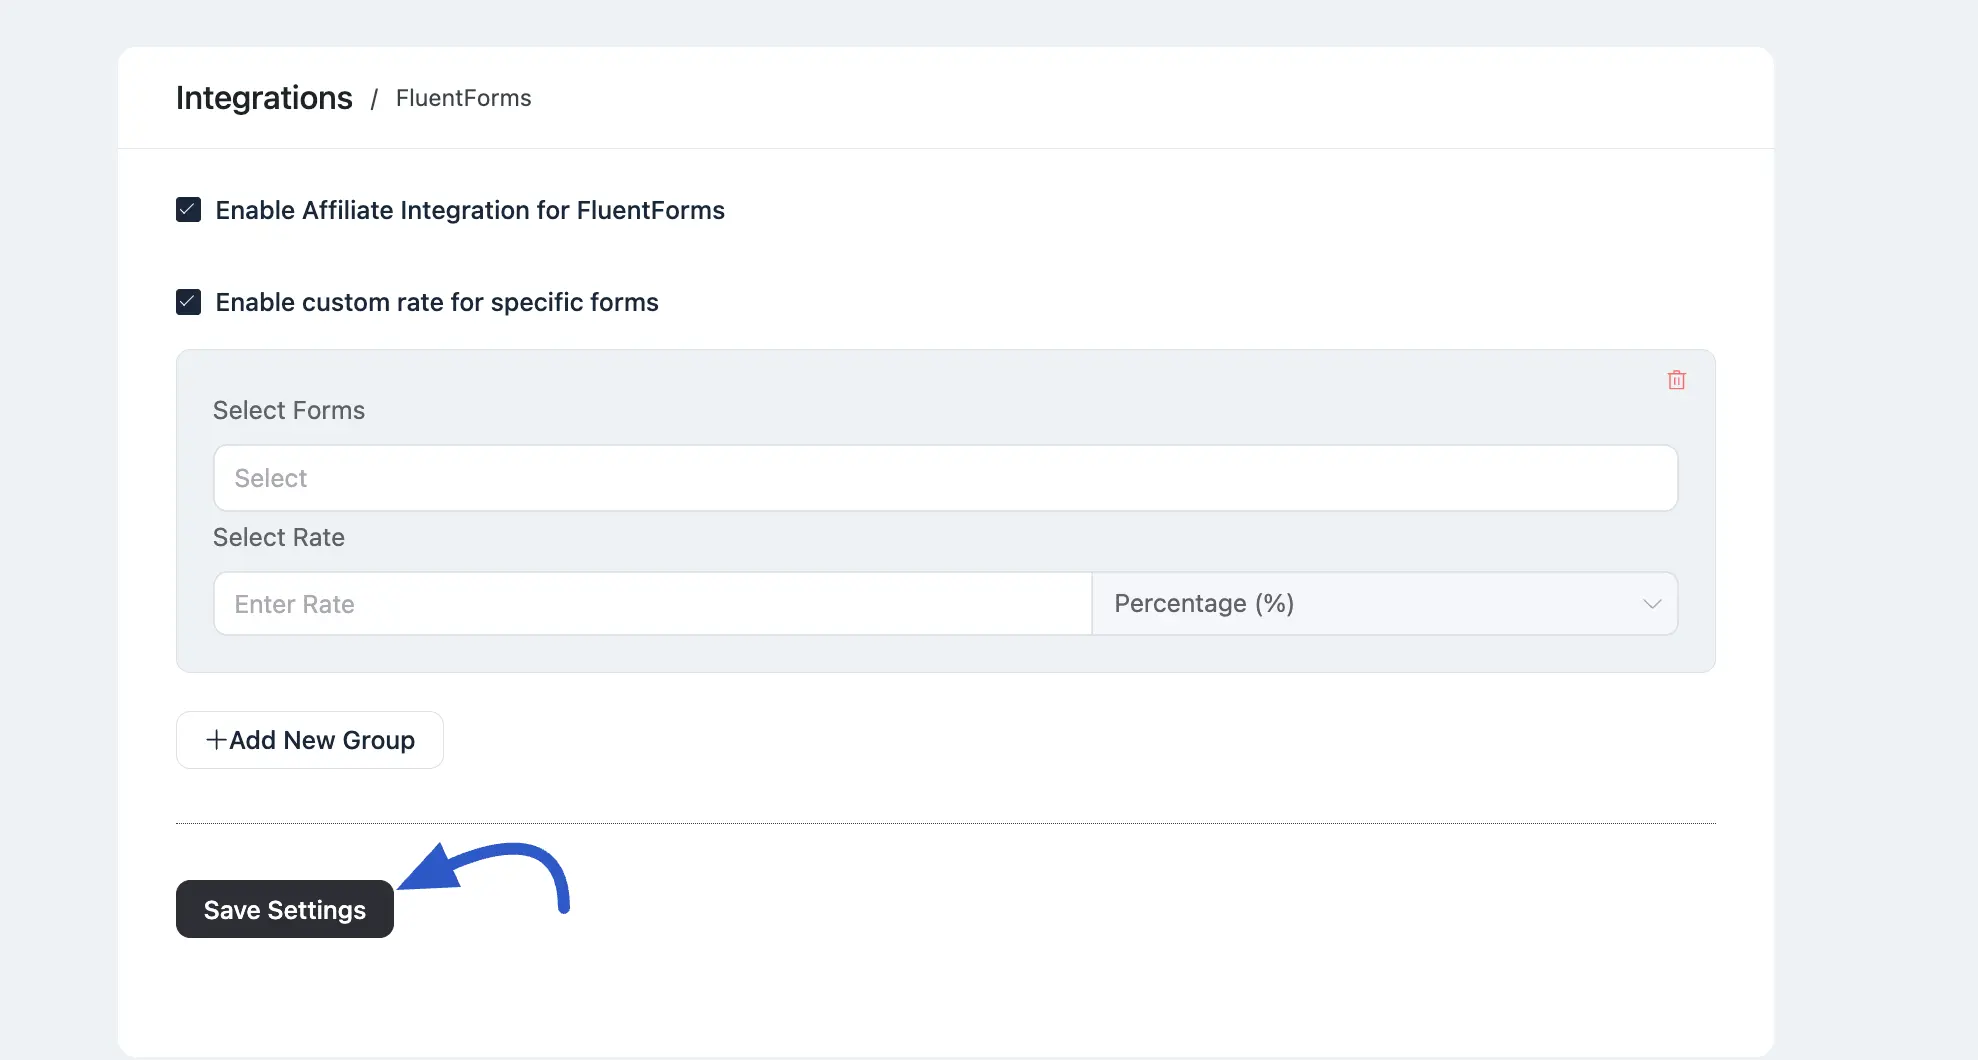
After clicking the Manage button, you can configure how affiliate commissions are handled for your payment forms.
- Enable Affiliate Integration for Fluent Forms: You must check this box to activate commission tracking for all your Fluent Forms payment forms.
- Enable custom rate for specific forms: Check this box if you want to override the default commission rate and set special rates for your payment forms.
Set Custom Commission Rates for Your Forms
Once Enable custom rate is checked, you can define specific commission structures for individual payment forms. This is perfect for rewarding affiliates differently for various campaigns. Click on the +Add New Group button to create your first custom rate.
- Select Forms: This option allows you to apply the custom rate to a specific payment form. Enter a keyword in the text field to search for and select the form to which this custom rate will apply.
- Select Rate: Set the commission rate for the selected form. Enter a numerical value into the field to set the commission amount.
- Rate Type Selector: Click the dropdown menu to choose the type of commission:
- Percentage: The affiliate will receive a percentage of the payment amount.
- Fixed: The affiliate will receive a fixed amount as commission, regardless of the payment amount.
Save Settings: Once you're done, click the Save Settings button.
Tracking Affiliate Commission
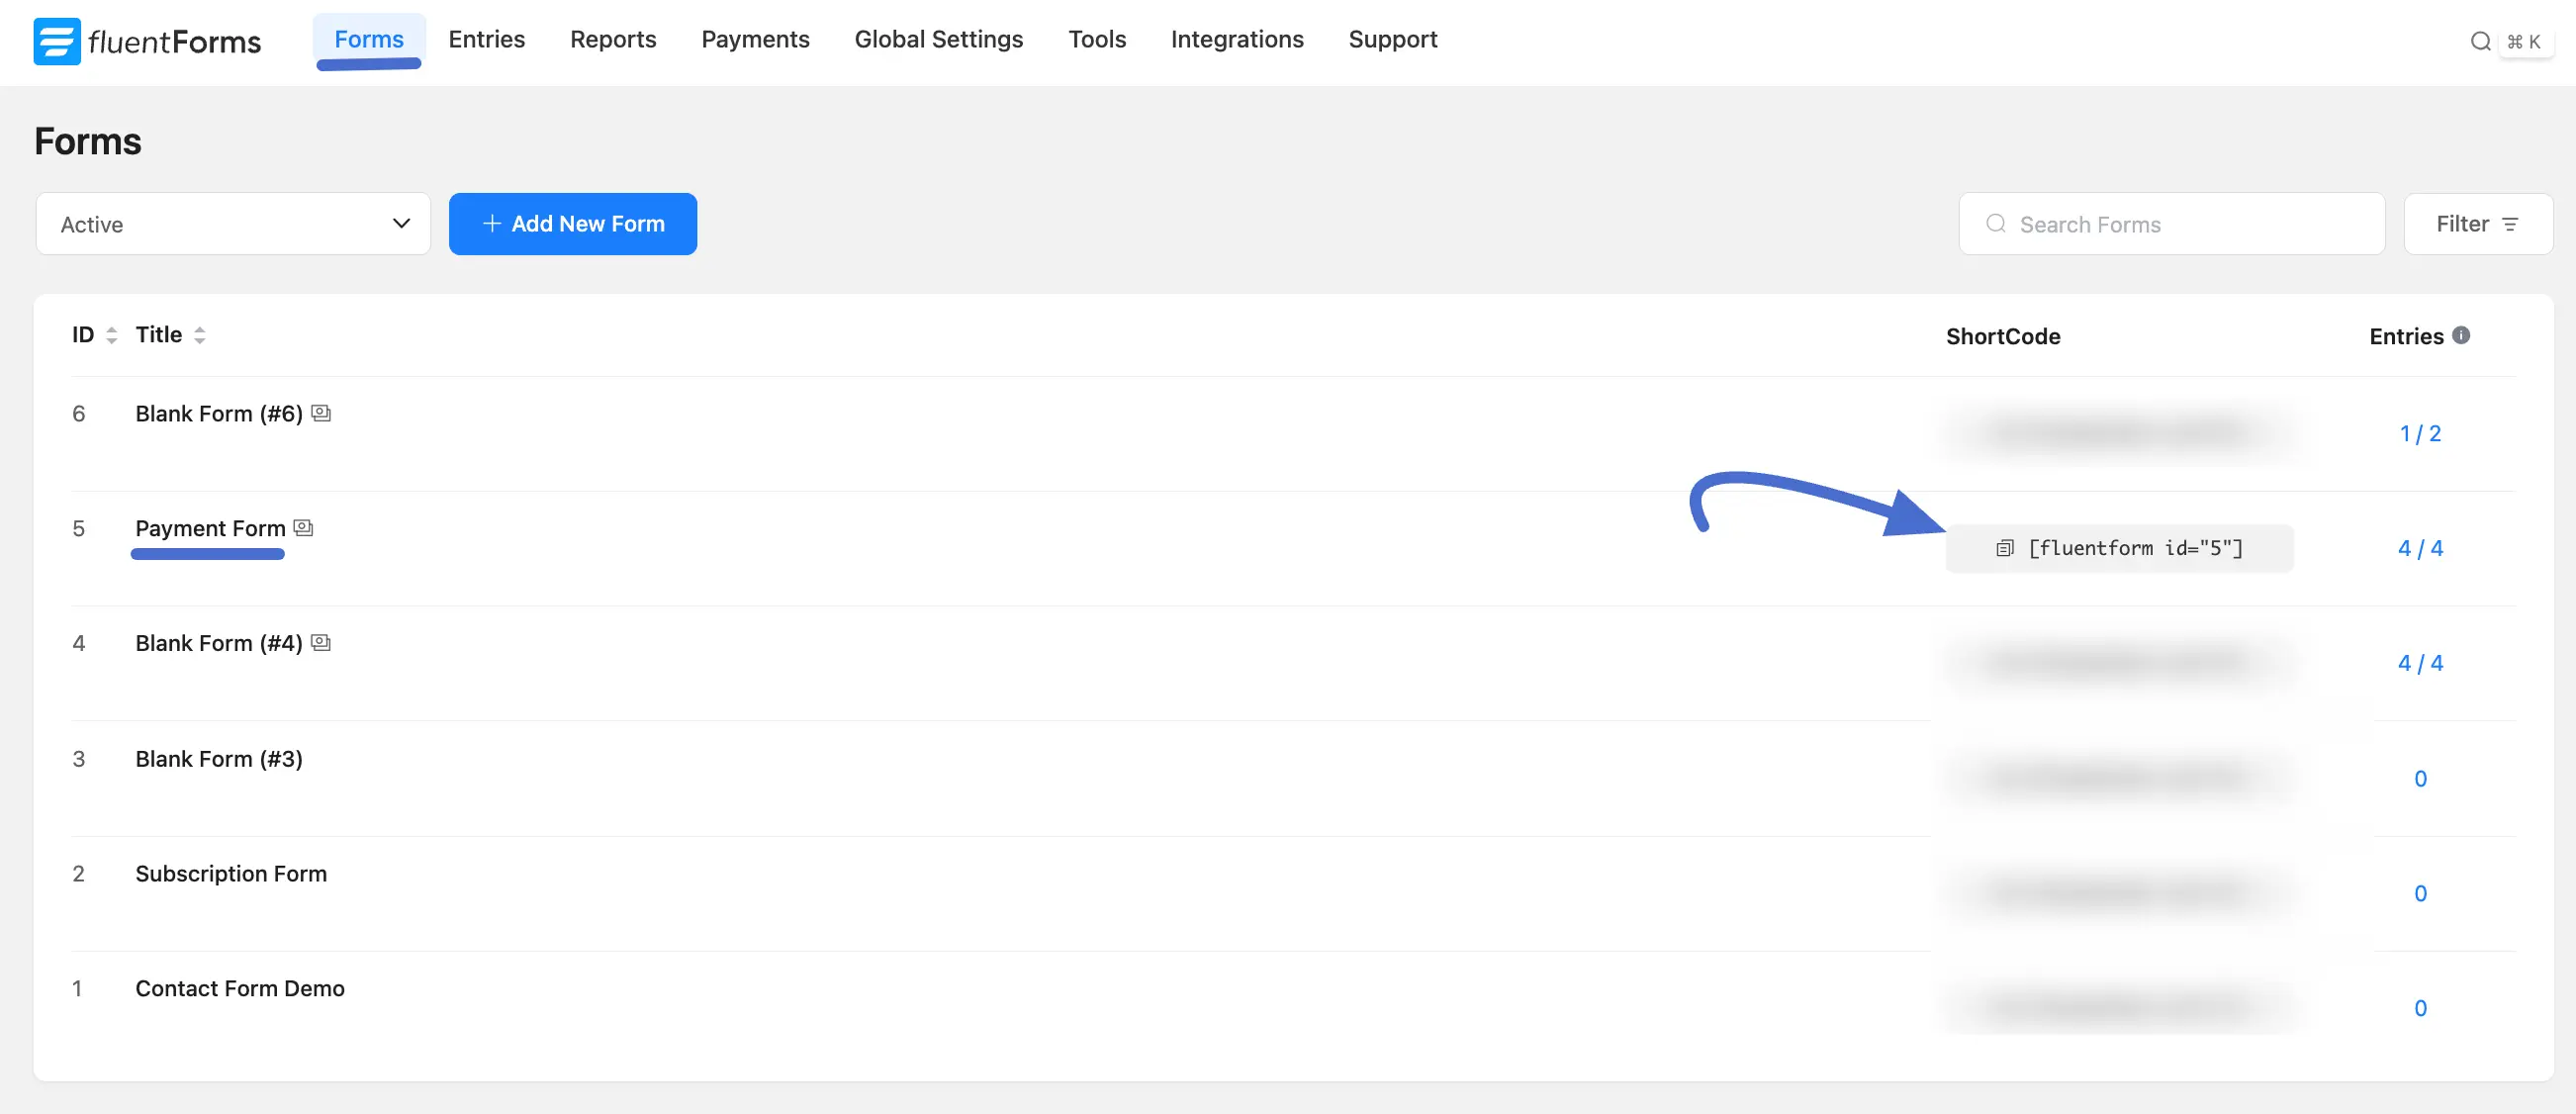
Now, you need to display the form on a specific page or post. Go to the Fluent Forms dashboard and copy the Shortcode from your selected payment form. Then, paste this shortcode into the content area of your desired Page or Post. This will embed the form on your website, making it visible and ready for users to interact with.
Now, copy the Page or Post URL and paste it into the input field under the Generate Affiliate Link " section after logging into your Affiliate Area. Next, click the Generate button. Simply click the Copy button to grab it quickly and start sharing.
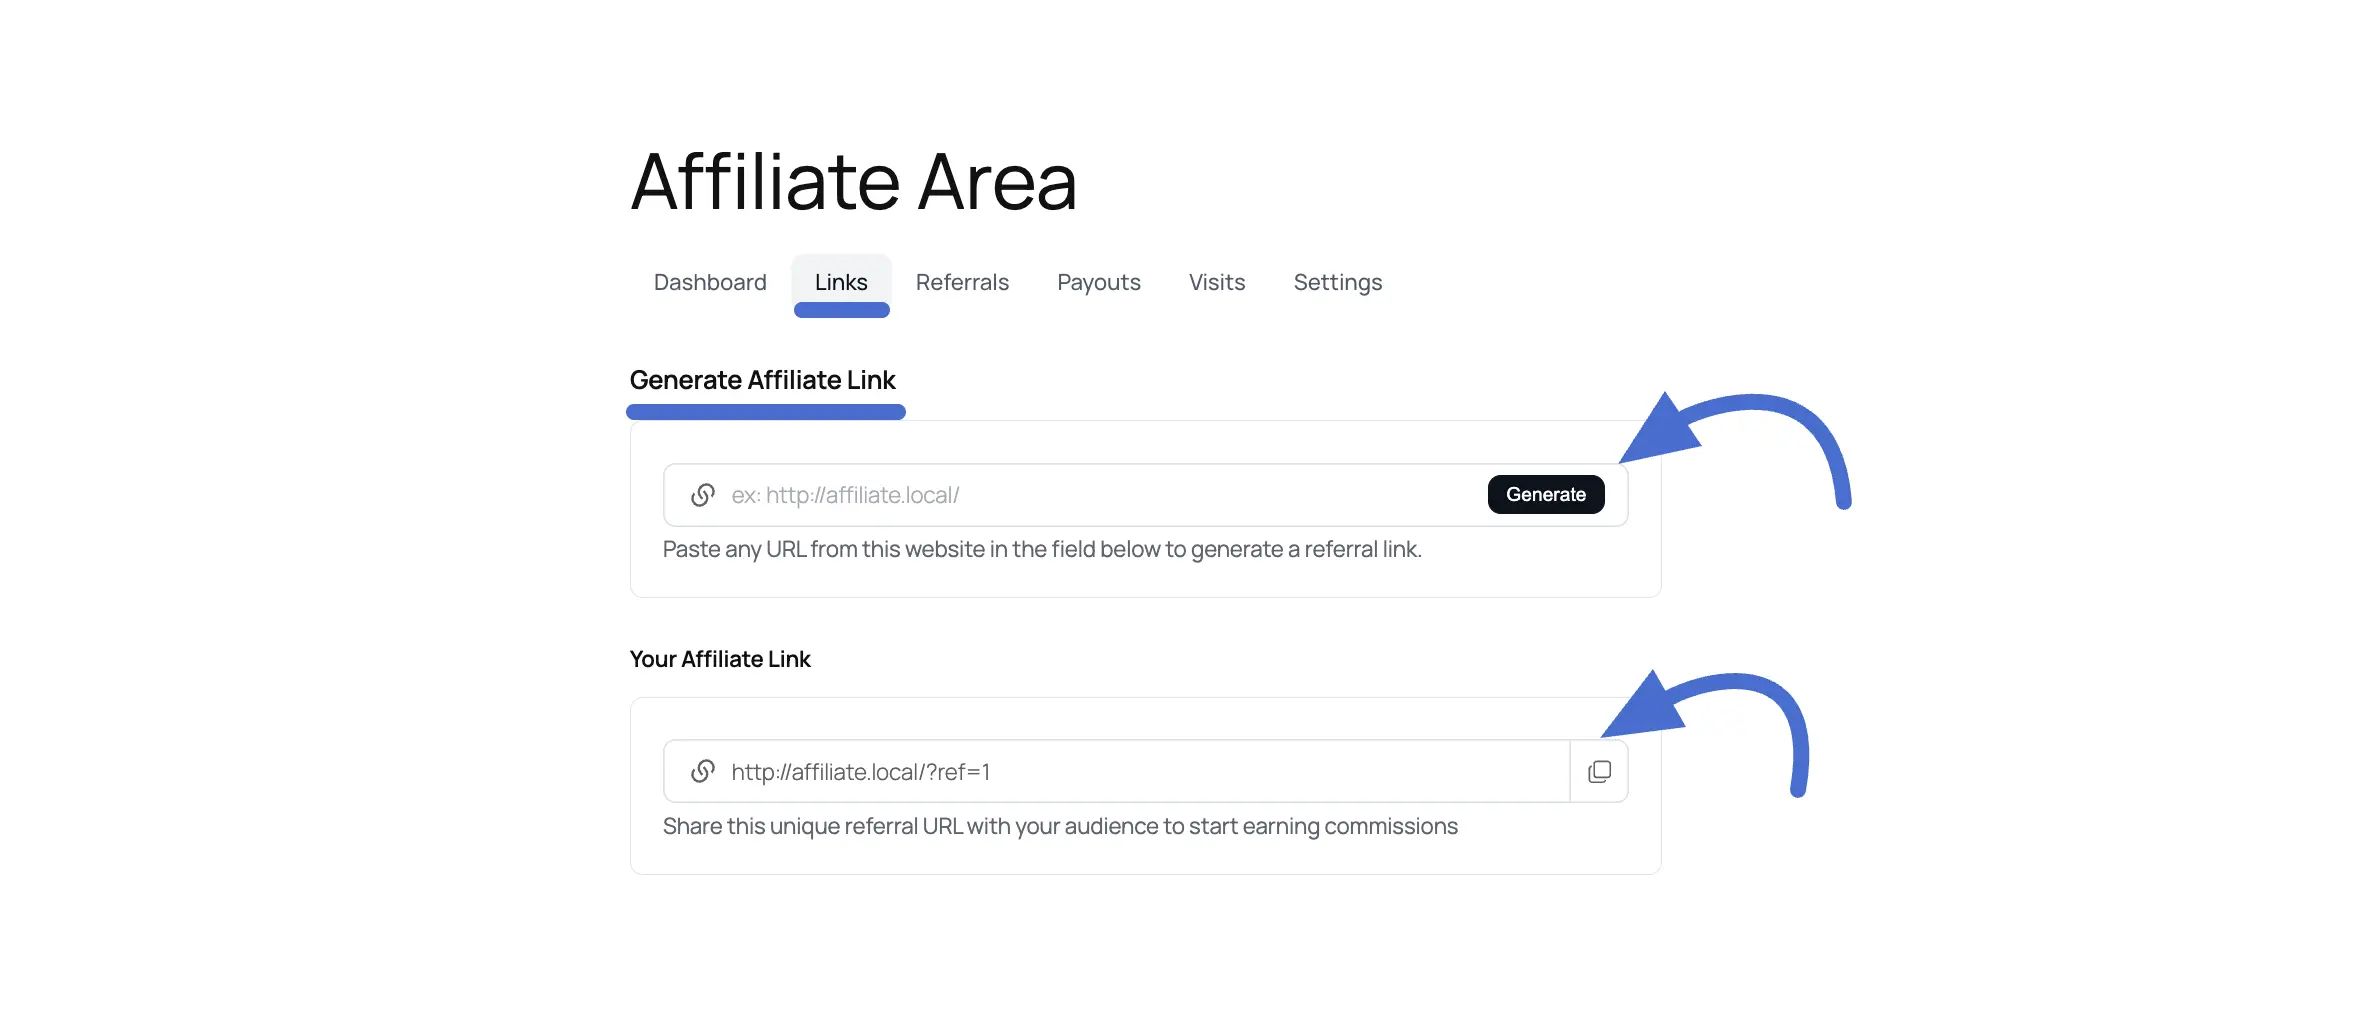
After the user submission this form using this affiliate link, you will get commissions. Below is a screenshot given- 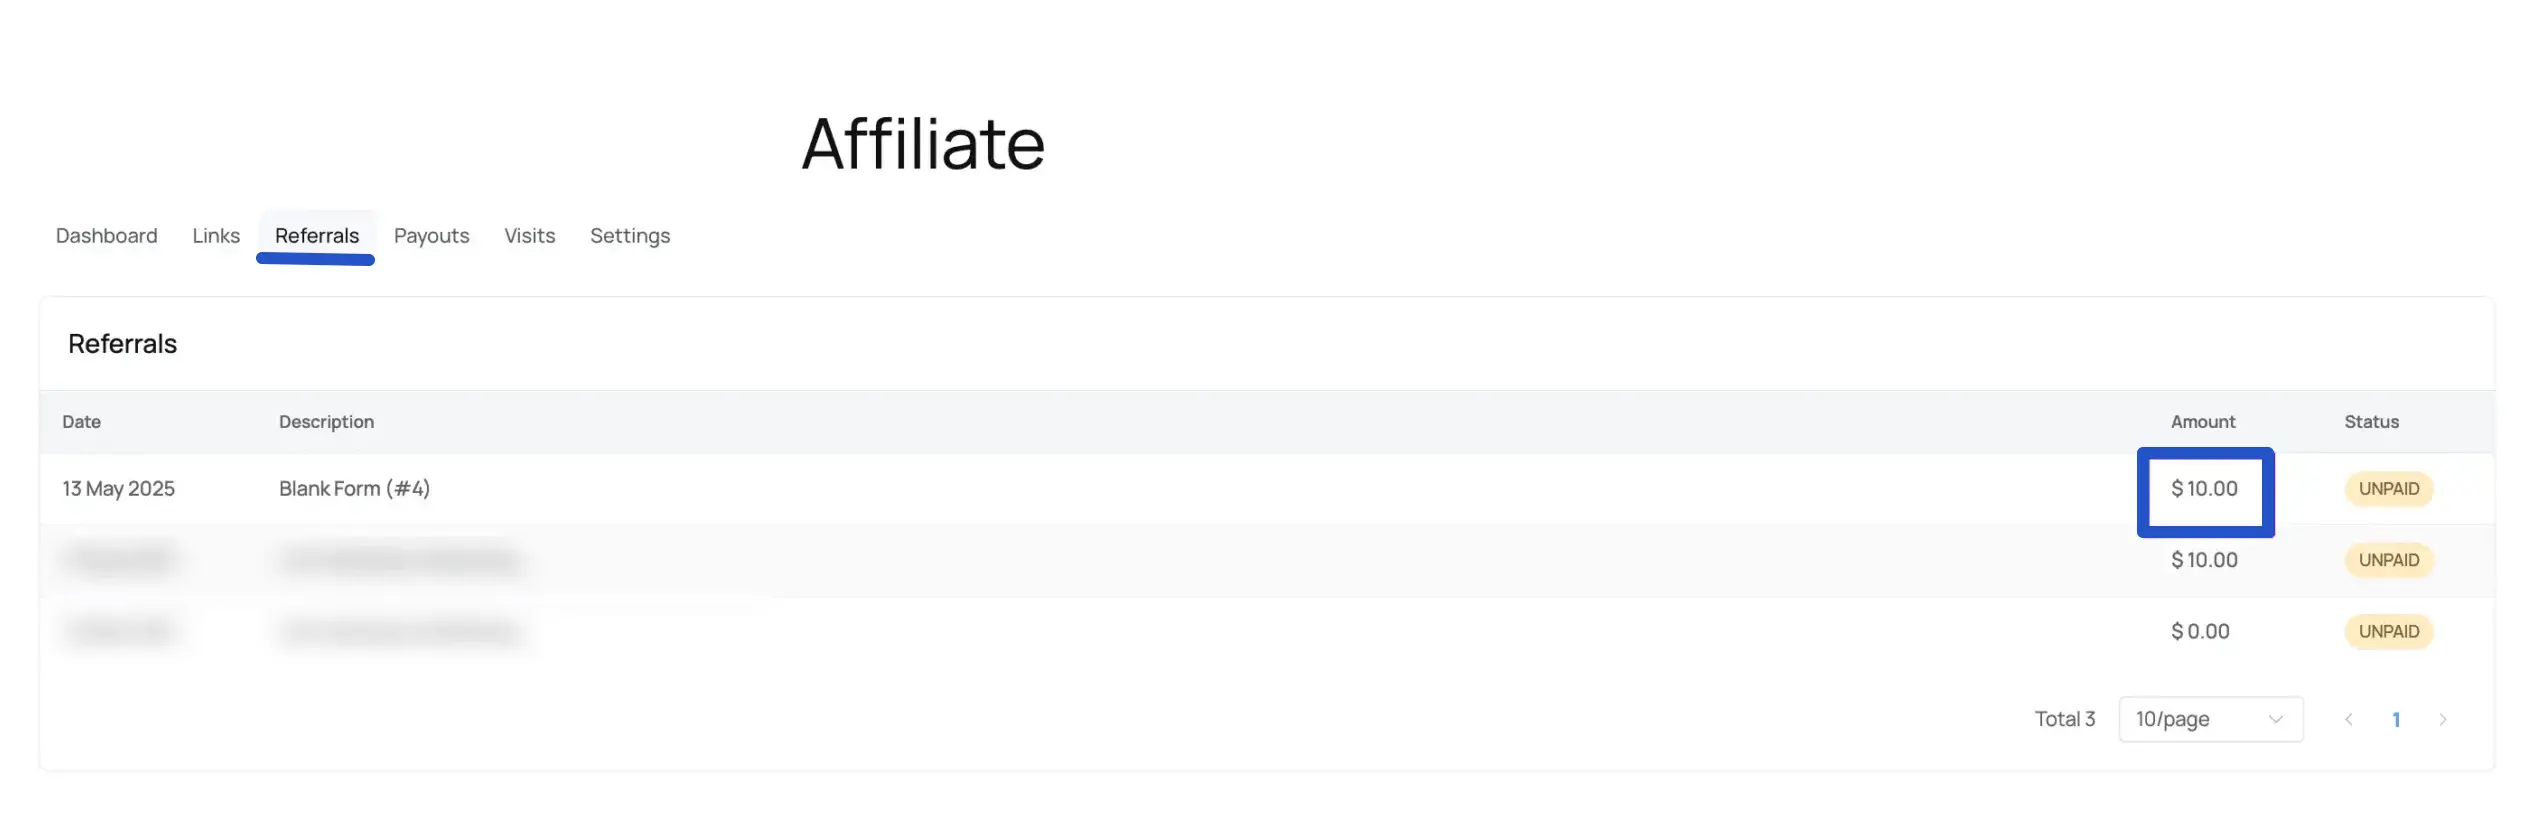
Creating a Custom Affiliate Registration Form
If you want to pay affiliates a commission when someone submits a specific form (such as a paid payment form), you need to set it up within that form's settings.
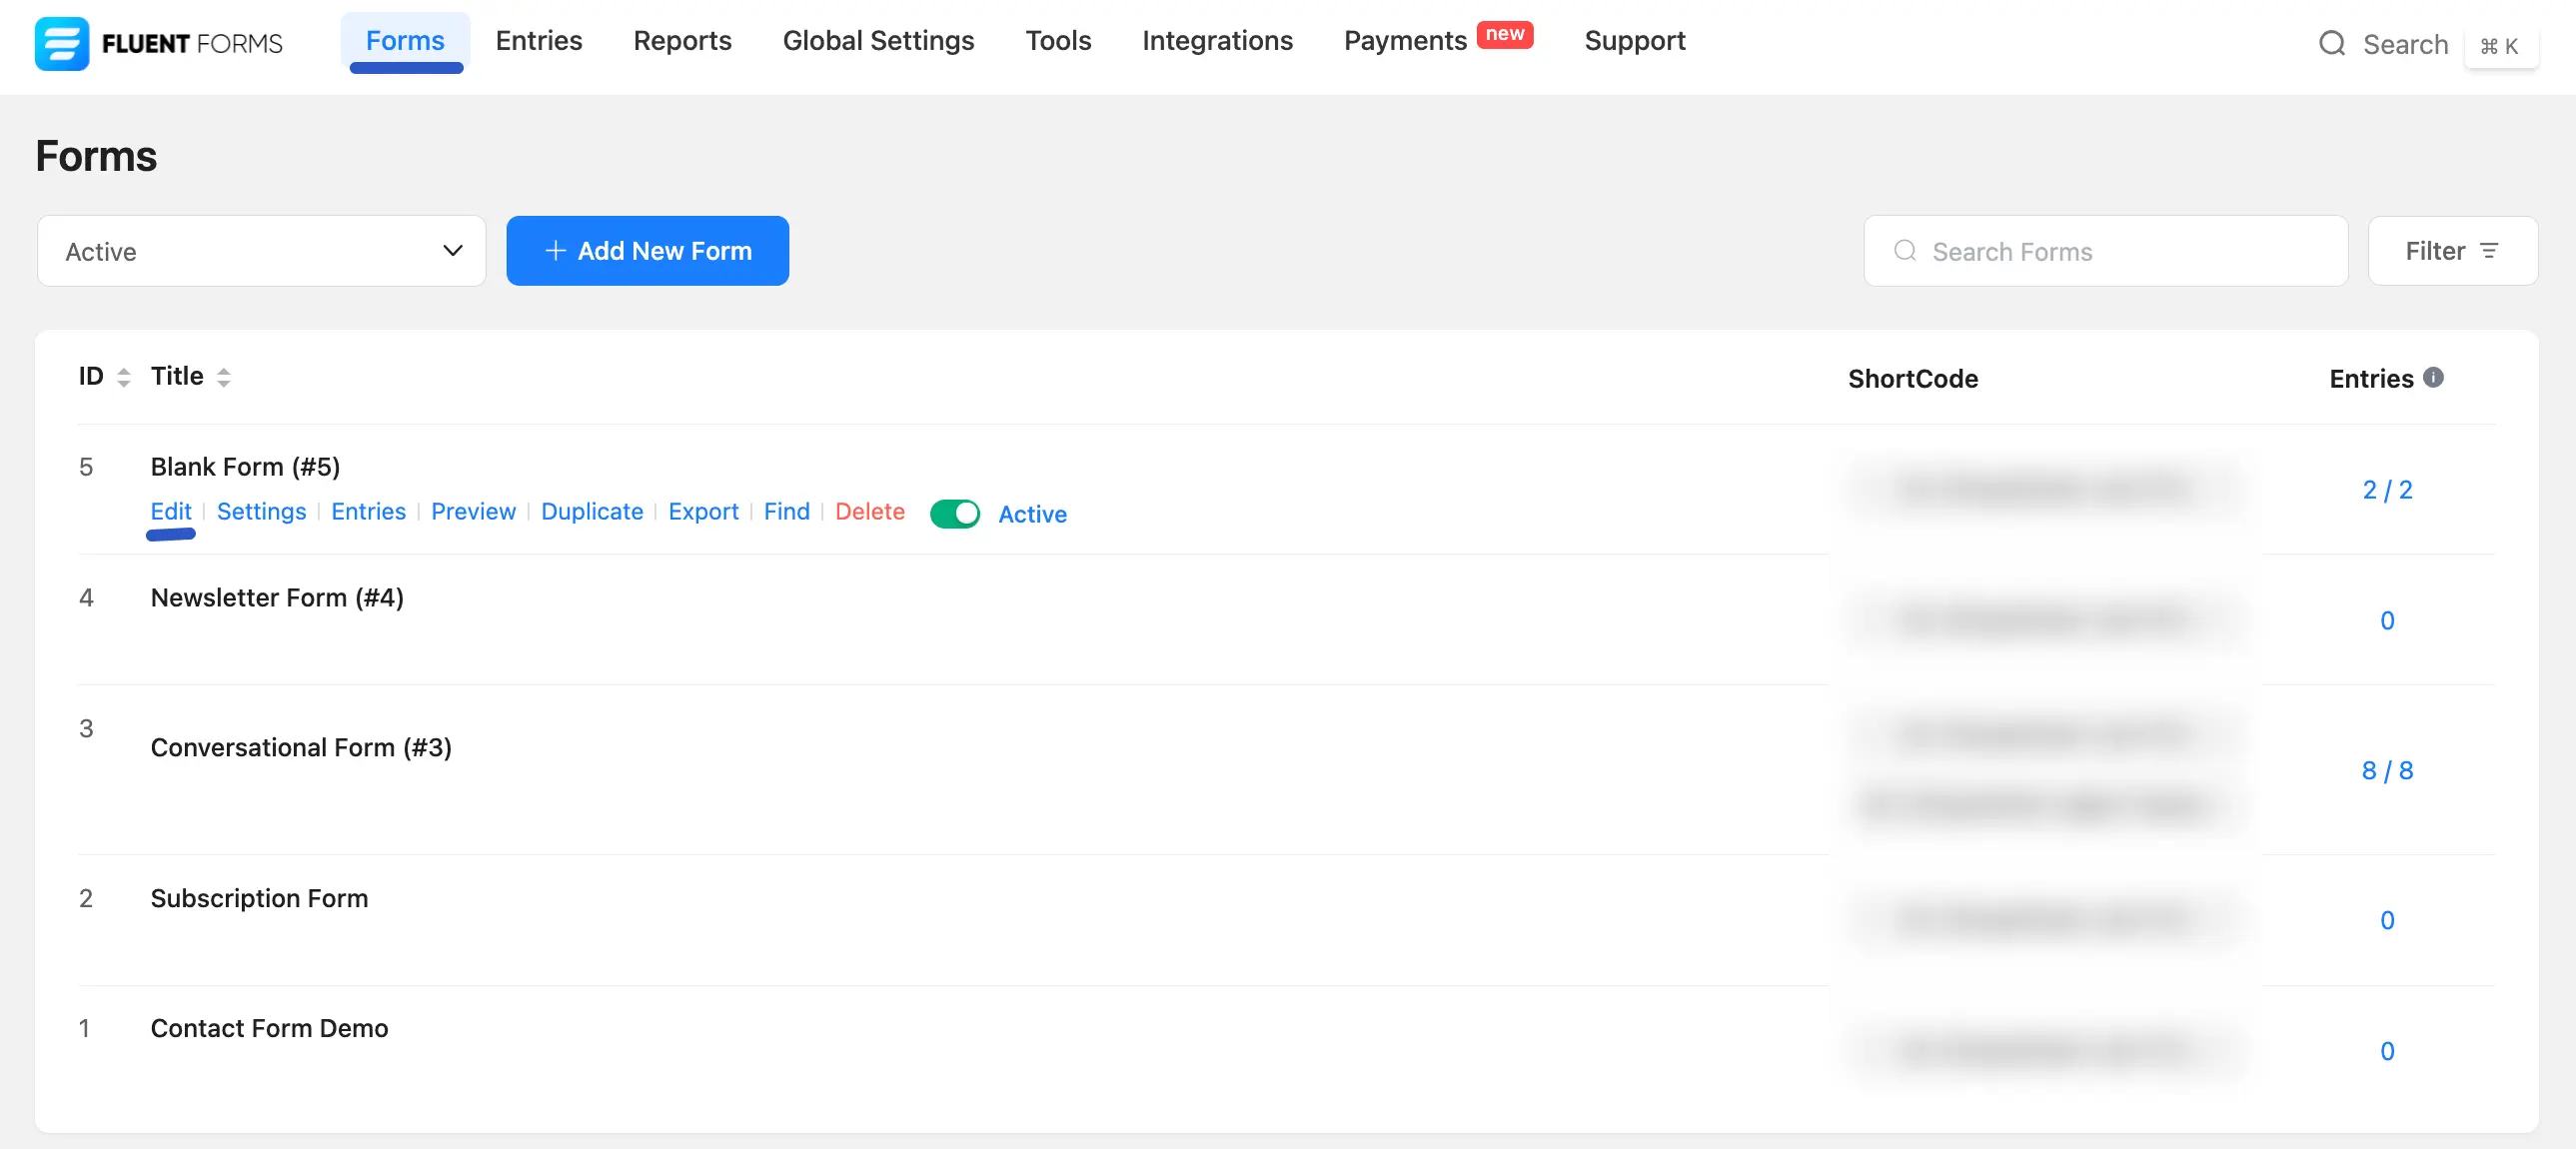
First, create your form using Fluent Forms if you haven't already. Go to the Edit screen for the form you want to connect.
Configure the Integration Feed
Next, you need to connect this specific form to FluentAffiliate's registration system.
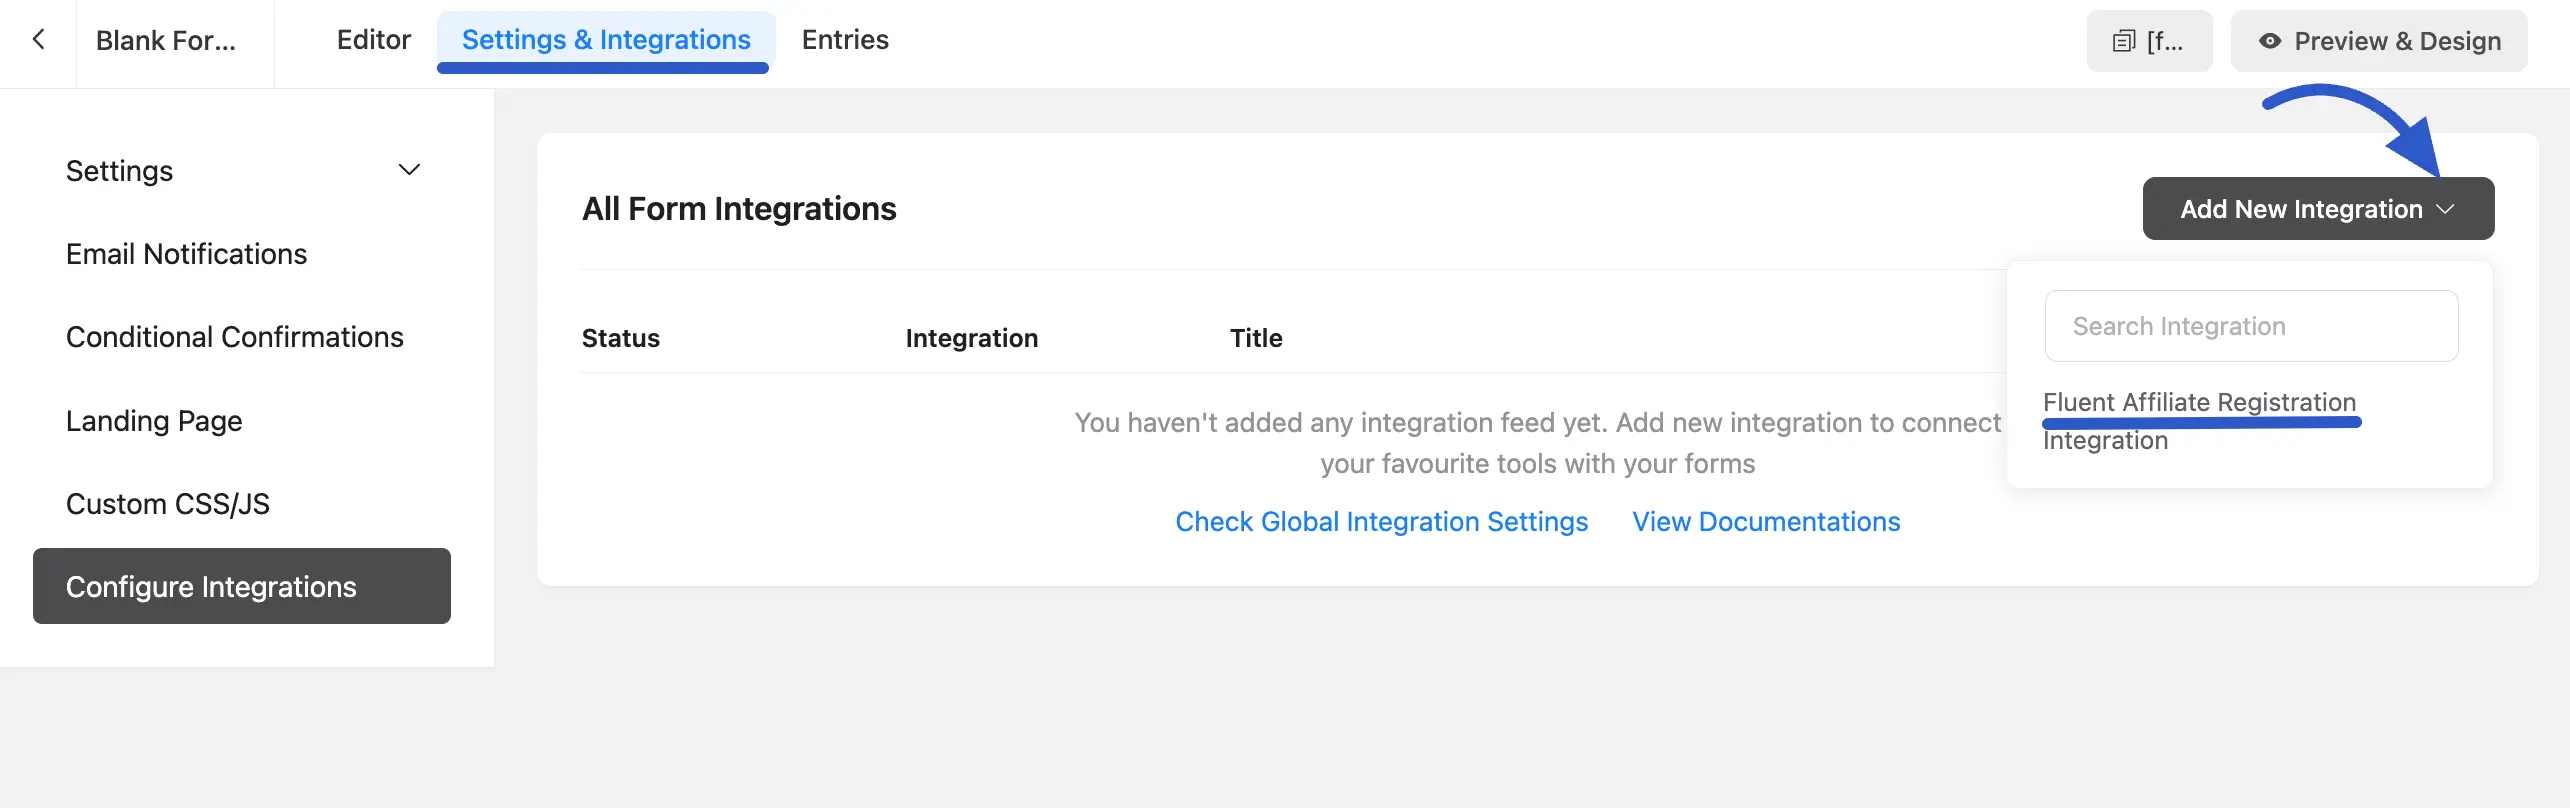
Go into the settings for your registration form and click on Settings & Integrations.
From the left menu, select Configure Integrations.
Click the Add New Integration button and choose Fluent Affiliate Registration Integration from the dropdown list.
Map Your Form Fields
Now, you need to tell FluentAffiliate which form field corresponds to which piece of affiliate data.
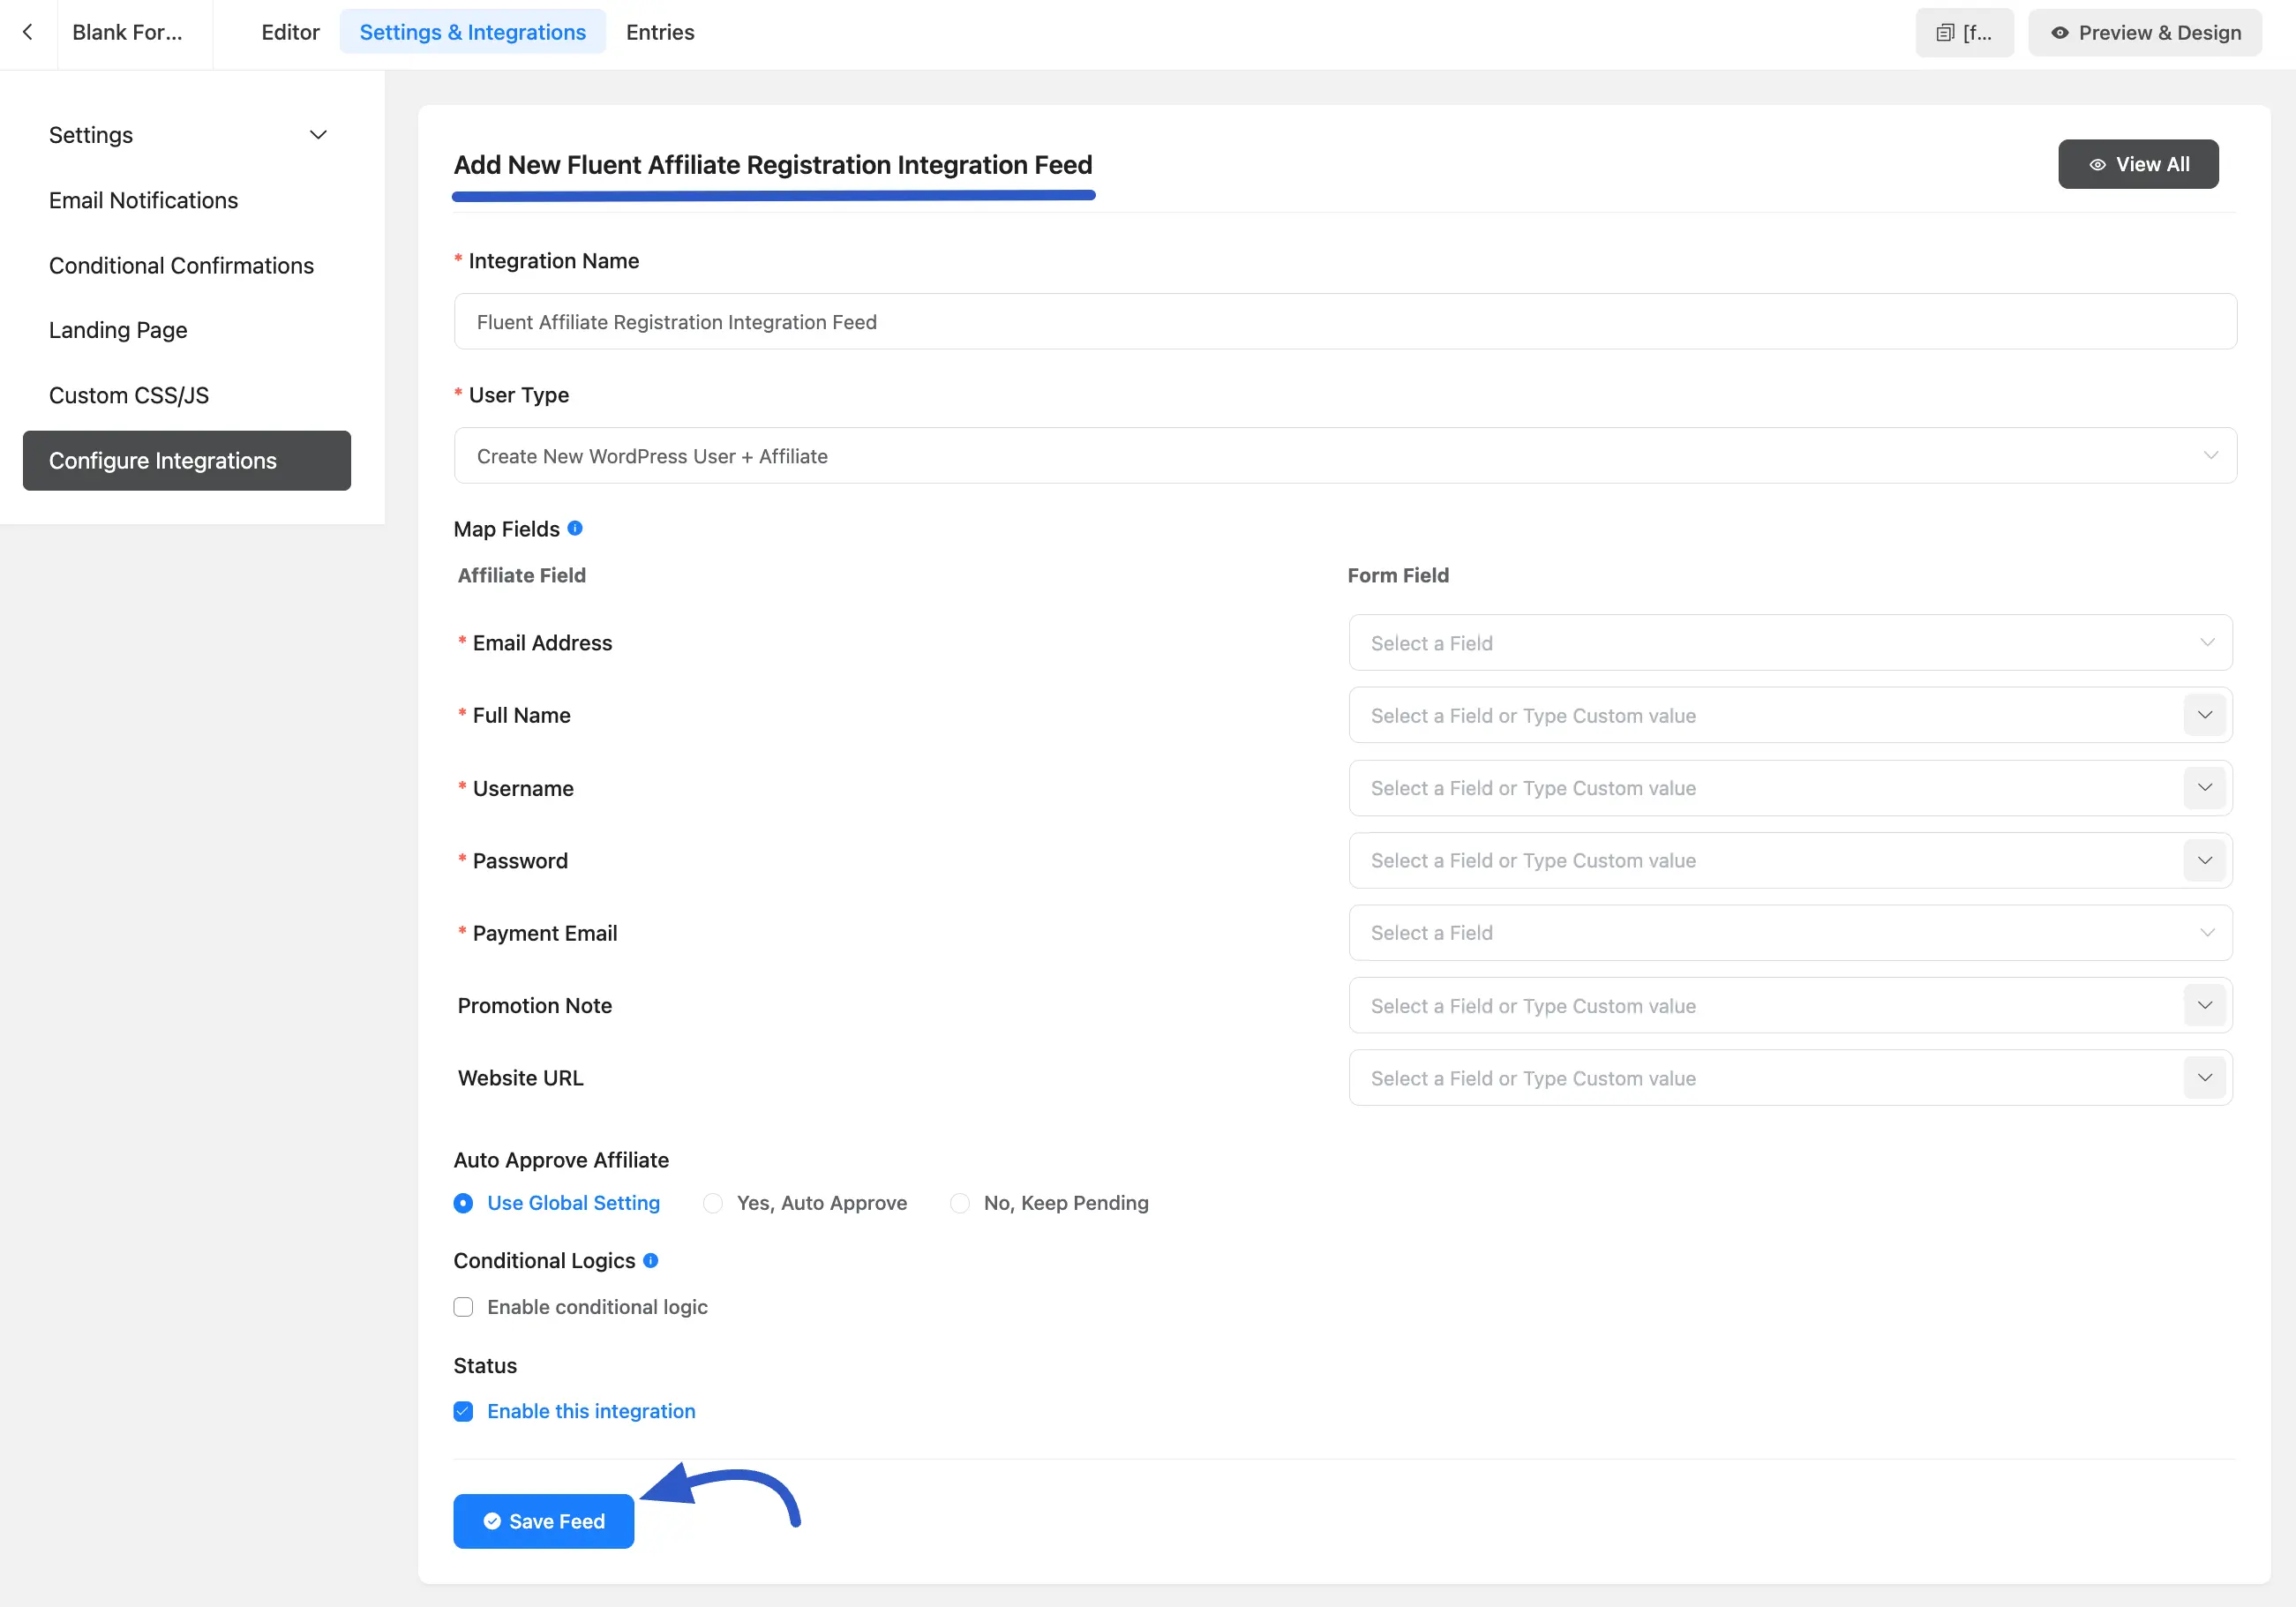
Integration Name: Give your feed a recognizable name.
User Type: Decide what kind of account is created when the form is submitted. You can choose from two options in the dropdown menu:
- Create New WordPress User + Affiliate: Select this option to allow new visitors to register as affiliates. When they submit the form, it will easily create a WordPress user account and an affiliate account for them.
Map Fields (for Creating a New User + Affiliate)
This section connects the fields from your Fluent Form to the new user and affiliate profiles that will be created upon submission.
- Email Address: This is the primary email for the new WordPress user account. Map this to the main email field on your form.
- Full Name: This will be the user's display name on your site. Connect this to the name field from your form.
- Username: This is the username the person will use to log in. Map this to the field where you ask the user to provide a username.
- Password: This sets the password for the new user's account. You must map this to a "Password" field on your form.
- Payment Email: This is the email address where the affiliate will receive payment notifications, such as those from PayPal. It can be the same as their main email address or a different one.
- Promotion Note: If your form has a field where you ask how the person plans to promote your products, you can map that text area here.
- Website URL: If you ask for the affiliate's website or blog URL, connect that field here.
- Create Affiliate for Existing User (must be logged in): Choose this option for existing members of your site who want to become affiliates. The user must be logged into their WordPress account to use the form. Upon submission, an affiliate profile will be created and linked to their existing user account.
Map Fields (for Creating an Affiliate for an existing user who must be logged in)
After selecting the user type, you need to tell FluentAffiliate which fields on your form correspond to the affiliate's information. Since you are adding affiliate access to an existing user, their name is already in the system. You just need to map the new information.
- Payment Email: This is the most important field, as it's the email address where the affiliate will receive their payout notifications and payments (e.g., via PayPal). Click the dropdown on the right and select the "Email" field from your form.
- Promotion Note: If you have a field in your form where you ask potential affiliates how they plan to promote your products, you can connect it here. This is optional.
- Website URL: If you've asked for the affiliate's website or blog address, you can map that form field here. This is also optional.
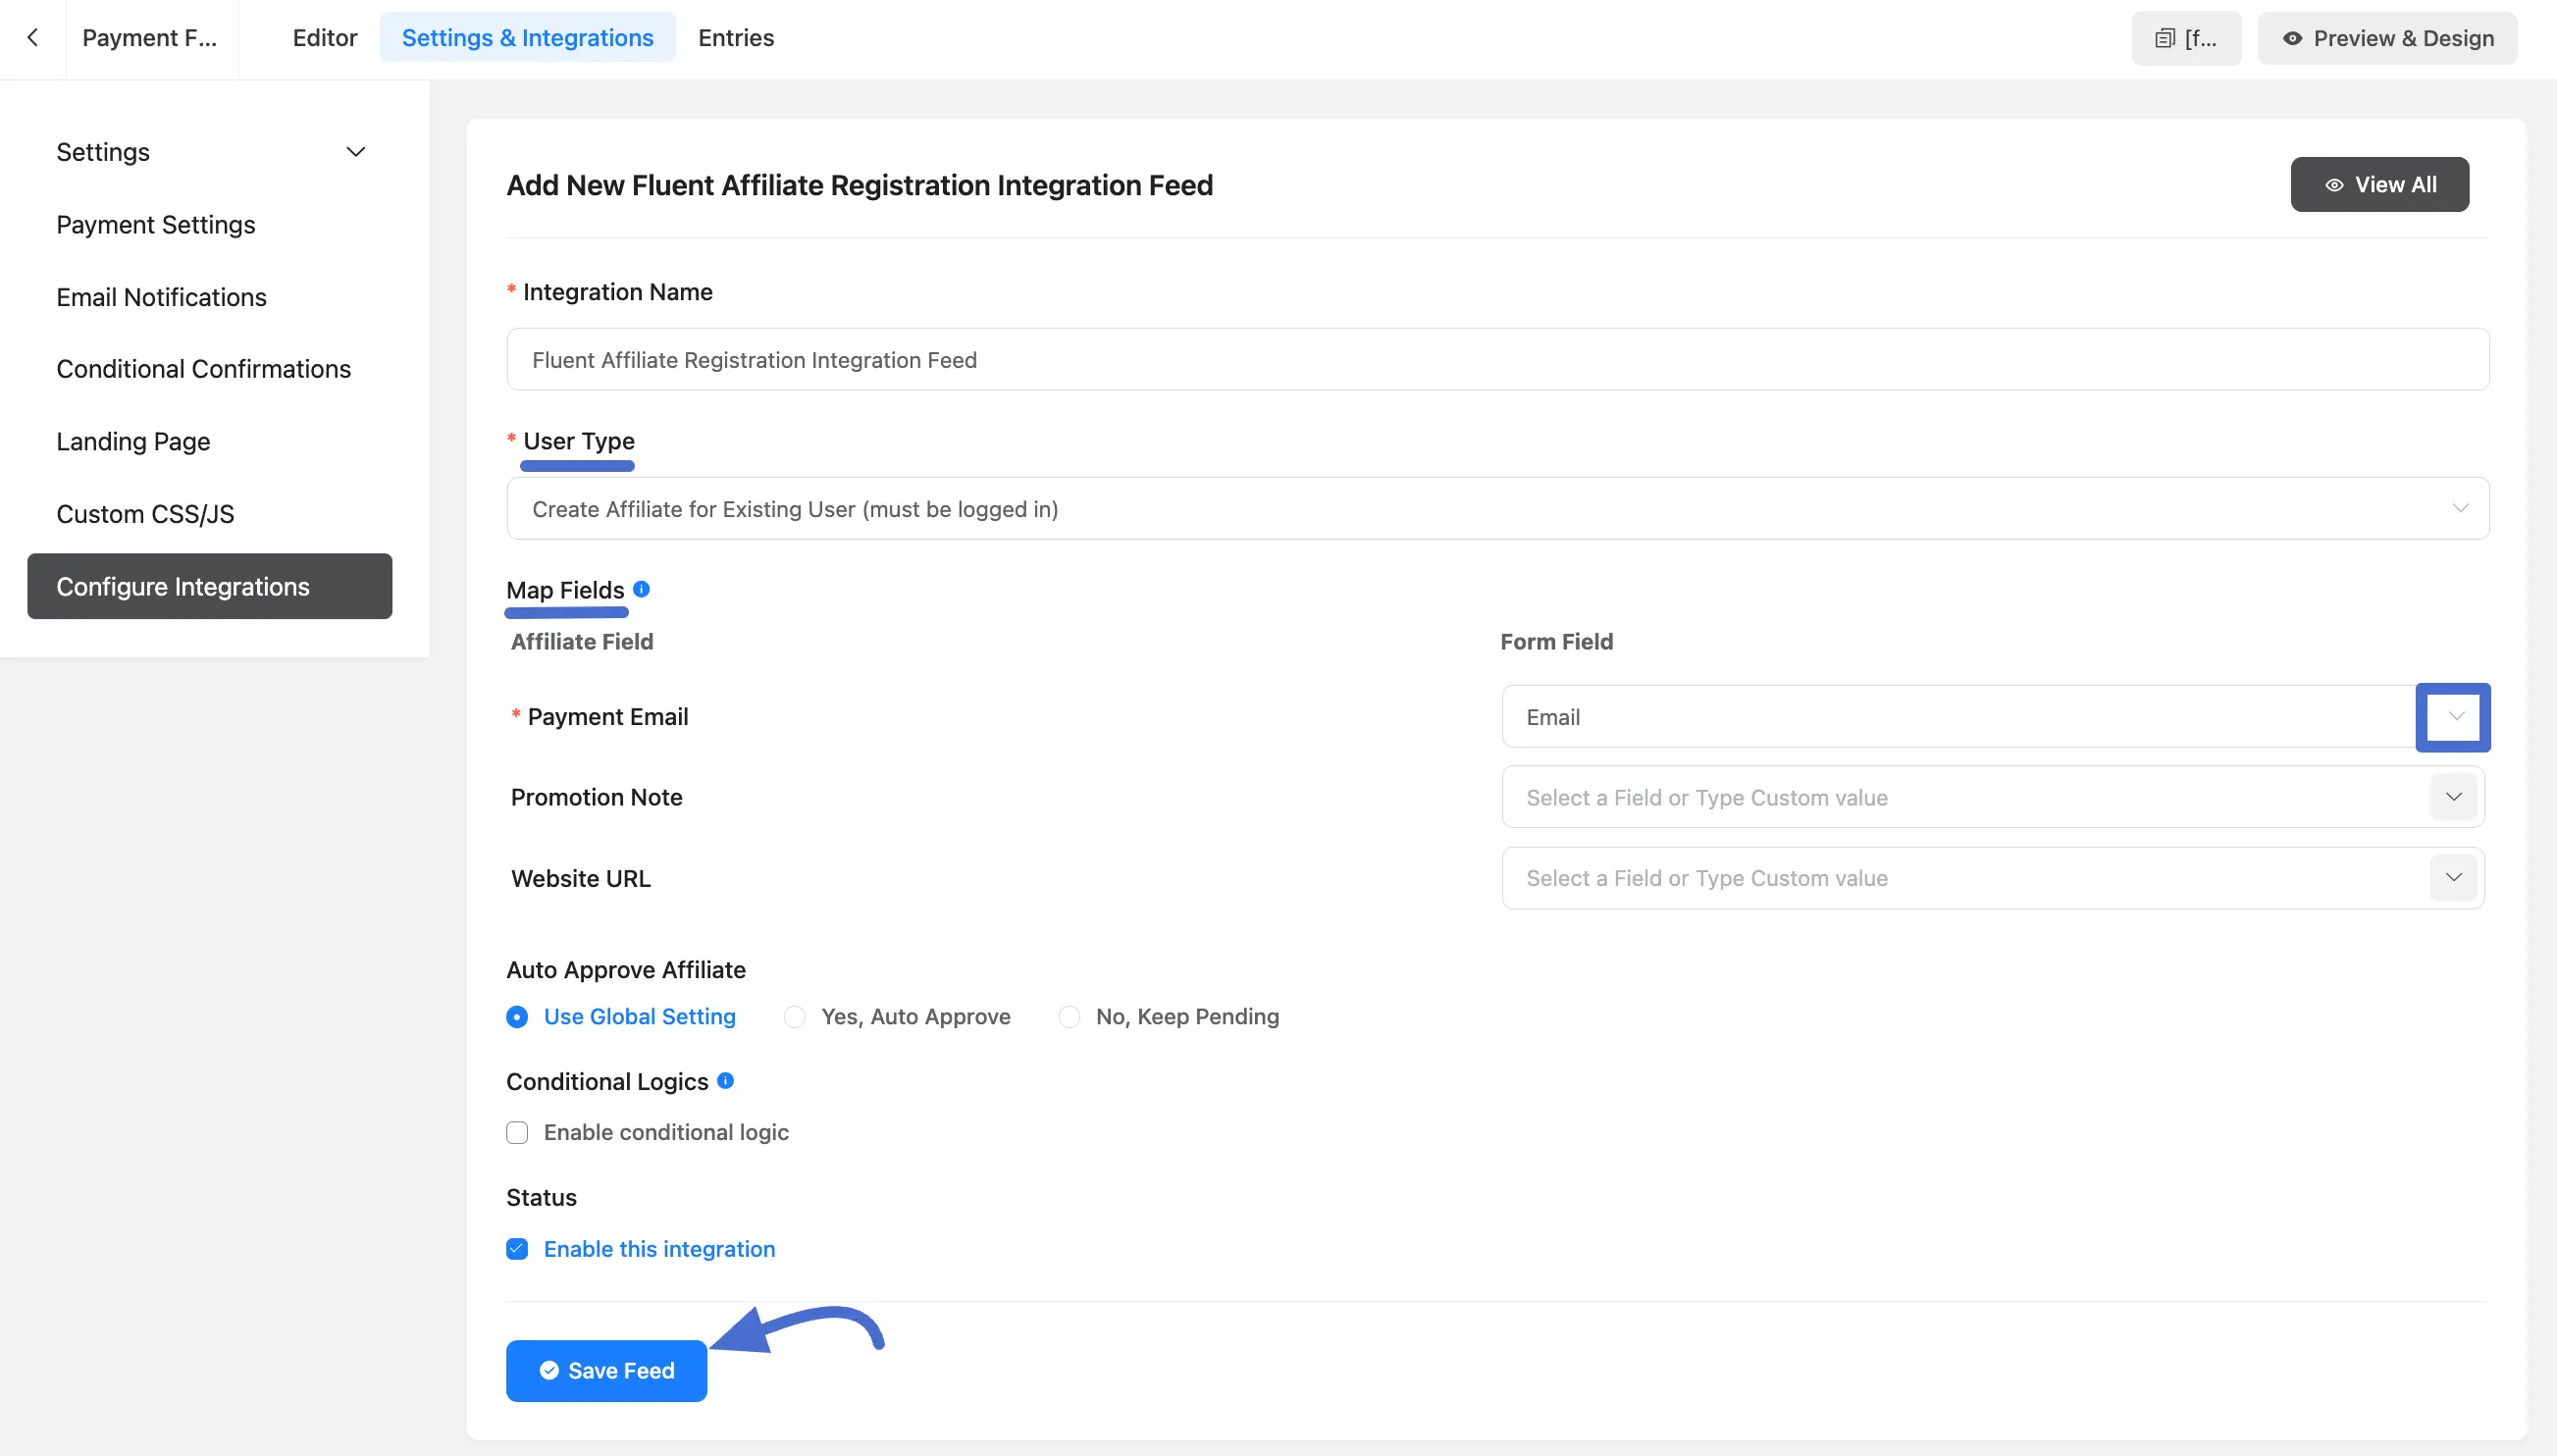
Auto Approve Affiliate: Choose whether to use the global setting, automatically approve the affiliate, or keep their application pending for you to review manually.
Conditional Logic: You can enable this to process the registration feed only when certain conditions are met. For example, you could set a condition to only register a user as an affiliate if they select a "Yes, I agree to the terms" checkbox on your form.
Status: Ensure the Enable this Integration checkbox is checked to make the feed active. You can uncheck this at any time to temporarily disable new affiliate registrations through this form without deleting your settings.
Click Save Feed when you are done.
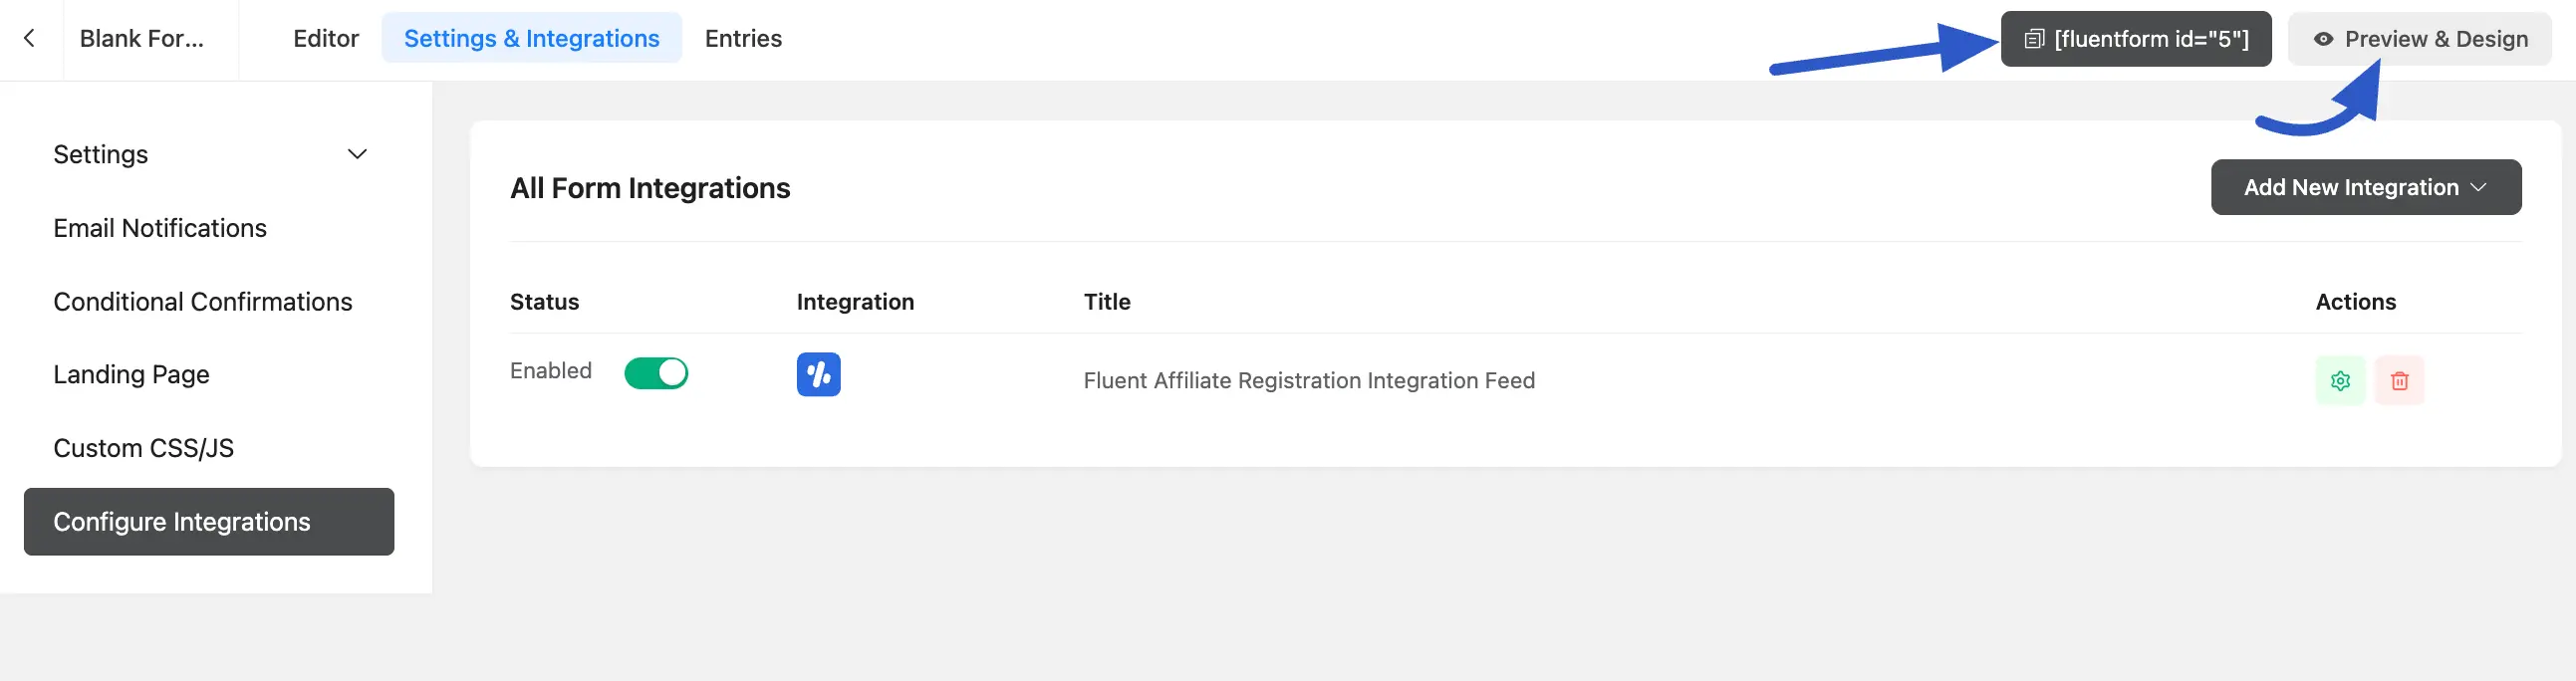
After saving, a success message will appear confirming that the feed has been created.
Now, you can easily edit, delete, or disable this feed at any time from the form's integration settings.
Embed your Form
Once you complete the customizations, click the Preview & Design button in the middle of the screen. This will allow you to see a live preview of how your form will look on the front end.
To display the form on a specific page or post, simply copy the Shortcode from the top right corner of the screen. Then, paste this shortcode into the content area of your desired Page or Post.
This will embed the form on your website, making it visible and ready for users to interact with.
Troubleshooting Common Issues
Here are solutions to common issues you might encounter:
- Registration Form Not Working: Double-check that you have correctly mapped all the required fields (like Email and Password) in the form's integration feed. An unmapped required field will cause the registration to fail.
And that's it. This is an easy process to integrate Fluent Forms with FluentAffiliate.