Appearance
LifterLMS Integration with FluentAffiliate
Want to grow your online course sales through affiliate marketing? With FluentAffiliate, you can now easily integrate with LifterLMS and start tracking affiliate referrals for your courses. This guide will show you how to set it up in just a few clicks!
NOTE
Lifterlms integration is a pro feature of FluentAffiliate. To use it, you need FluentAffiliate Pro.
Make sure both the LifterLMS and FluentAffiliate plugins are installed and activated on your site before you begin.
Enable the LifterLMS Integration
First, you need to activate the LifterLMS module within FluentAffiliate to allow them to communicate.
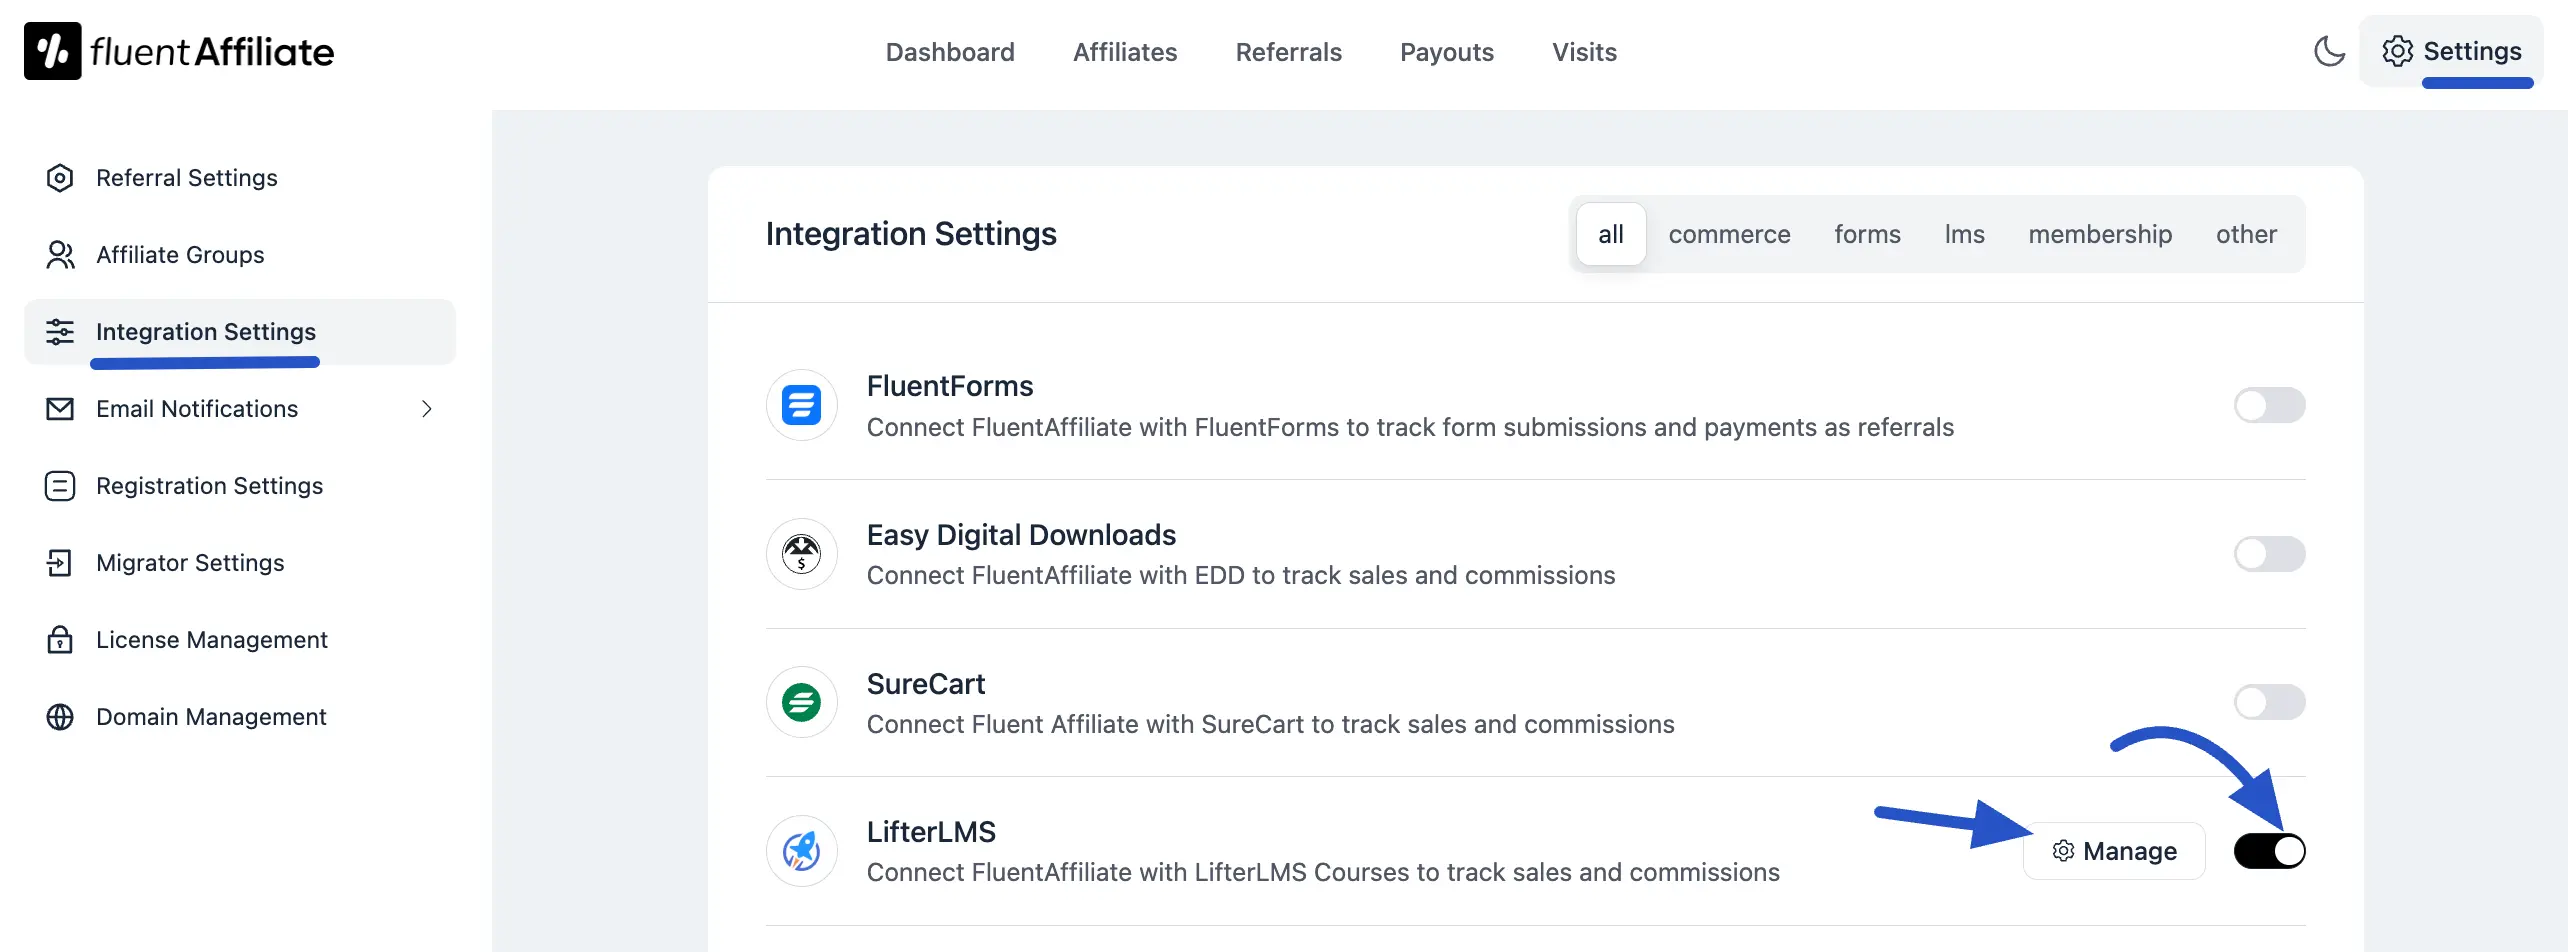
- Go to your WordPress Dashboard, navigate to FluentAffiliate Dashboards, and click on the Settings tab top right corner.
- Then, click on Integration Settings from the left sidebar.
- Find LifterLMS in the list and click the toggle button to switch it on. A Manage link will appear.
Configure LifterLMS Settings
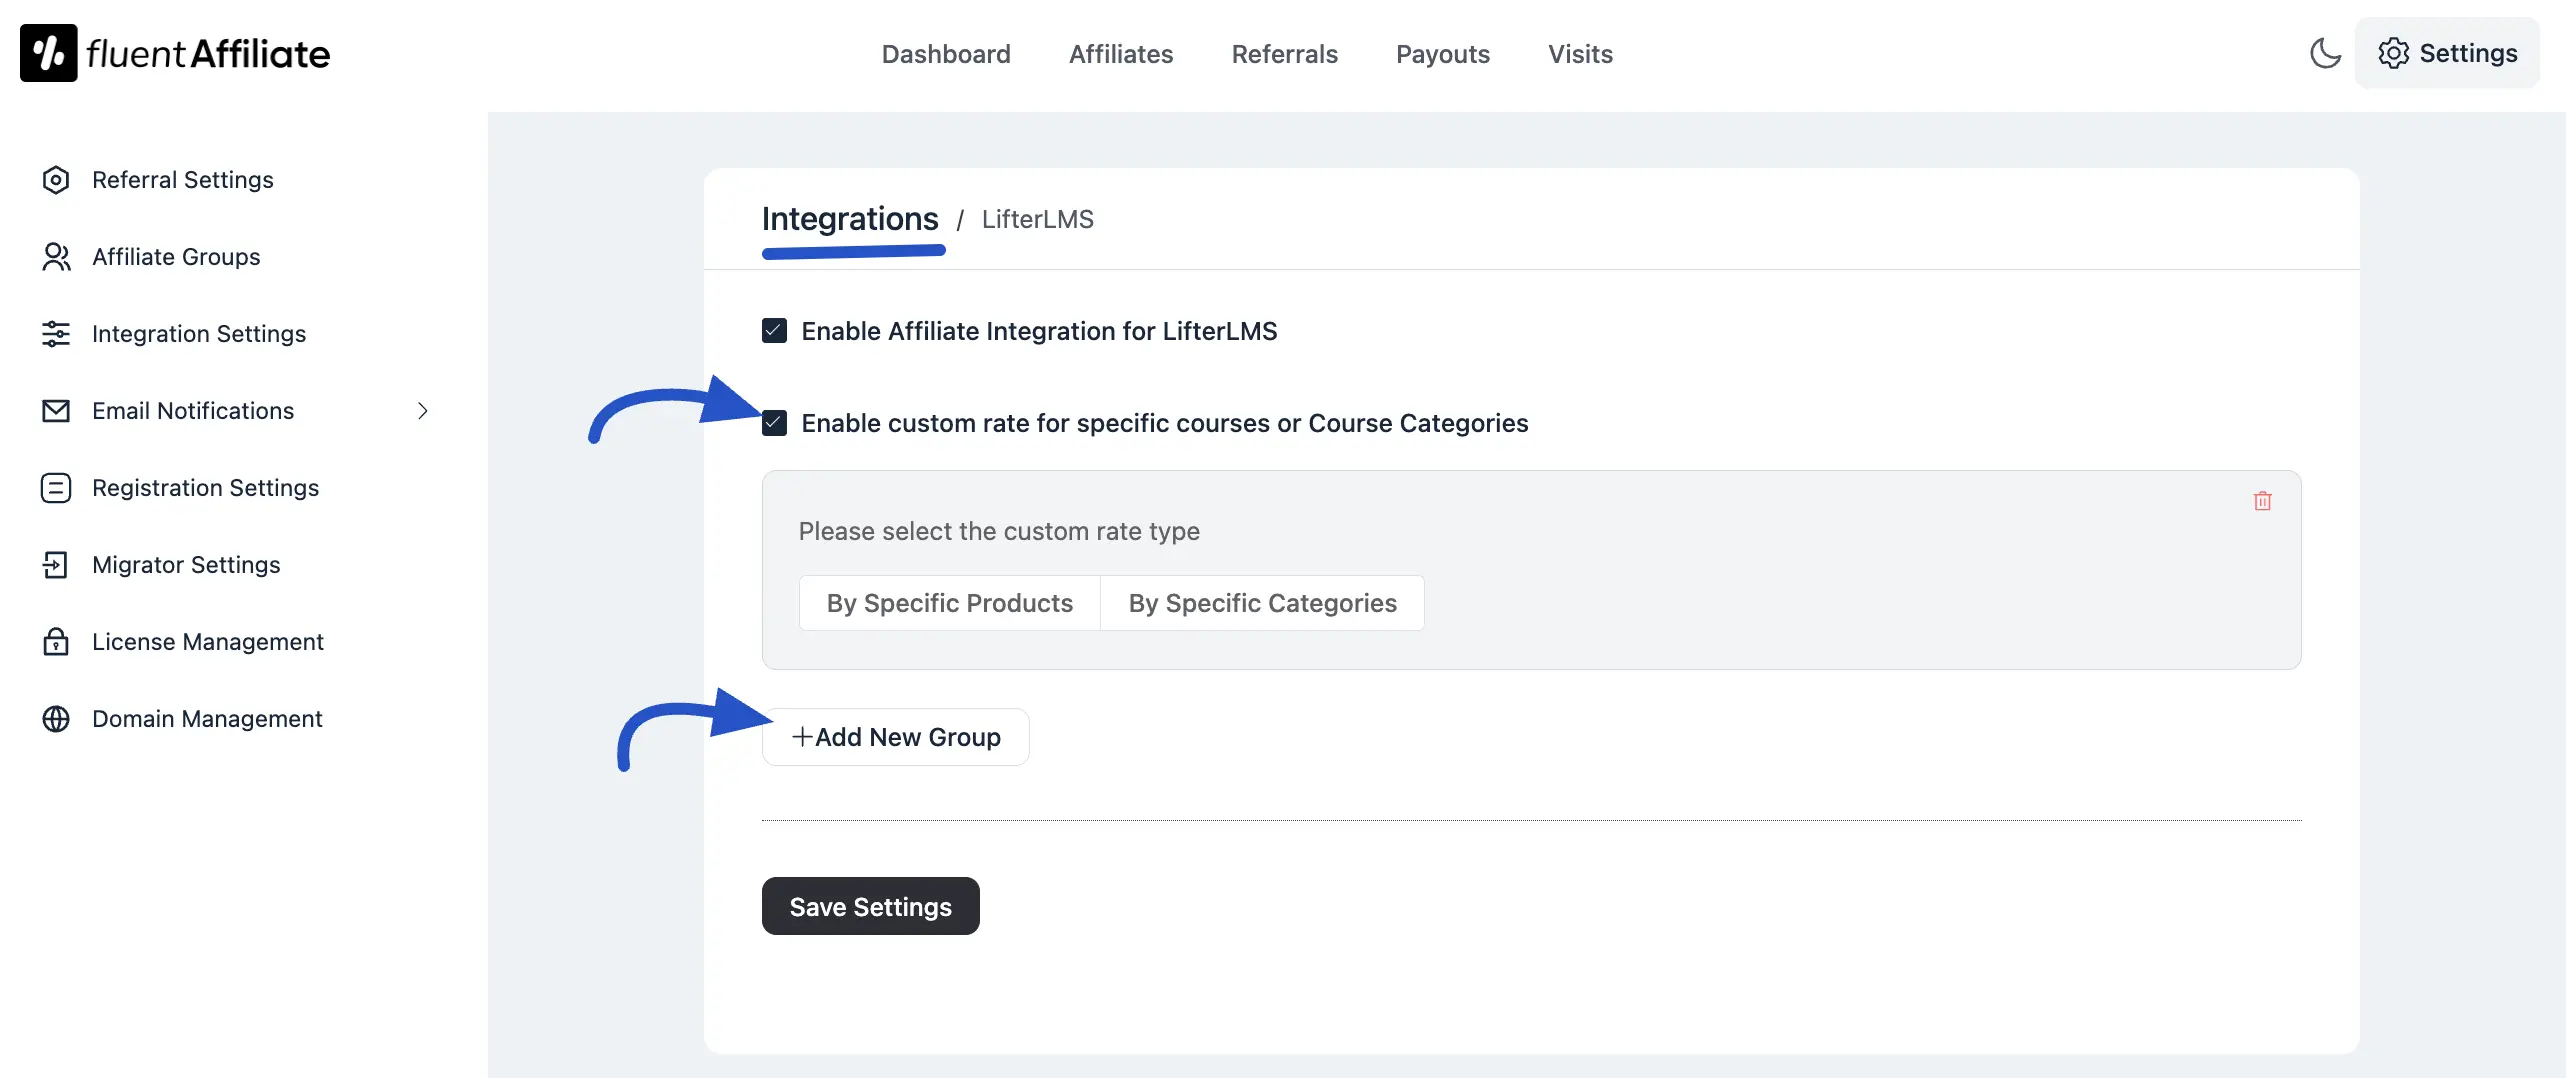
Click the Manage link to open the settings panel. Here, you can set custom commission rates for your LifterLMS courses, which will override your global affiliate settings.
- Enable Affiliate Integration for LifterLMS: You must check this box to activate commission tracking for all your LifterLMS courses.
- Enable custom rate for specific courses or Course Categories: Check this box if you want to offer different commission rates for different courses. This is perfect for running special promotions or offering a higher incentive for your signature courses.
Custom Affiliate Rate Configuration
Once you enable custom rates, you can define your specific commission rules.
First, you must choose if the custom rate will apply By Specific Products (which refers to your individual LifterLMS courses) or By Specific Categories.
Next, configure the rate itself:
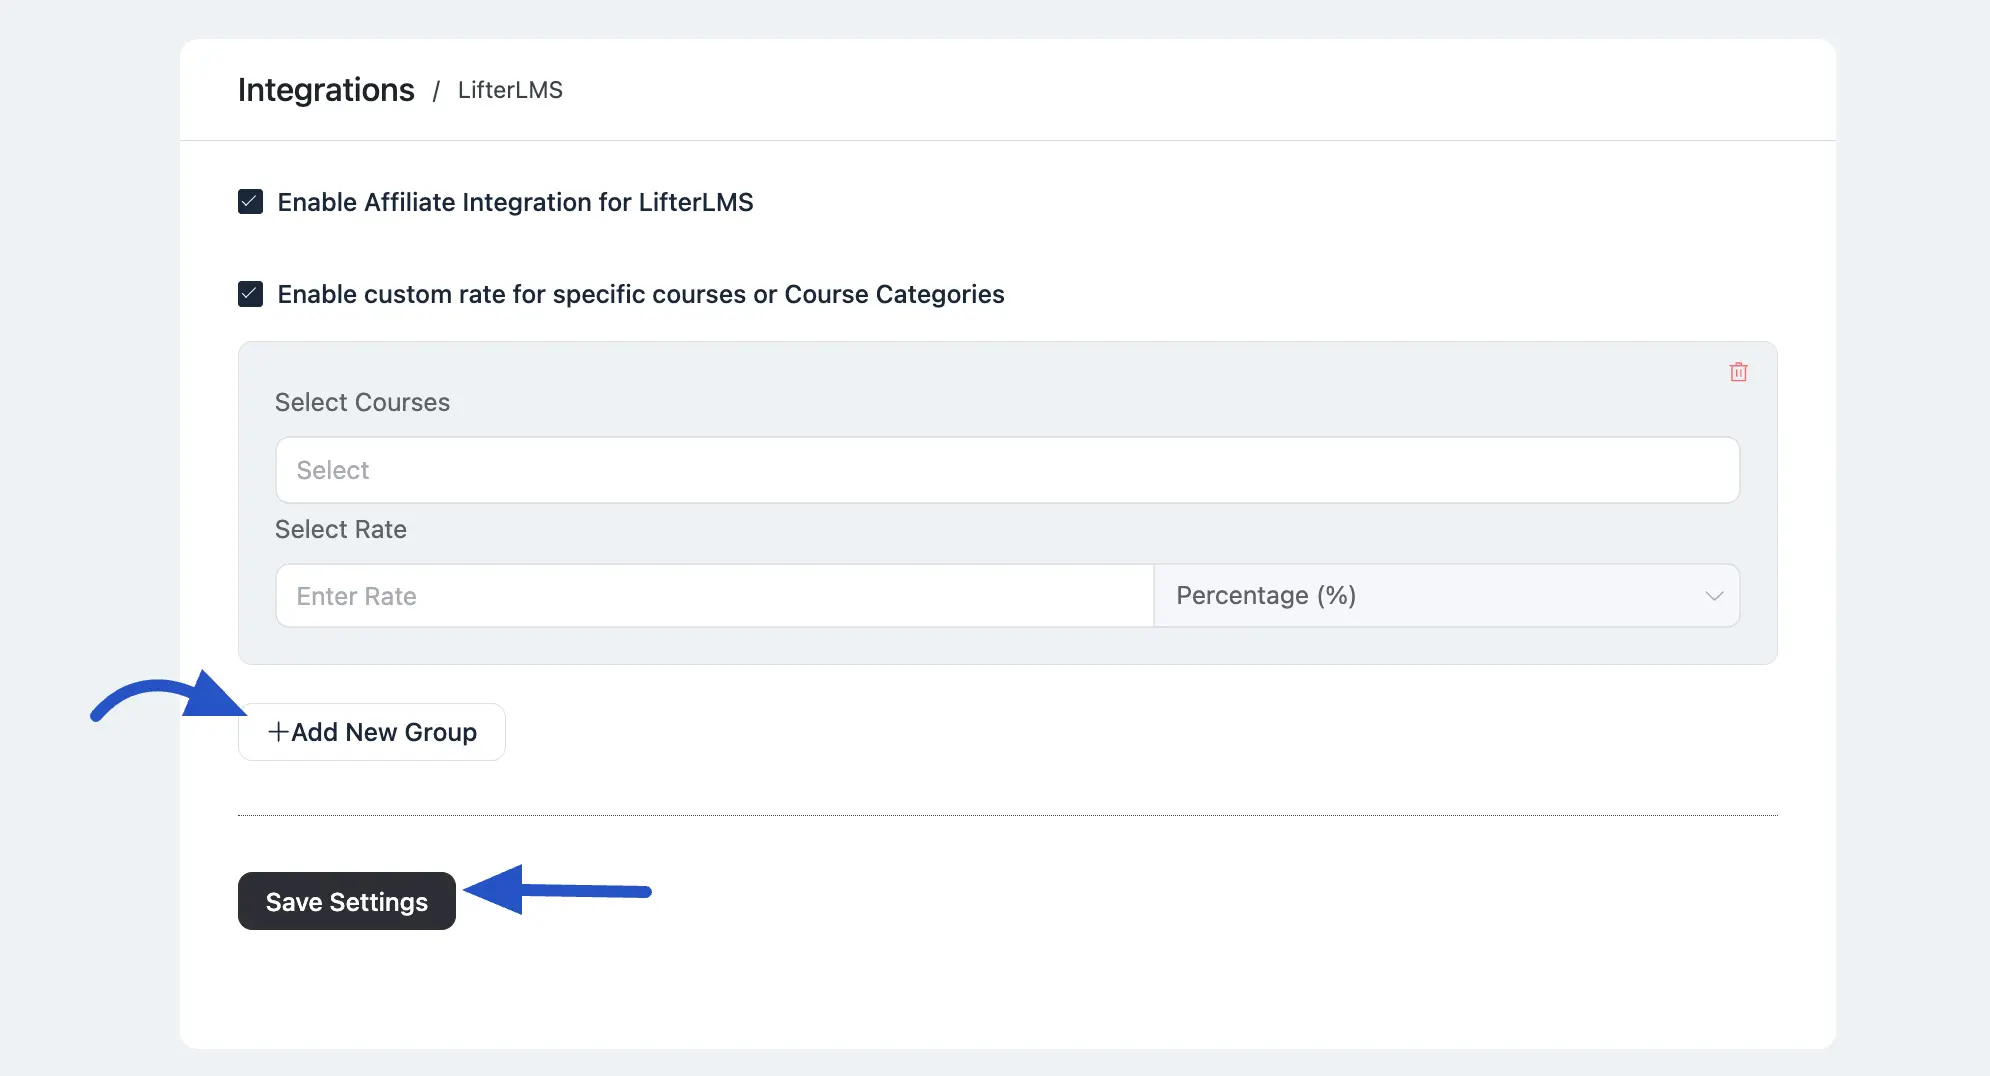
Select Courses: In the Select field, start typing the name of the course you want to set a custom rate for and choose it from the list.
Select Rate: Enter the commission value (e.g., 25 for 25% or $25) and use the dropdown menu to choose if the rate is a Percentage (%) or a Fixed amount.
Add More Rates: If you want to set another custom rate for a different course, click the +Add New Group button. This adds a new row for you to create another rule. You can also remove a rule by clicking the red Delete icon.
Save Settings: After configuring your custom rates, click the Save Settings button to make them live.
Generate an Affiliate Link
Now that the integration is set up, your affiliates can start promoting your Courses. To do this, they need to generate your affiliate link from their affiliate dashboard.
When a student clicks the link and enrolls in the course, the affiliate earns a commission based on the rates you've set!
Troubleshooting Tips
Affiliate Sale Not Tracked: Verify that the integration toggle is enabled in FluentAffiliate's settings. If you're using custom rates, double-check that they are configured correctly for the specific course being purchased.
Affiliate Not Getting Credit: This can sometimes be a browser issue on the customer's end. Ensure they don't have cookies blocked and that they completed the checkout without clearing their session or switching browsers.