Appearance
Multi-Domain Management
The Multi-Domain Management feature is designed to track affiliate referrals that originate from different websites that you own.
The core principle is straightforward: An affiliate can link to any of your connected "Child Sites" (like a blog), but the final transaction must occur on your "Main Site" (your primary store) for a commission to be generated. The system seamlessly tracks the user's journey between these sites.
How This Works in Practice
Let's use two websites for a clear example:
siteX.com(Your Main Site): This is your primary online store where products are sold and payments are processed. The full FluentAffiliate plugin is installed here.siteY.com(Your Child Site): This is a content blog you own, used to review products or attract new visitors.
Here is the step-by-step customer journey:
- An affiliate shares their unique link, which points to a helpful article on your blog,
siteY.com. - A customer clicks this affiliate link and lands on
siteY.com. At this moment, the system identifies the visitor and links them to that specific affiliate. - The customer reads the article and clicks a link that takes them to the product page on your main store,
siteX.com. - The customer successfully completes their purchase on
siteX.com.
Because the final sale happened on the Main Site (siteX.com), FluentAffiliate correctly attributes the commission to the affiliate who sent the initial click to the Child Site (siteY.com).
How It Works
This system operates on a "hub and spoke" model to ensure all data is managed from one central place.
- The Main Site (The Hub): This is the website with the full FluentAffiliate plugin installed. It functions as the central command center, managing all affiliates, tracking sales data, and handling commission payouts. All purchases must be finalized here.
- Child Sites (The Spokes): These are your secondary websites. They do not need the full plugin. Instead, they use a simple, free helper plugin called the FluentConnect Addon.
The sole purpose of the FluentConnect Addon on a child site is to inform the main site whenever a visitor arrives through an affiliate link. This allows the main site to be aware of the referral and credit the correct affiliate if that visitor later makes a purchase on the main site.
Step 1: Enable Multi-Domain on Your Main Site
Your first step is to enable the multi-domain functionality within your main FluentAffiliate dashboard and prepare it to accept a new connection.
- To begin, navigate from your WordPress dashboard to FluentAffiliate → Settings → Domain Management.
- Find the Enable Multi Domain Affiliate option and click the toggle switch to activate the service. This tells your main site that it's ready to manage other domains.
- Next, click the + Connect a new site button to begin the process of linking a new child site.
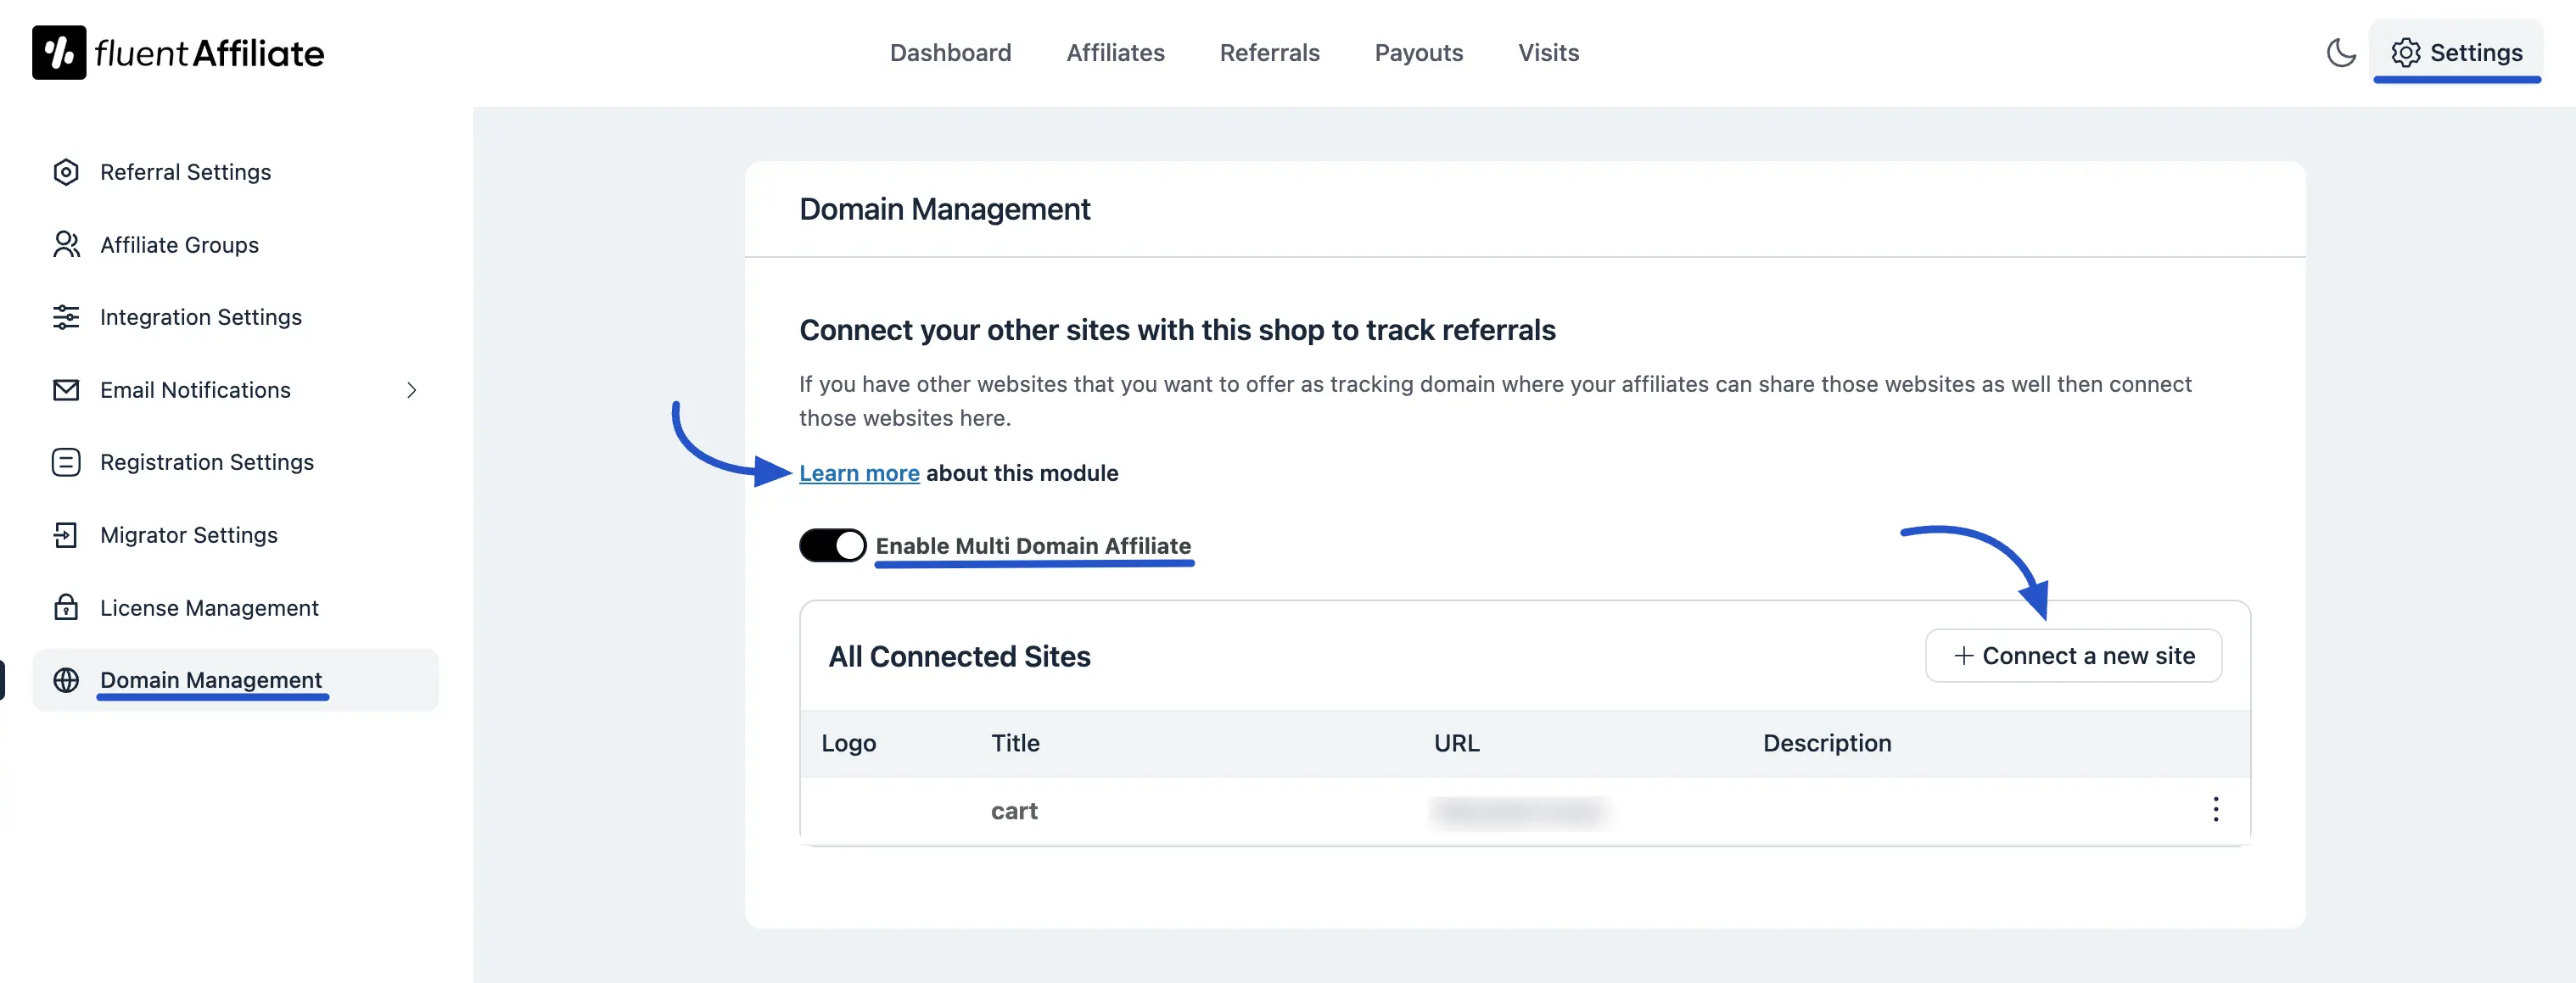
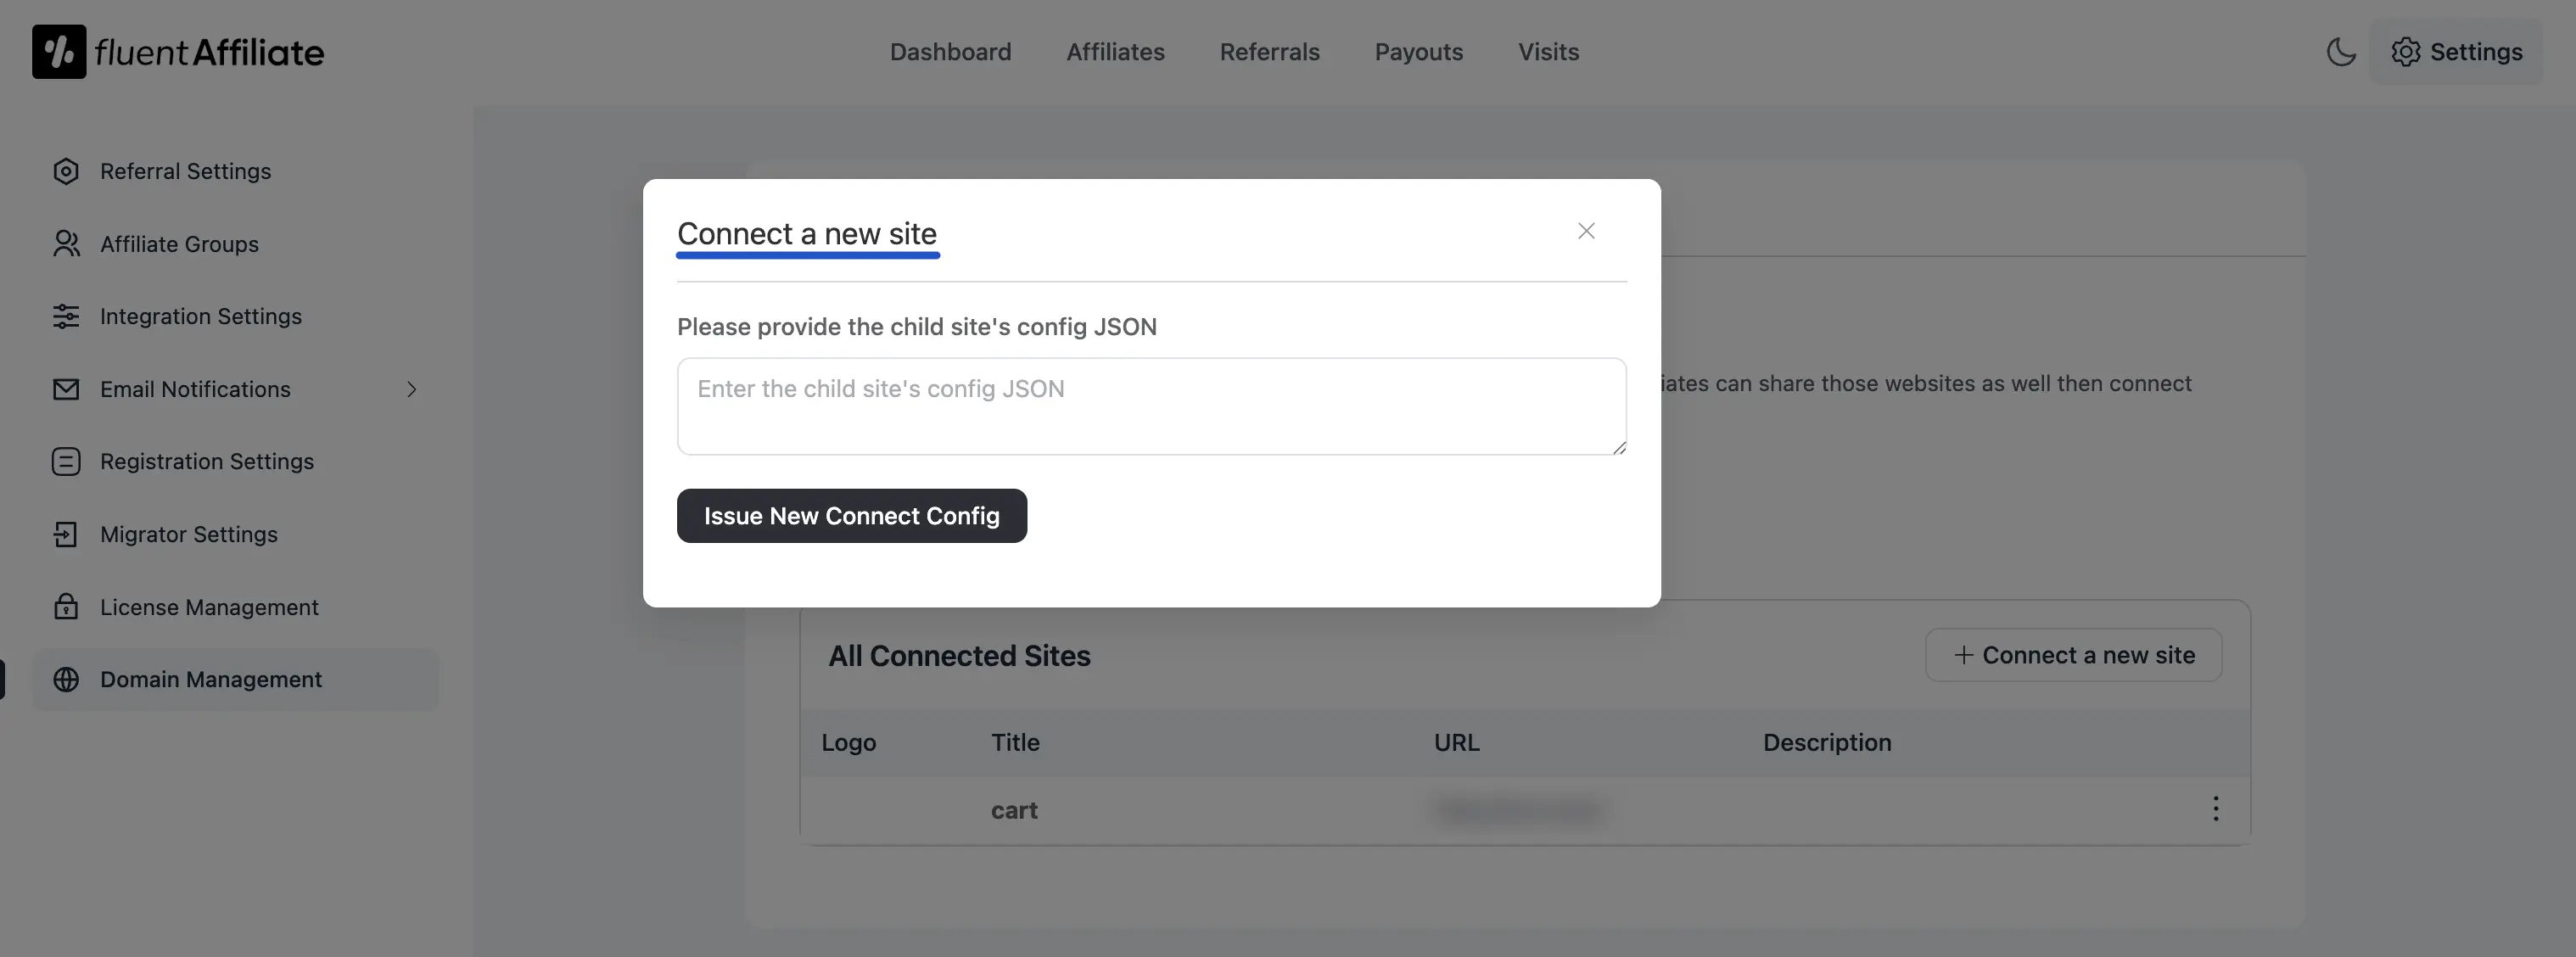
- A pop-up titled "Connect a new site" will appear. It will have a field asking for the child site's 'config JSON'. For now, simply keep this pop-up open on your main site. We need to go get this special code from your child site first.
Step 2: Install FluentConnect on Your Child Site
Now, open a new browser tab and log in to the WordPress dashboard of the child site you wish to connect. The goal here is to install the helper plugin and generate the unique connection code.
- On your child site's dashboard, you need to install the FluentConnect Addon. This lightweight plugin is designed specifically to create a secure bridge between your child site and your main FluentAffiliate dashboard. You can download this addon by clicking the "Learn more about this module" link on the main site's Domain Management page. Then, go to Plugins > Add New, upload the addon's .zip file, and activate it.

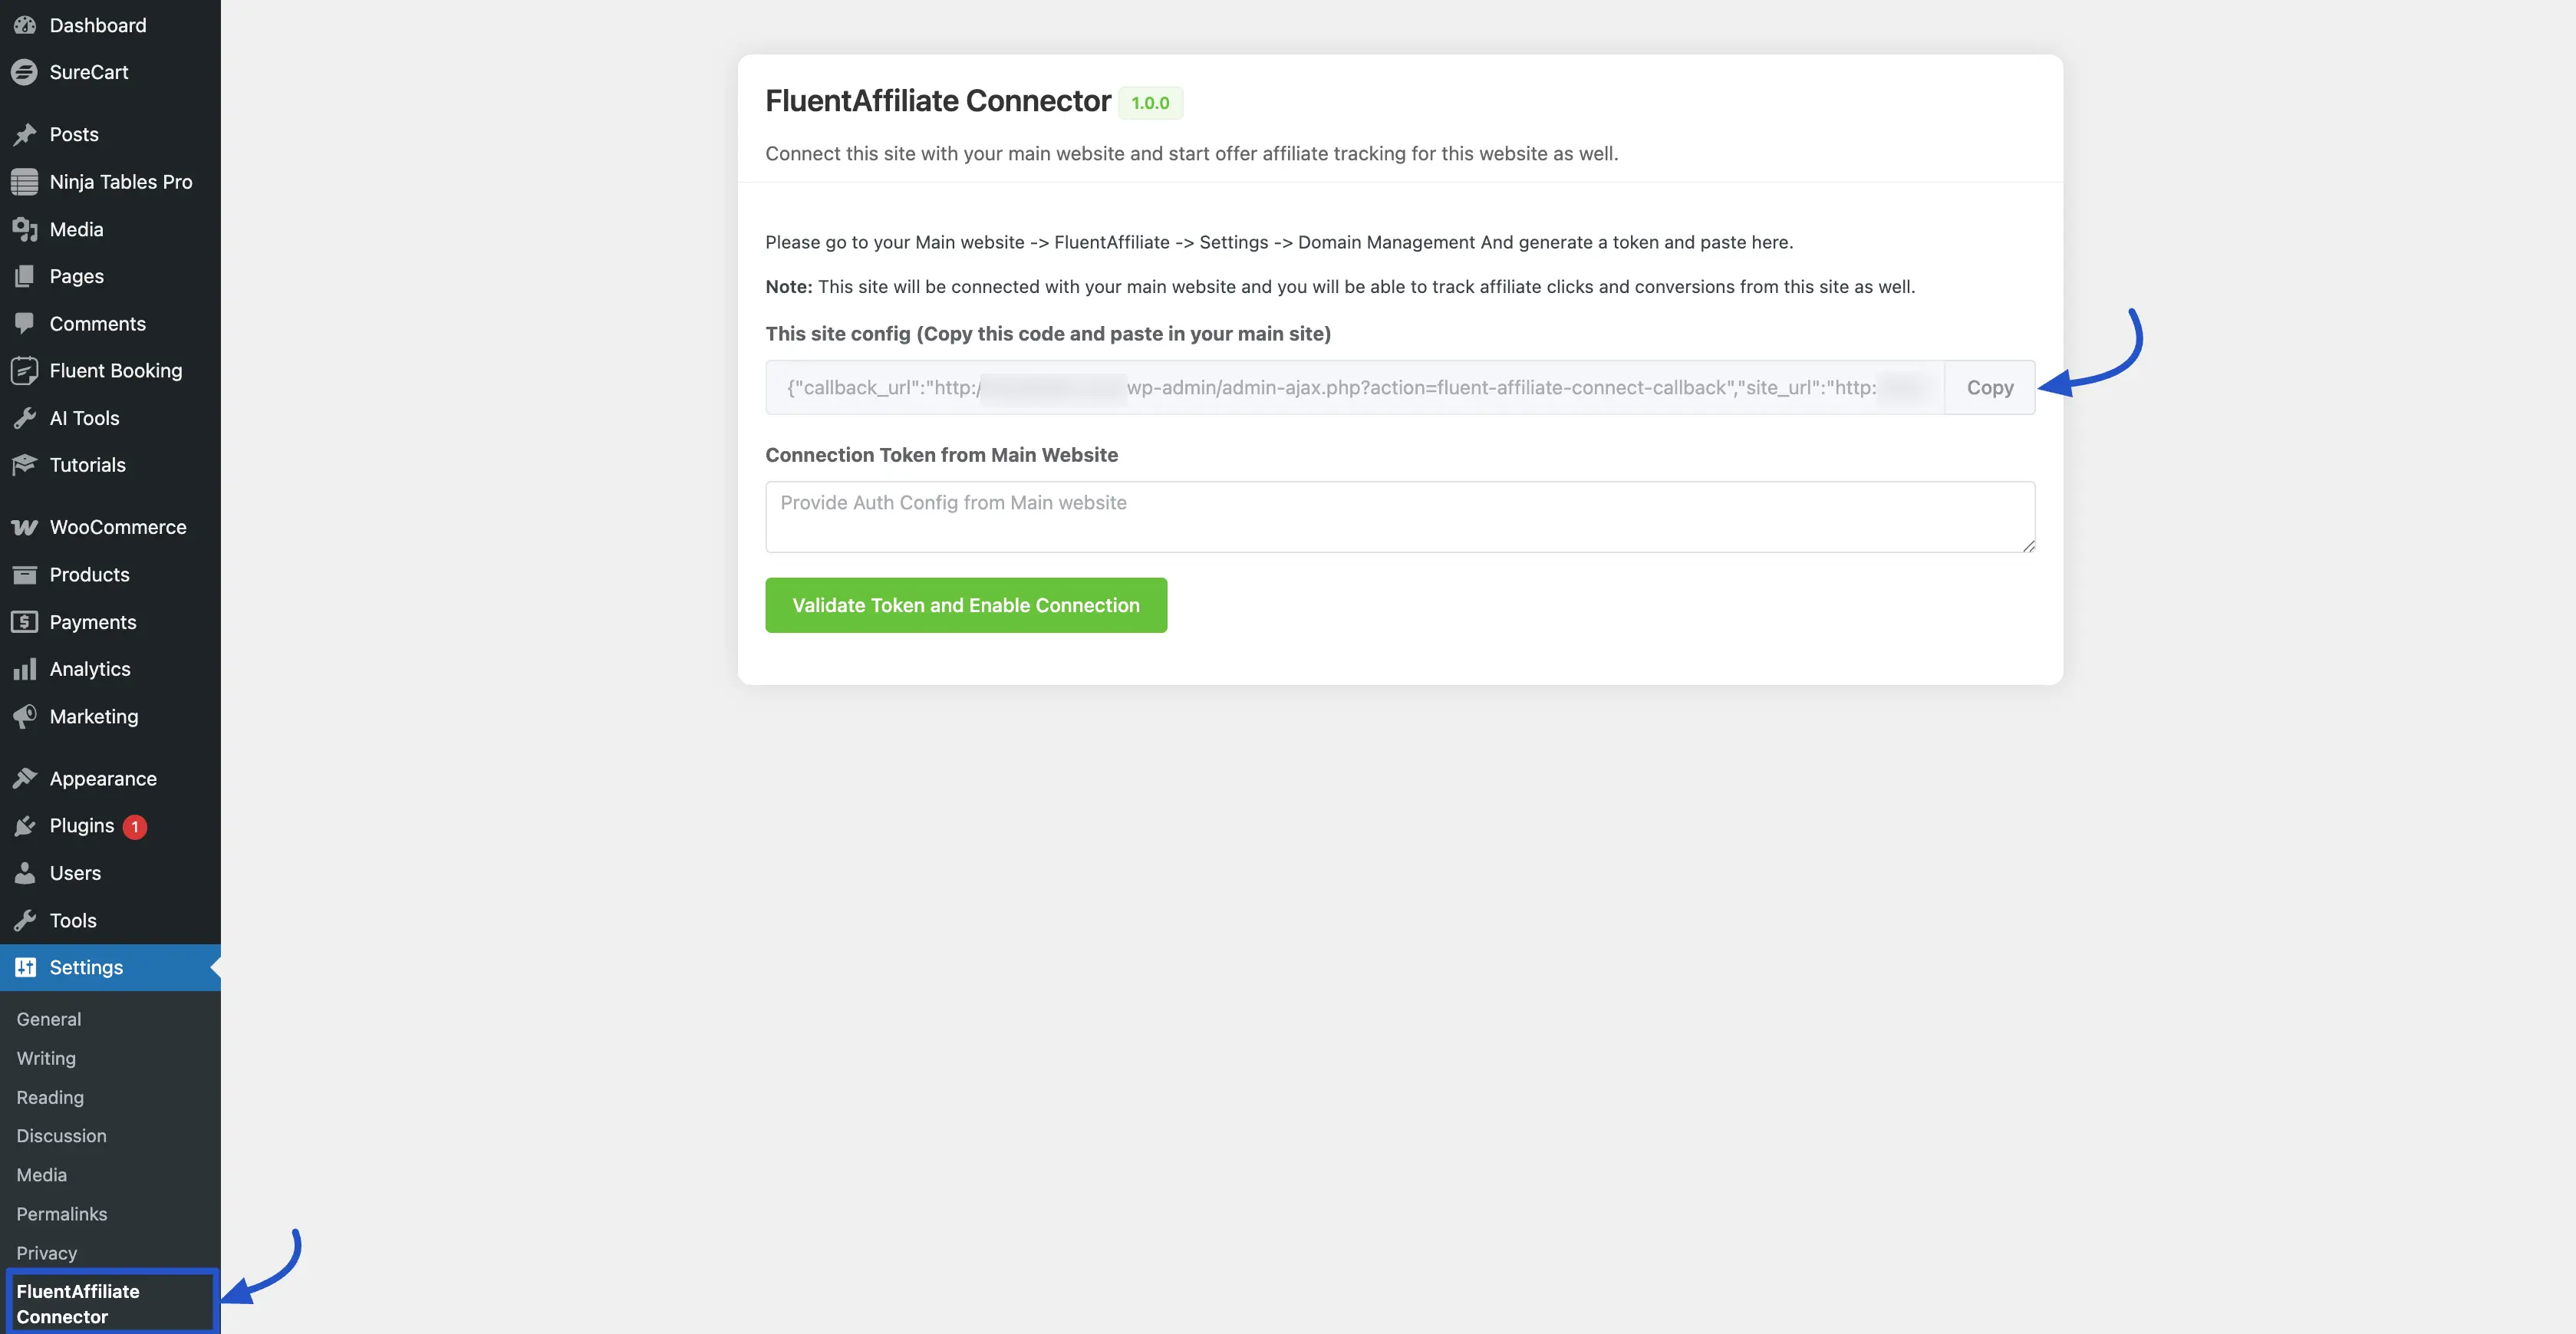
- Once the addon is activated, a new menu item will appear. Navigate to Settings → FluentAffiliate Connector from the left sidebar.
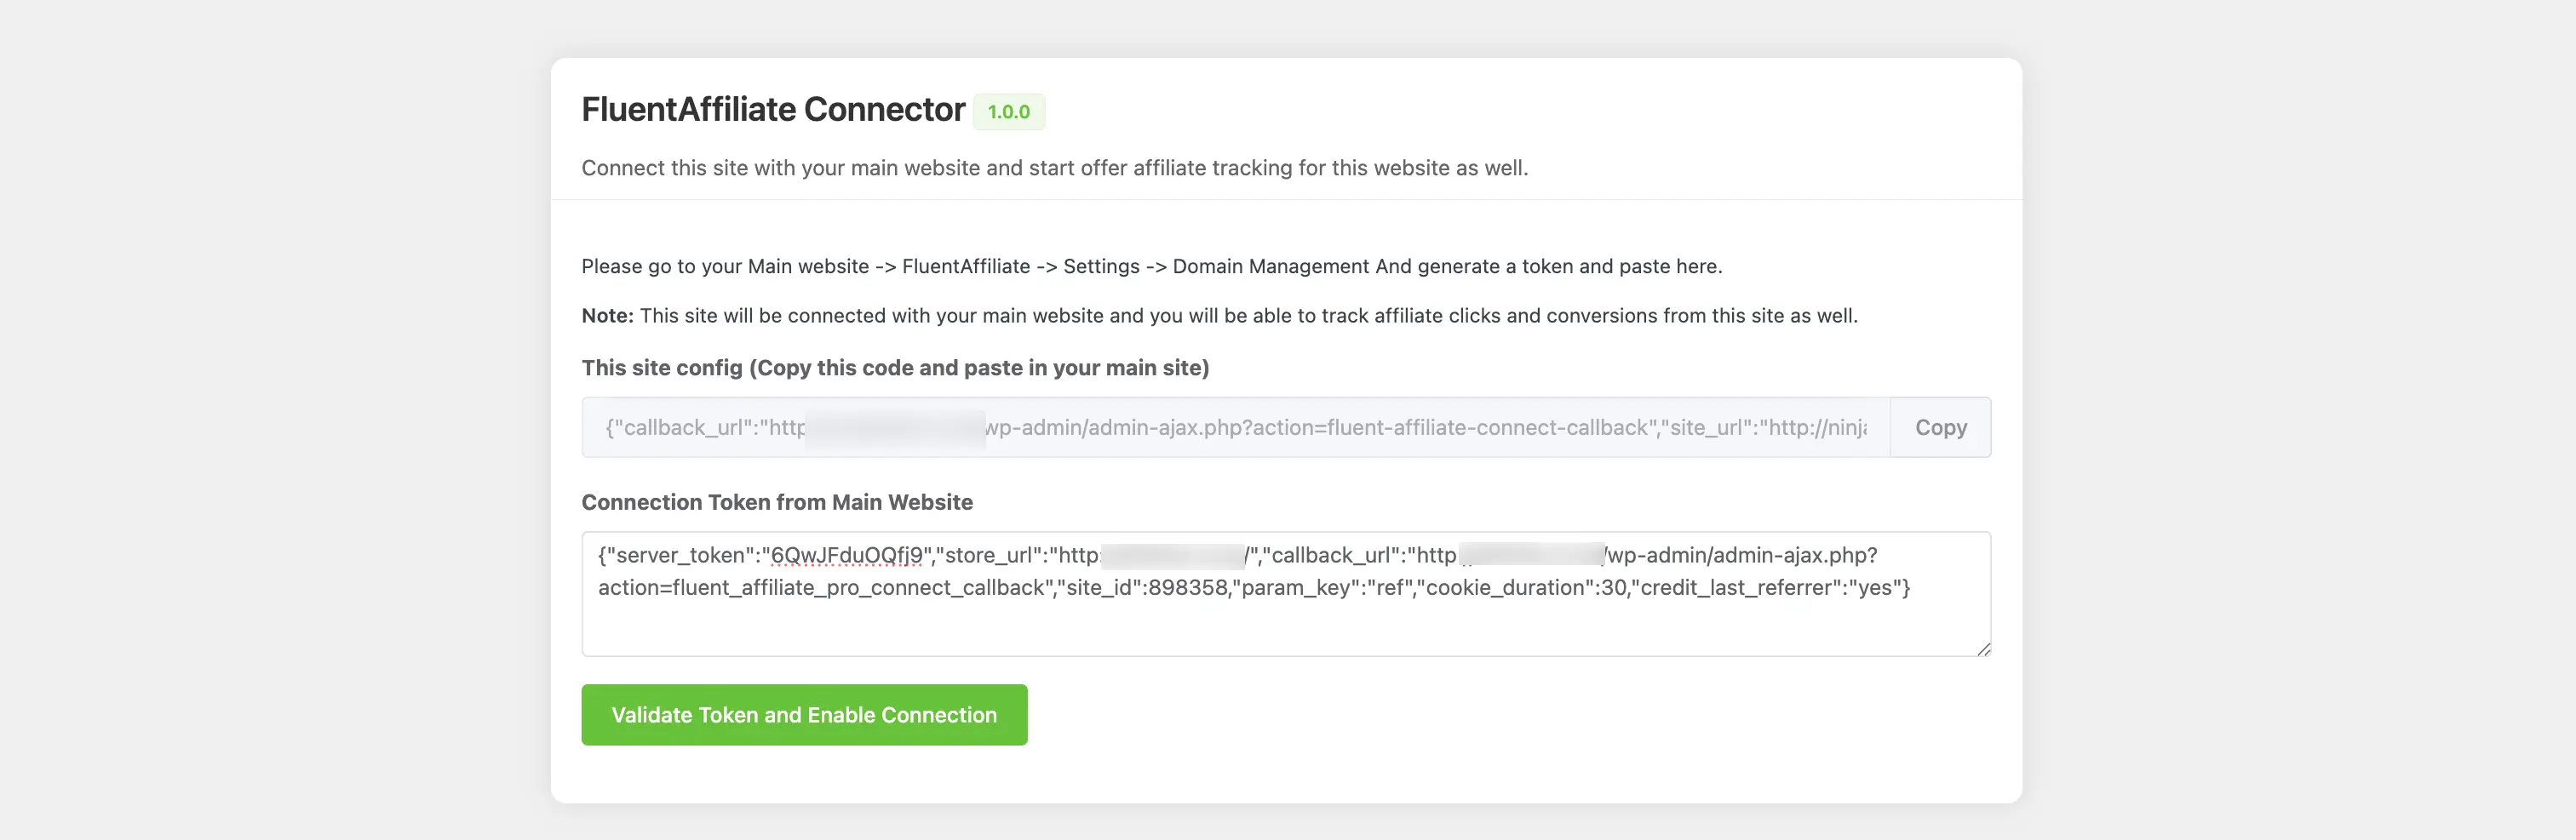
- This screen is dedicated to the connection process. You will see a large text box labeled This site config (Copy this code and paste in your main site). This JSON code is a unique fingerprint for your child site. Copy this entire code.
Step 3: Generate the Connection Token on the Main Site
With the config JSON copied, return to the browser tab with your main site's dashboard, where the pop-up should still be open.
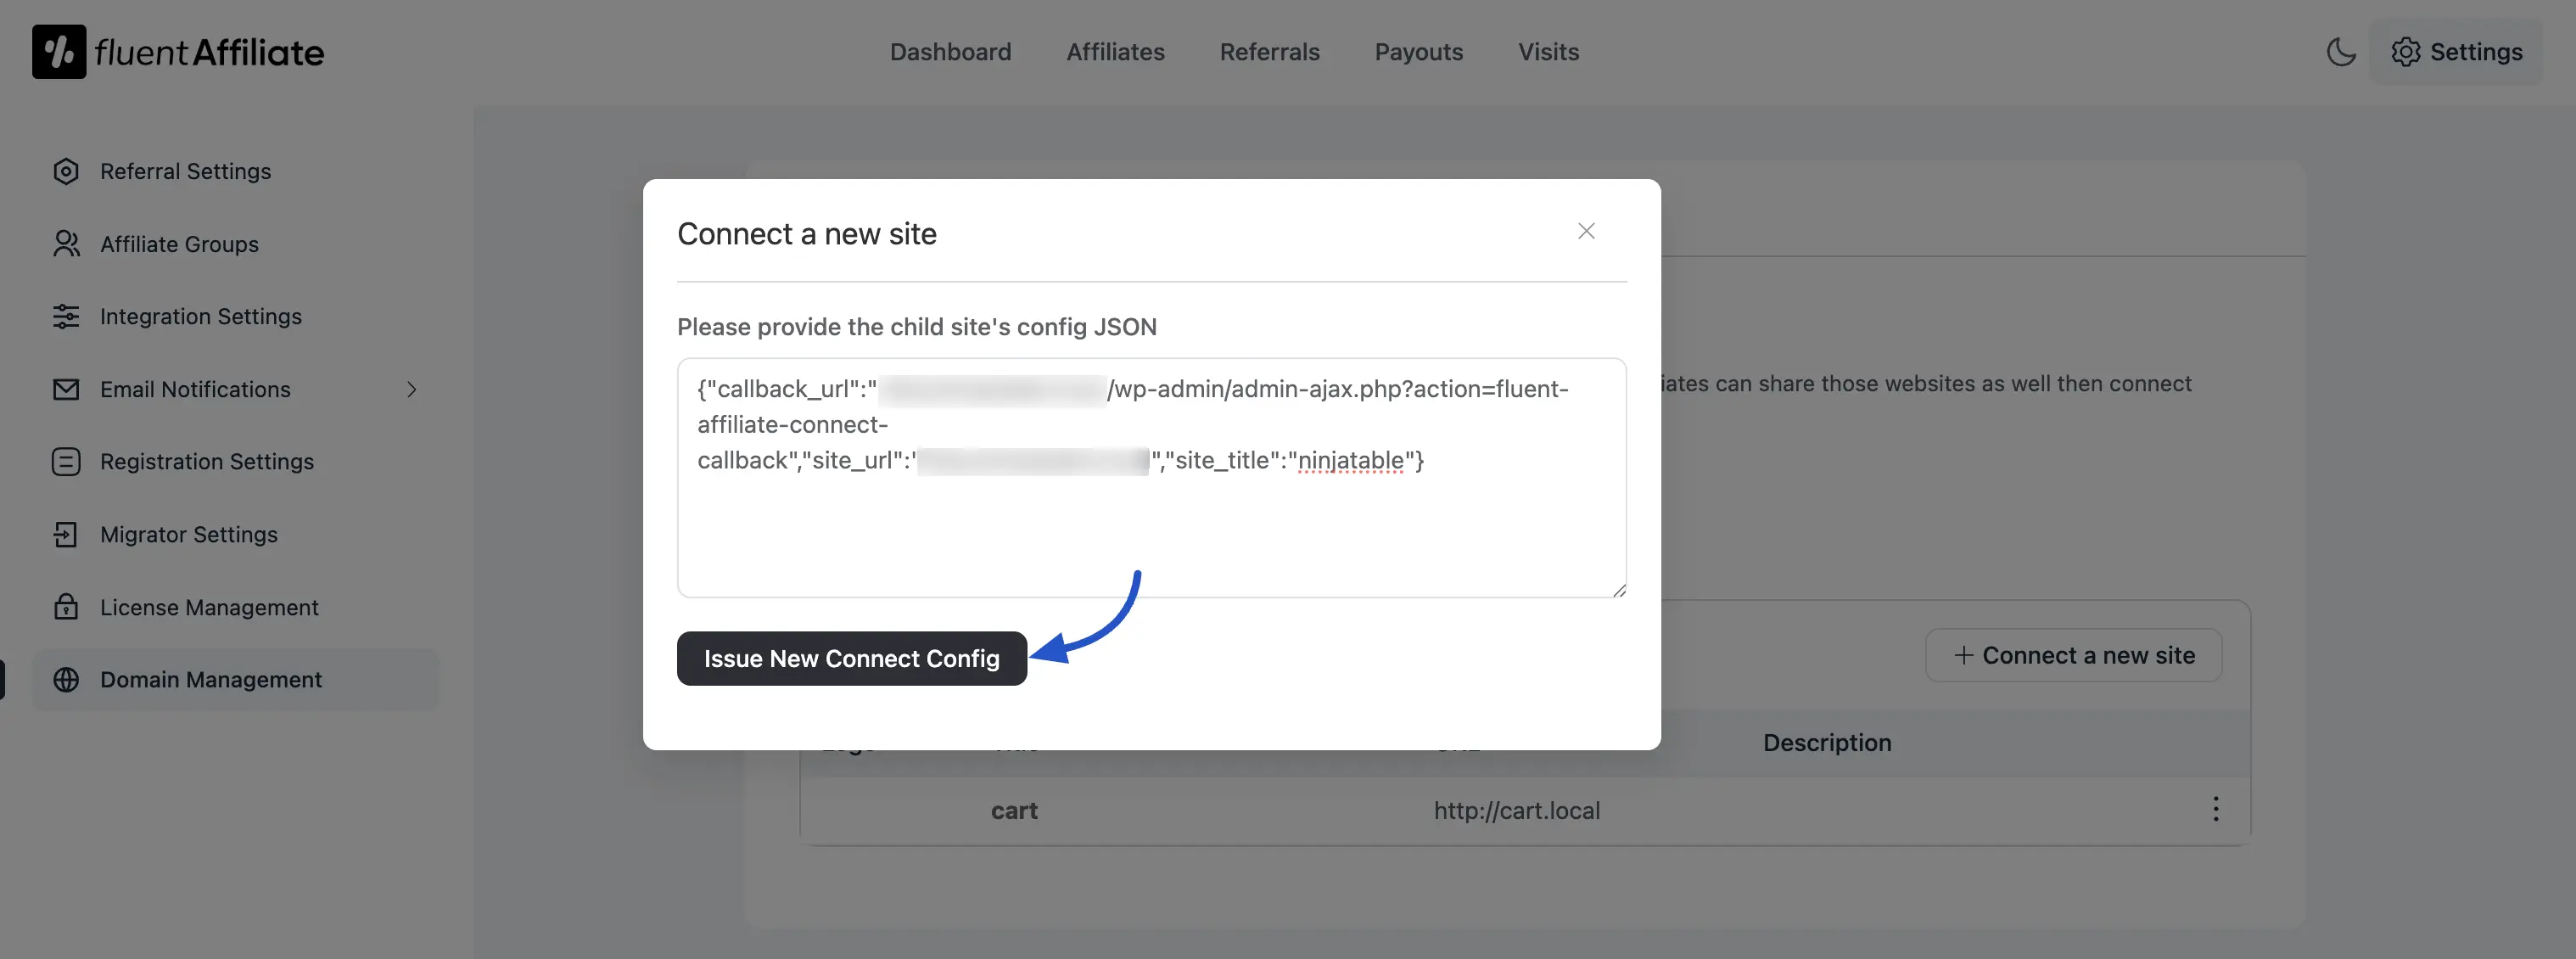
- Paste the JSON code you just copied from your child site into the text field labeled "Please provide the child site's config JSON".
- Click the Issue New Connect Config button. Your main site will now securely communicate with your child site using the code you provided.
- After a moment, you will see a Success message and a new field will appear containing a secure token. This token is a one-time key to authorize the connection. Click the Copy button to copy this server token.

Step 4: Finalize the Connection on the Child Site
For the final step, go back to your child site's dashboard to complete the secure handshake.
- Return to the FluentAffiliate Connector page (
Settings → FluentAffiliate Connector). Paste the new token you copied from your main site into the field labeled Connection Token from Main Website. - Click the Validate Token and Enable Connection button. The addon will verify the token with your main site.
- Once validated, the page will refresh to confirm the link is active, displaying the message: Your site is connected with [Main Site Name]. The connection is now complete!
With the connection finalized, you can return to your main site's Domain Management page. You will now see your newly connected child site listed in the All Connected Sites table. You can now add a description and logo for the site so that your affiliates can easily identify and promote this new site as well.