Appearance
GiveWP Integration with FluentAffiliate
Integrating GiveWP with the FluentAffiliate plugin helps you to manage affiliates of your donation campaigns, memberships, and course purchases. In this guide, we’ll walk you through the steps to connect GiveWP with FluentAffiliate and set up affiliate commission for your campaign.
NOTE
GiveWP is a pro feature of FluentAffiliate. To use it, you need FluentAffiliate Pro.
To get started, you must first install and activate the GiveWP plugin on your WordPress website.
Enable GiveWP in FluentAffiliate
Once you have both plugins activated, follow these steps to connect GiveWP with FluentAffiliate:
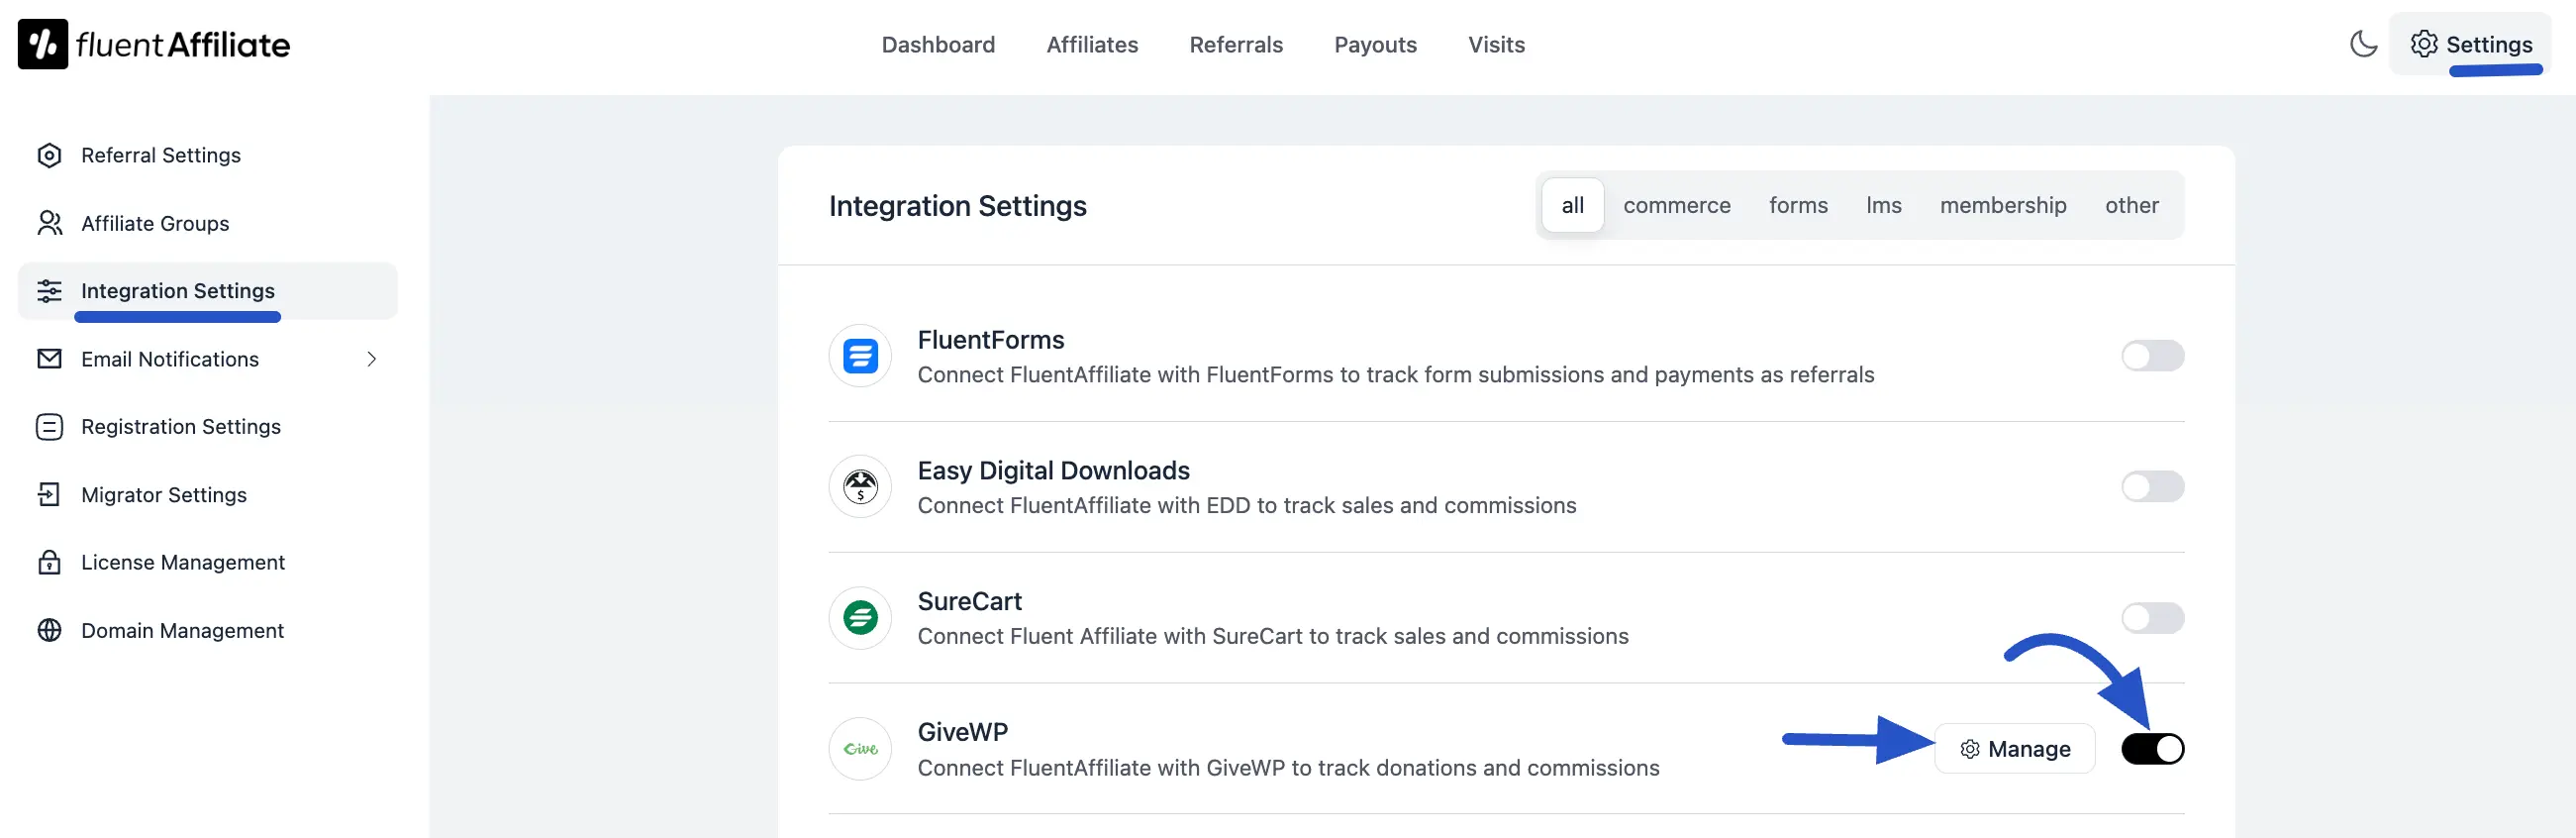
- Go to the FluentAffiliate Dashboard.
- From there, click on the Settings tab in the top right corner.
- On the left sidebar, you’ll find an option called Integration Settings. Simply click on that.
- Inside Integration Settings, you’ll see a list of different integration options. Find GiveWP in this list.
- Now, simply click on the toggle button to enable GiveWP integration with FluentAffiliate to track donations.
- Your GiveWP integration with FluentAffiliate is now active, allowing affiliates to earn referral commissions on GiveWP Campaign and Course sales.
In the Manage section, you’ll find additional settings to customize how affiliate commissions work with your GiveWP donation campaign, memberships, and courses.
Configure GiveWP Settings
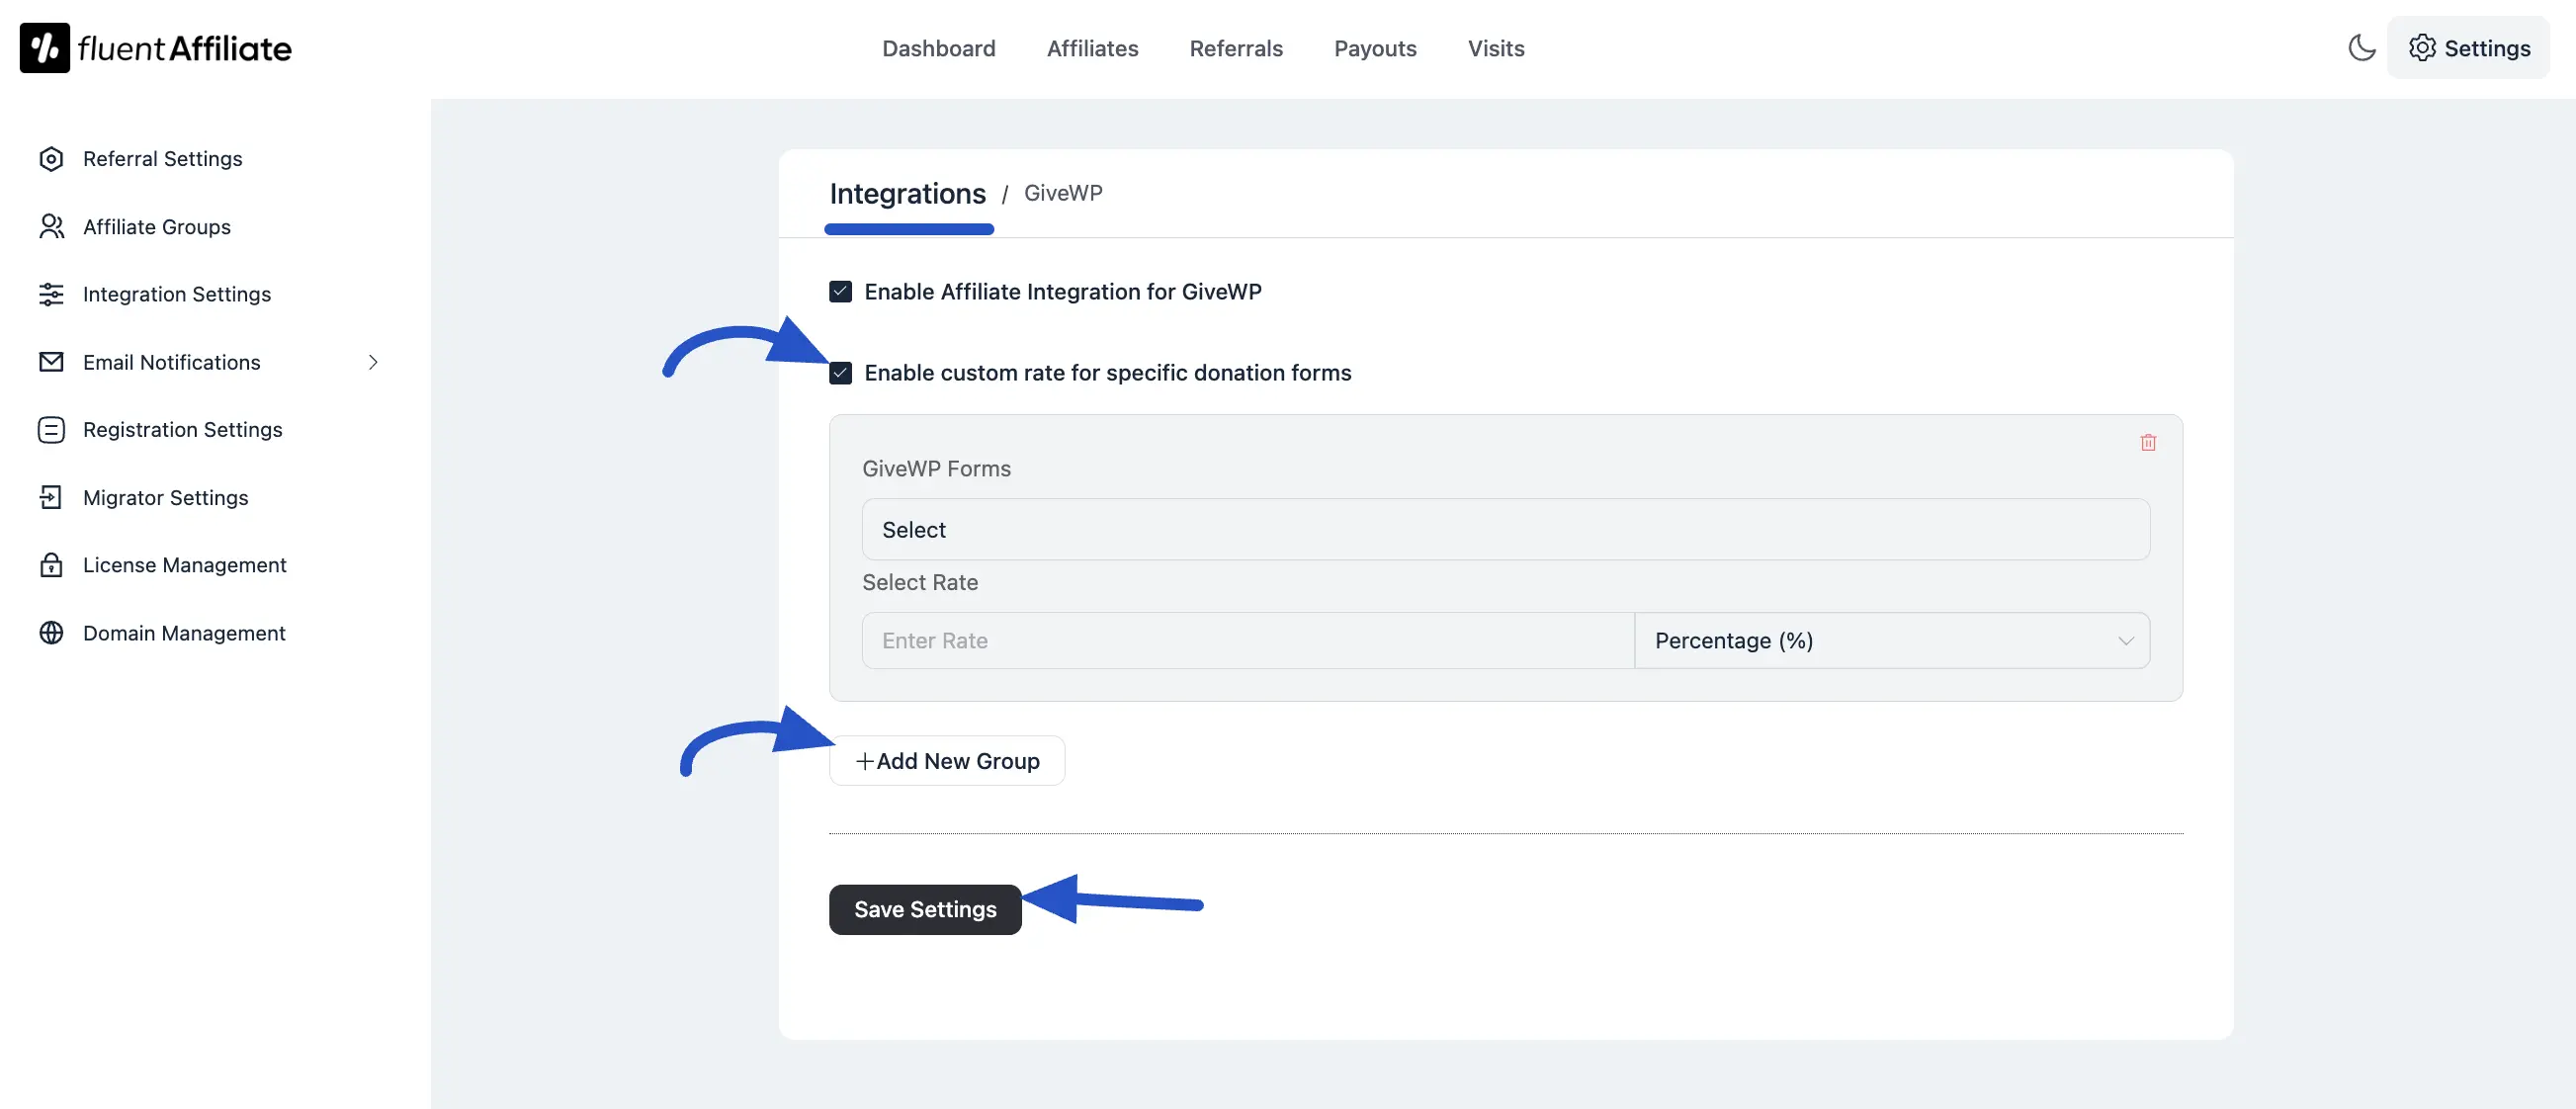
After clicking the Manage button, you can configure how affiliate commissions are handled for your donation forms.
- Enable Affiliate Integration for GiveWP: You must check this box to activate commission tracking for all your GiveWP donation forms.
- Enable custom rate for specific donation forms: Check this box if you want to override the default commission rate and set special rates for different donation forms.
Custom Affiliate Rate Configuration
Once Enable custom rate is checked, you can define specific commission structures for individual donation forms. This is perfect for rewarding affiliates differently for various campaigns.
Click on the +Add New Group button to create your first custom rate.
- GiveWP Forms: This option allows you to apply the custom rate to a specific donation form. Enter a keyword in the text field to search for and select the form to which this custom rate will apply.
- Select Rate: Set the commission rate for the selected form.Enter a numerical value into the field to set the commission amount.
- Rate Type Selector: Click the dropdown menu to choose the type of commission:
- Percentage: The affiliate will receive a percentage of the donation amount.
- Fixed: The affiliate will receive a fixed amount as commission, regardless of the donation amount.
- Add More Rates: After configuring a rate, you can click the +Add New Group button again to add more custom rates for other donation forms. You can also delete a rate by clicking the delete icon on the right side.
Once all your custom rates are added, click the Save Settings button to apply them.
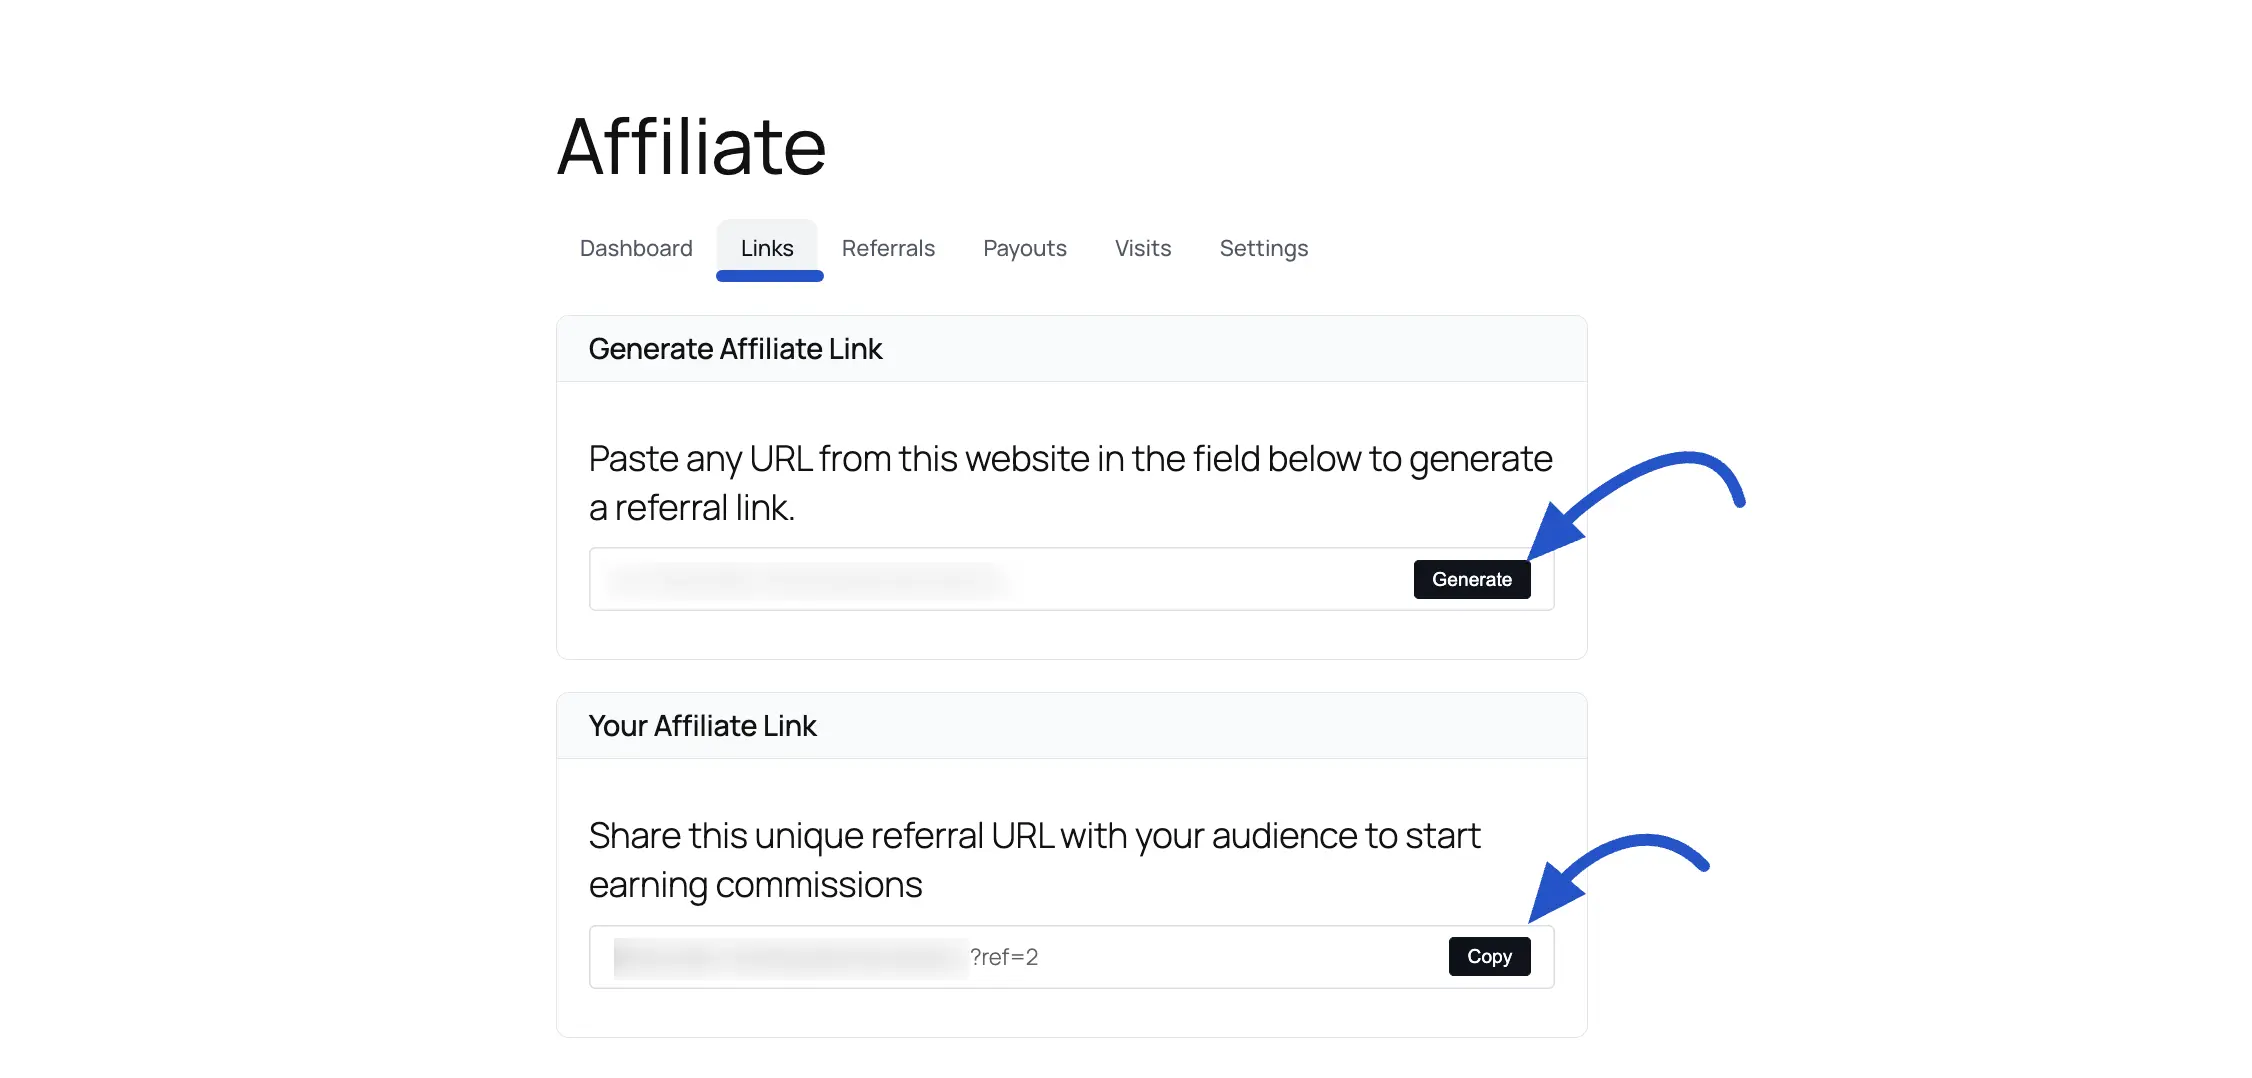
Generate an Affiliate Link
After you’ve completed configuring the GiveWP settings, the next step is to log in to your Affiliate Area provided by FluentAffiliate. To learn more about how can generate your affiliate link, read this article.
If someone purchases the campaign or courses using your affiliate link, you’ll earn a commission based on the settings you’ve configured.
And that’s it! This is the easy process to integrate GiveWP with FluentAffiliate and start earning commissions.