Appearance
Registration Settings
The Registration Settings section gives you complete control over your affiliate registration form. You can enable or disable registrations, set approval requirements, and customize the form fields to collect the information you need from new affiliates.
Accessing Registration Settings
To configure these options, navigate from your WordPress dashboard to FluentAffiliate → Settings → Registration Settings.
General Registration Options
At the top of the page, you will find the two primary settings that control your entire affiliate registration process.
Enable Affiliate Registration: This acts as the master switch for your affiliate program's public registration.
- When this option is enabled, the affiliate registration form will be active and accessible, allowing new users to sign up.
- If you disable this option, it will prevent any new users from registering as affiliates.
Require admin approval for new affiliates: This setting gives you direct control over your affiliate vetting and approval workflow.
- When Enabled (Manual Approval): If you check this box, you have full control over who joins your program. New applicants will have their status set to "pending." You will then need to navigate to their individual affiliate profile to manually review their application and approve them. This is the recommended setting if you want to screen your affiliates before they can start promoting your site.
- When Disabled (Automatic Approval): If you leave this box unchecked, the approval process is hands-off. Any user who successfully completes the registration form will instantly become an active affiliate and can begin generating referral links immediately.
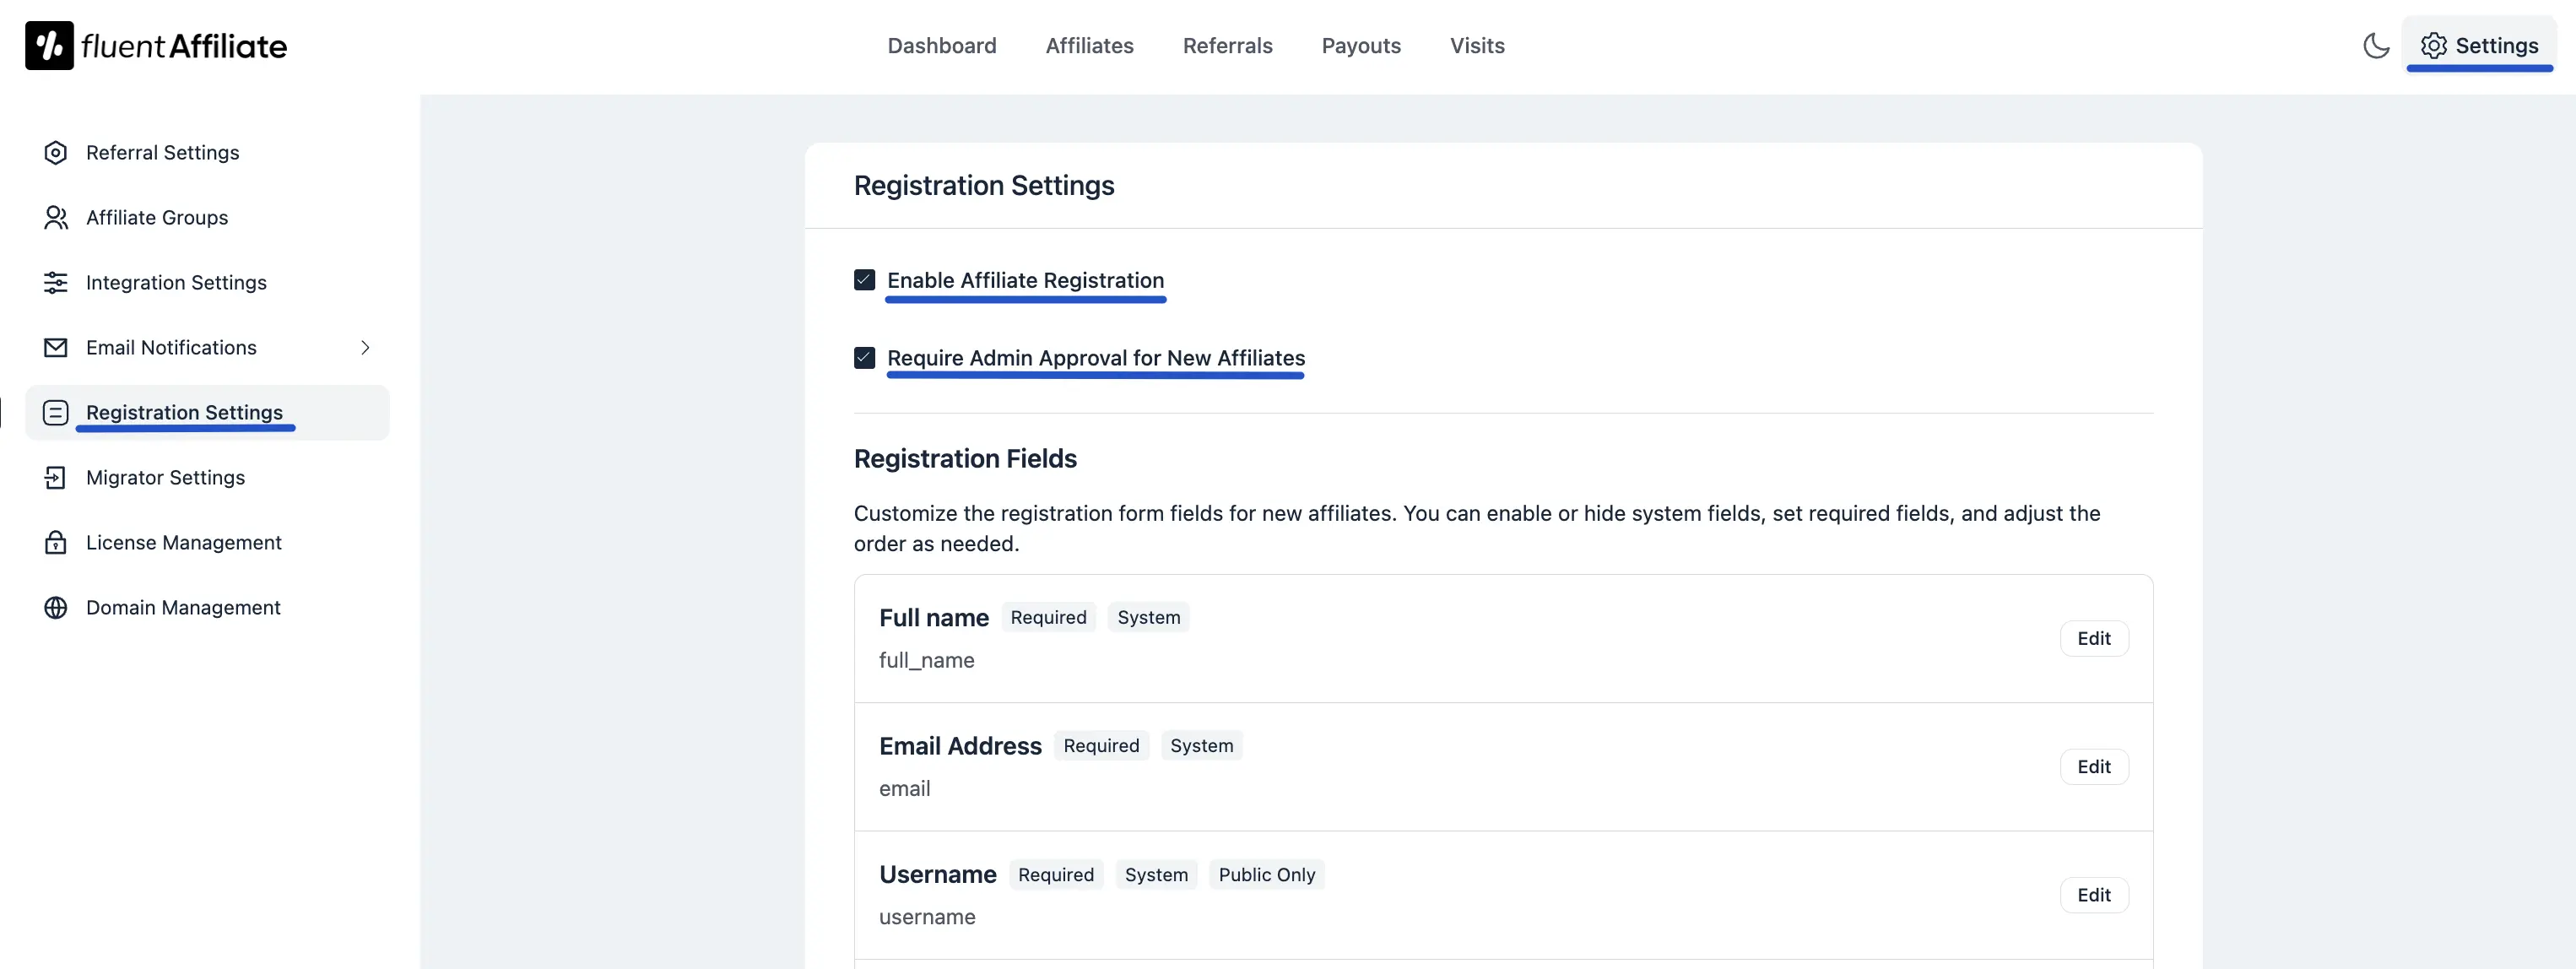
Managing Registration Fields
This section allows you to customize the registration form that potential affiliates will fill out. You can enable, disable, and edit the fields as needed.
Activating or Hiding Fields
For many fields, such as "How will you promote us?" or "Website URL," you can simply click the toggle switch to activate (show) or hide the field on the registration form.
Editing Fields
For core system fields like "Full name" or "Email Address," you can click the Edit button to modify their properties. This will open the Edit Registration Field pop-up.
In this pop-up, you can modify the following options:
- Label: Change the display name of the field.
- Placeholder: Set the placeholder text that appears inside the input field.
- Required: Choose whether the field is mandatory for the user to fill out.
- Status: Use this toggle to enable or disable the field on the form.
As noted in the pop-up, some system-defined fields may have limitations, such as only allowing label edits.
After making your customizations, remember to click the Save Settings button at the bottom of the page to apply all changes.