Appearance
Onboarding Setup
So, you've just installed FluentAffiliate. Welcome! The first thing you'll see is our quick Onboarding setup, designed to guide you through the core settings to get your affiliate program up and running in minutes.
The best part? You're always in control. If you're not ready to configure everything right away, you can skip steps and revisit them later from the main settings panel.
Let's walk through the new onboarding setup, step by step.
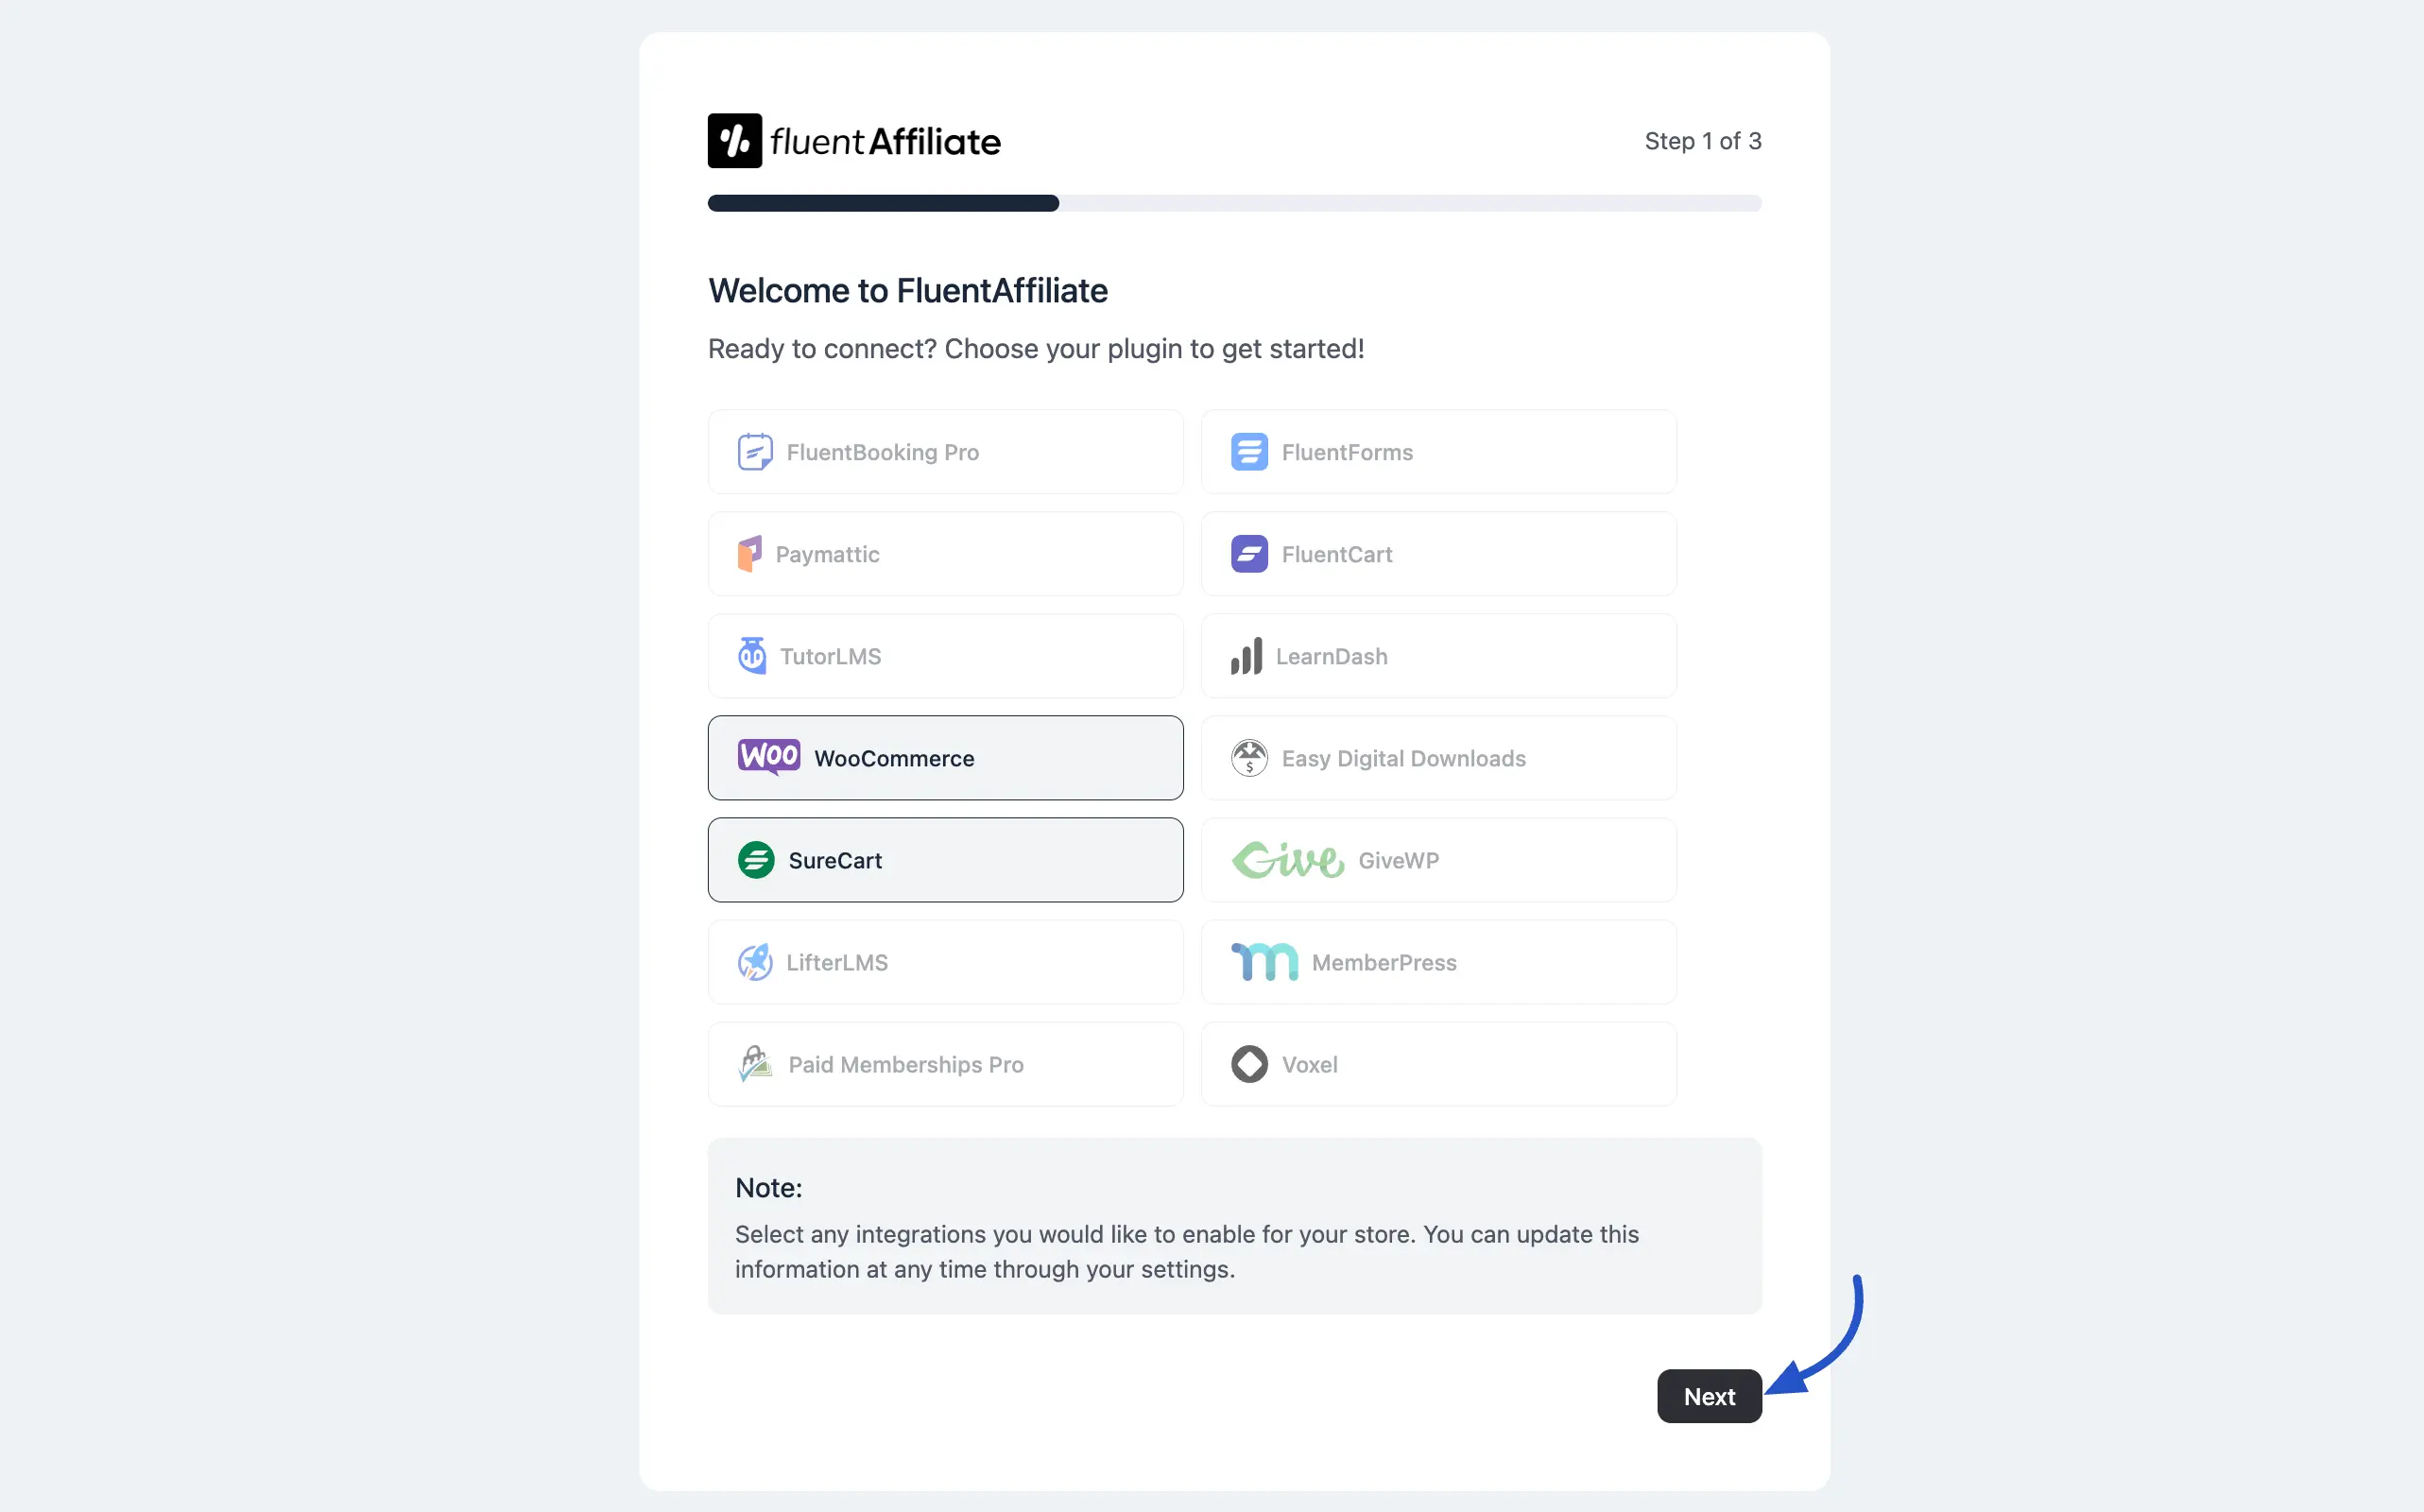
Step 1: Connect Your Plugins
The first step helps FluentAffiliate understand which platforms you use to sell products, courses, or services.
- Choose your plugin to get started: In this list, simply check the boxes next to the plugins you have installed and plan to use with your affiliate programs, such as FluentForms, WooCommerce, or LearnDash etc.
Click the Next button to proceed.
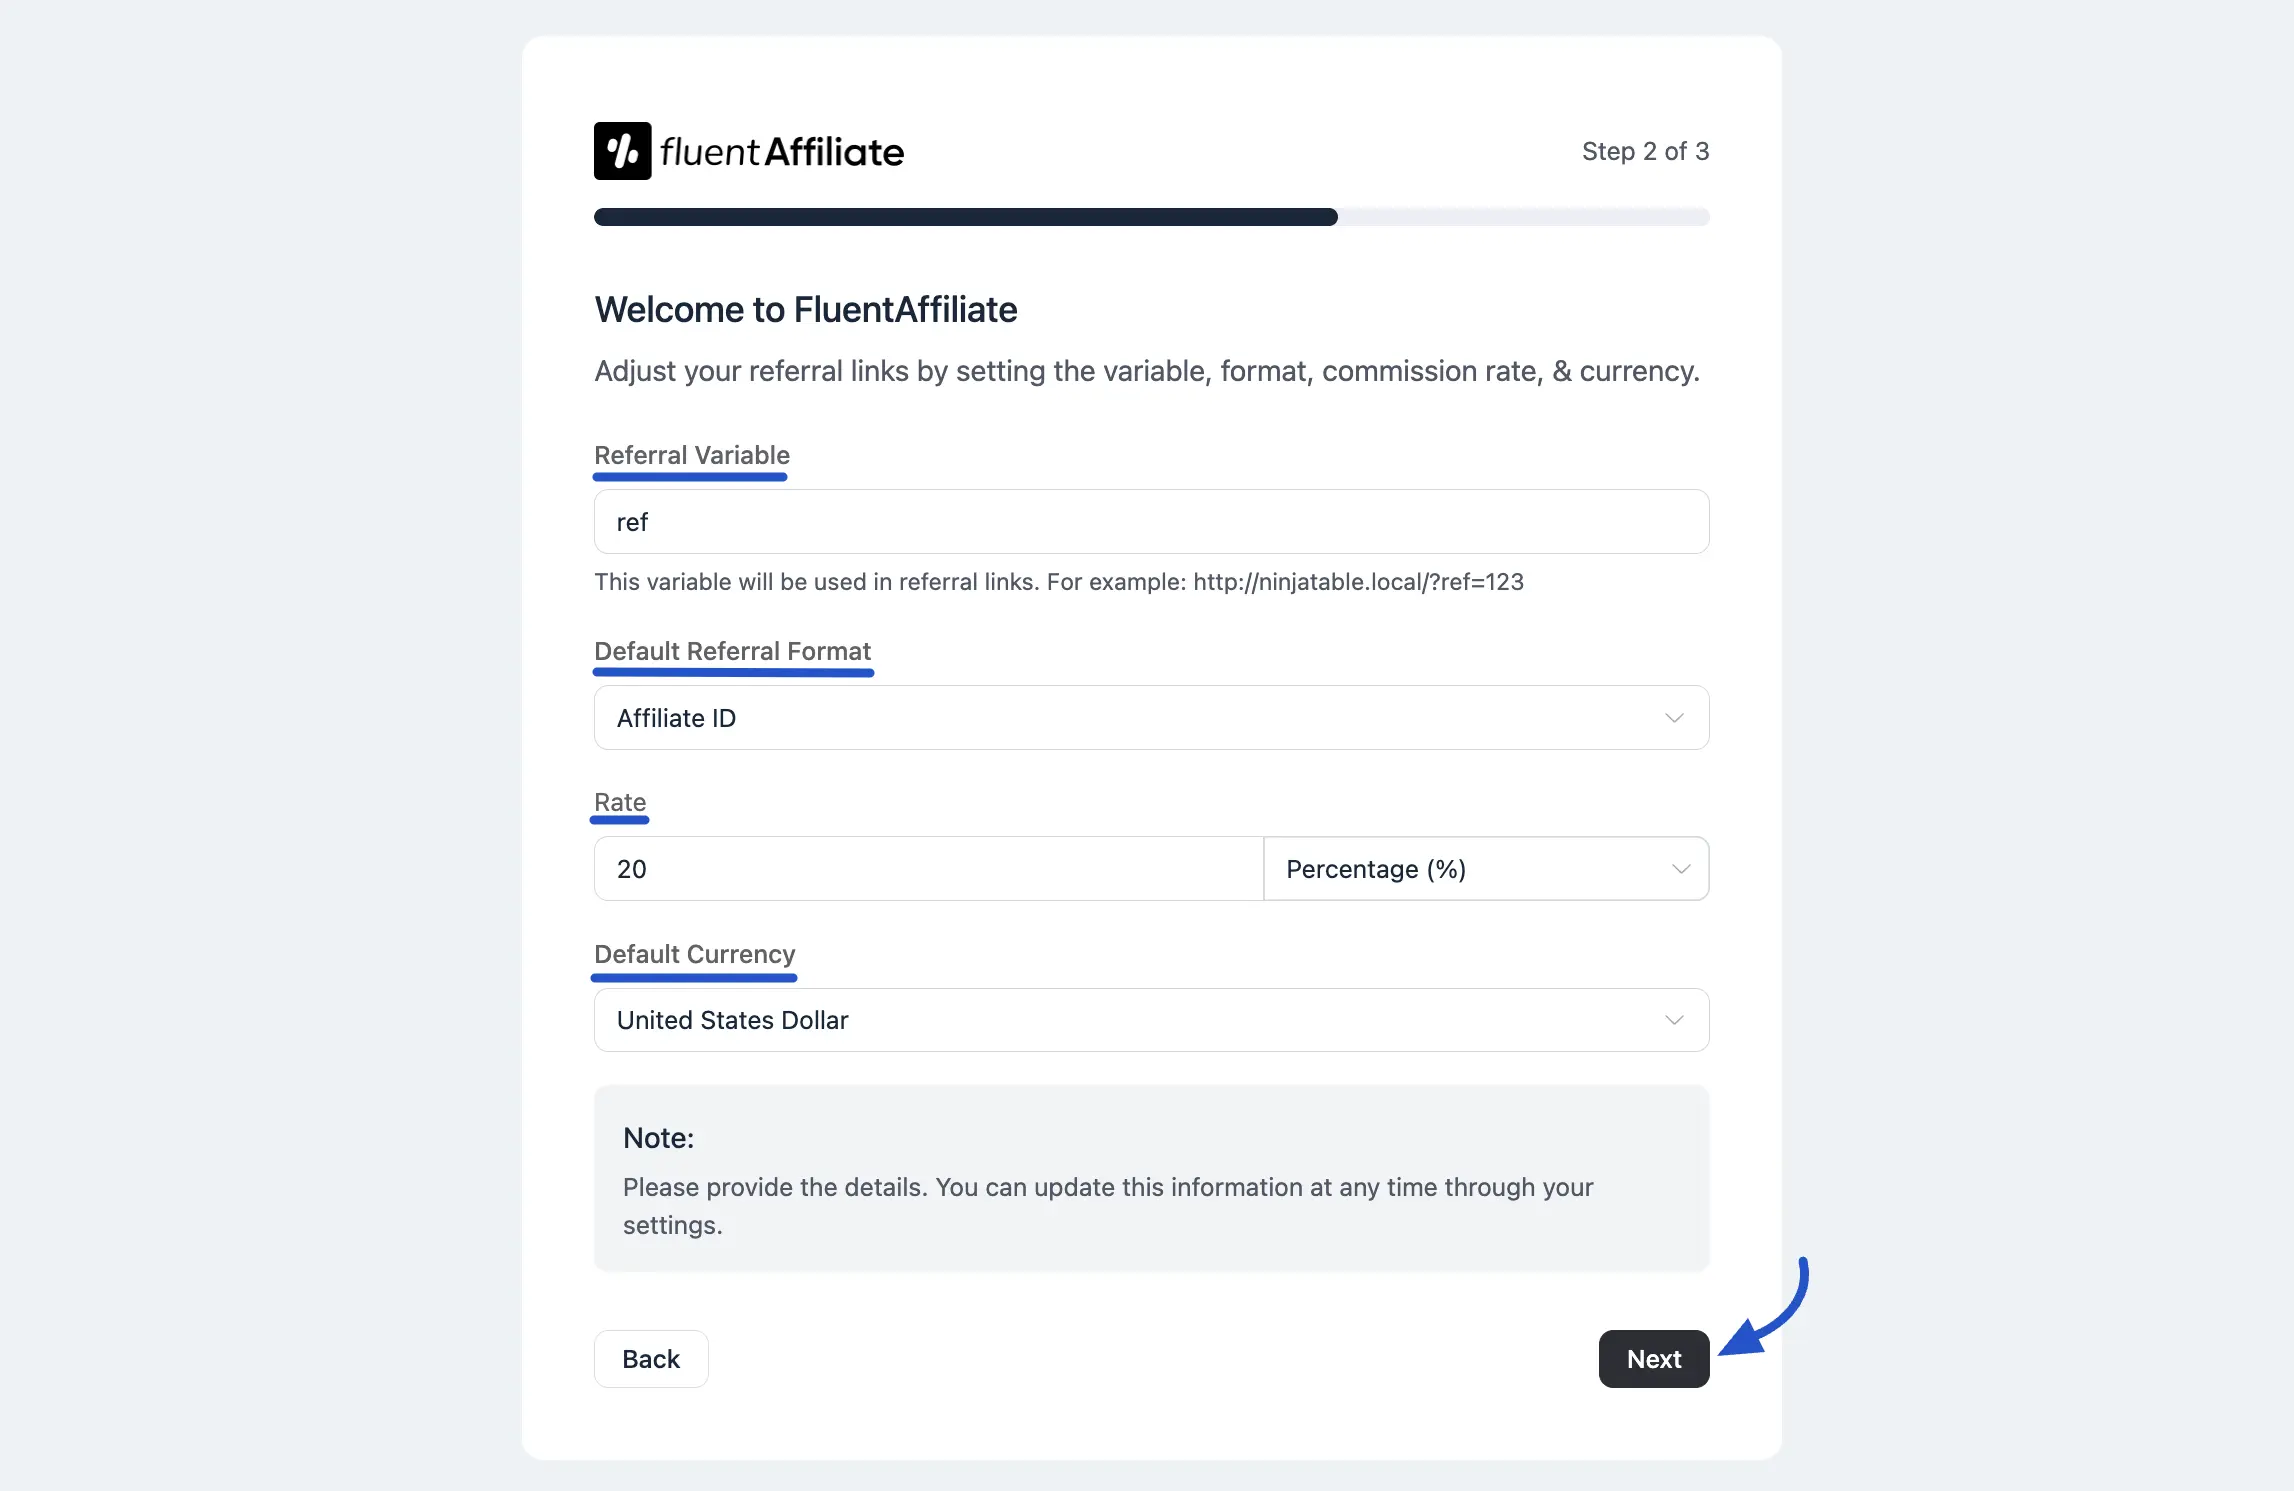
Step 2: Set Your Default Commission
In this step, you'll set the default referral and commission structure for your entire affiliate program. These are the global settings that will apply unless you create custom rates for specific products.
Here’s what to fill out:
- Referral Variable: This is the keyword that will appear in your affiliate URLs. For example, if you set it as
ref, a referral link will look likeyoursite.com/?ref=username. - Default Referral Format: Choose whether your affiliate links will use the affiliate's numeric ID or WordPress Username. Both options track perfectly; just pick the one you prefer.
- Rate: Enter the default commission value your affiliates will earn. You can also choose if this rate is a Percentage (%) of the sale or a Fixed amount.
- Default Currency: Select the currency you will use to pay your affiliate commissions from the dropdown menu.
Once you've configured these settings, click Next.
Step 3: Create Your Affiliate Portal
The final step is to create a dedicated page for your affiliates. This "Affiliate Portal" is where they will log in, track their performance, and generate their unique promotional links.
Affiliate Area: You need to select a page to serve as the portal. You can either choose an existing page from the dropdown menu or click the plus (+) icon to create a new page instantly.
If you create a new page, a pop-up will appear where you can enter the Page Title (e.g., "Affiliate Area") and click Add button.
FluentAffiliate will automatically place the [fluent_affiliate_portal] shortcode on the page you select. This shortcode is what makes the affiliate dashboard appear.
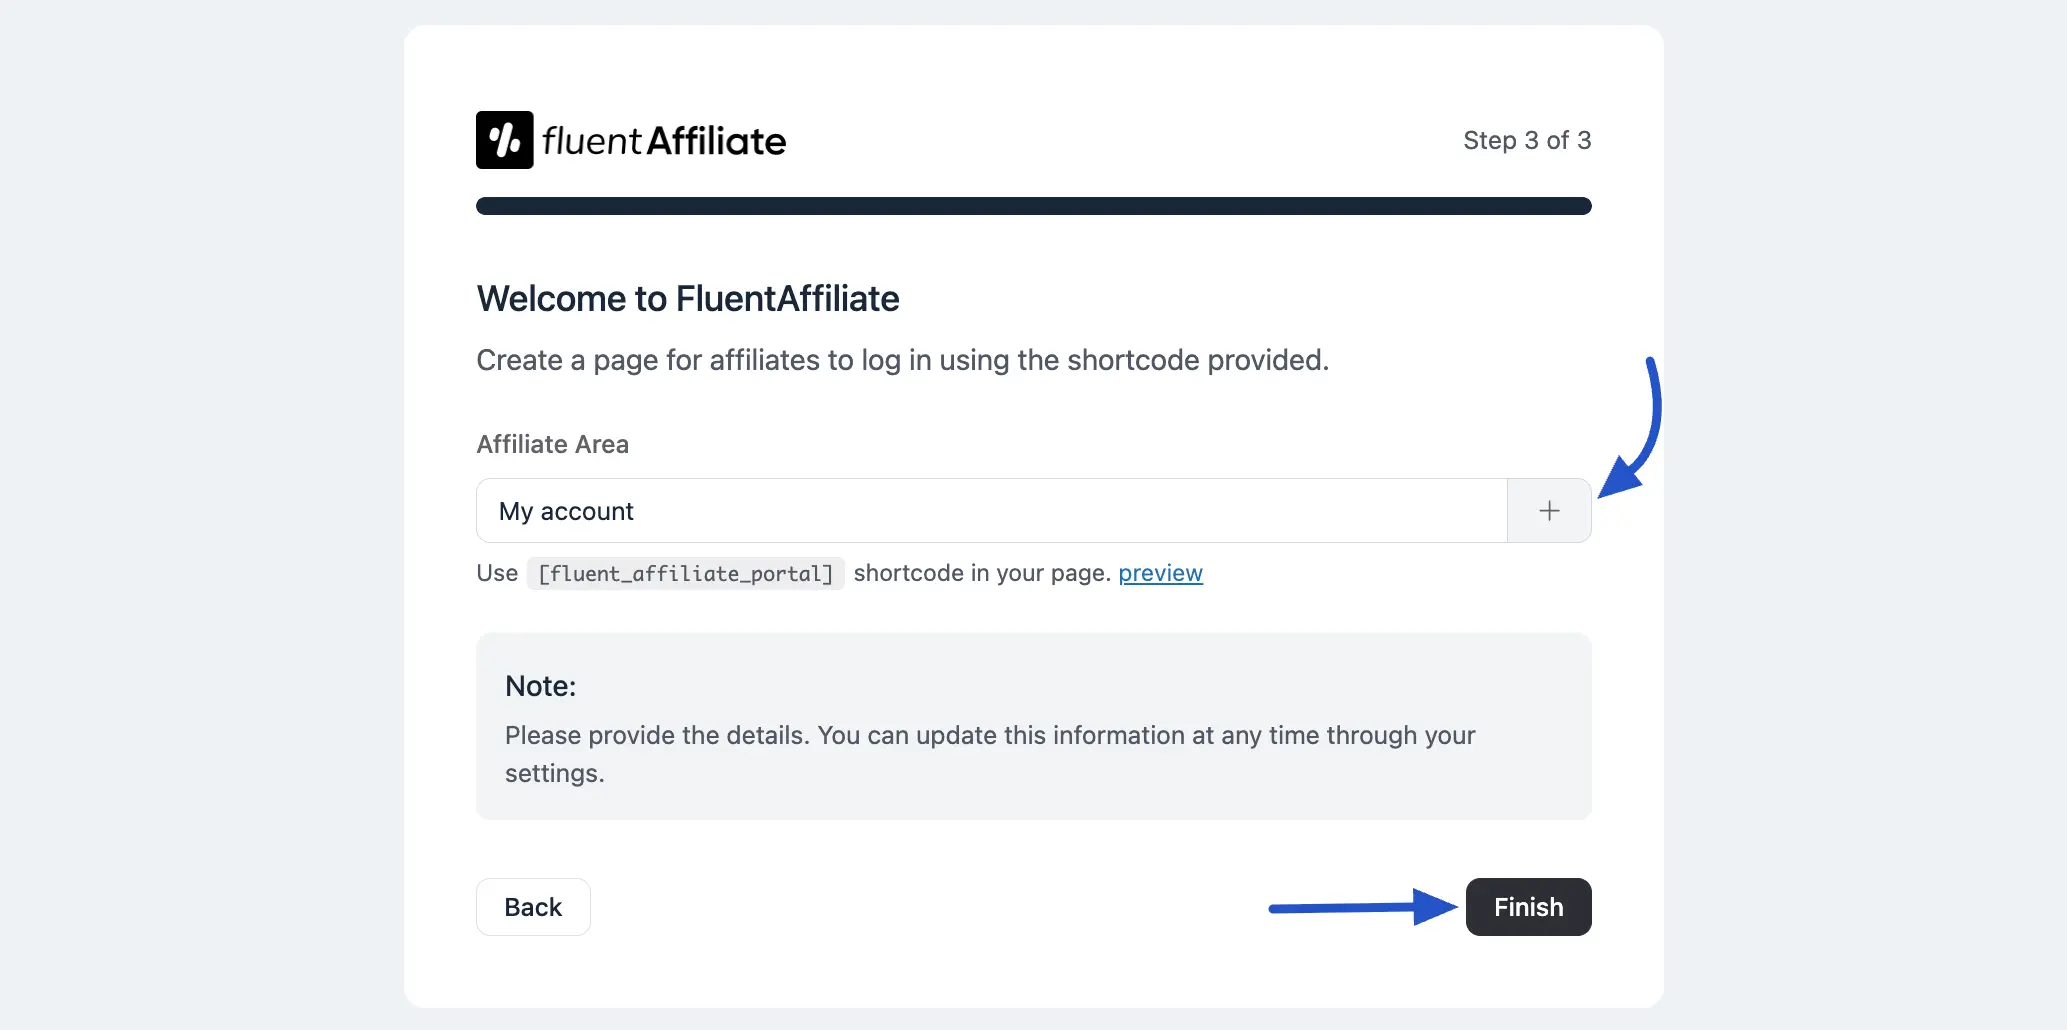
When you're ready, click the Finish button to save your settings and complete the setup.
That's it, you're all set with the onboarding setup for Fluent Affiliate!