Appearance
WooCommerce Integration with FluentAffiliate
WooCommerce is one of the most popular e-commerce plugins for WordPress, helping you build and manage a powerful online store. When you connect WooCommerce with FluentAffiliate, you can launch a full-featured affiliate program to boost your sales, track commissions, and manage affiliate payments with ease.
This guide will walk you through every step of integrating WooCommerce with FluentAffiliate.
NOTE
WooCommerce is a pro feature of FluentAffiliate. To use it, you need FluentAffiliate Pro.
To get started, you first need to have the WooCommerce plugin installed and activated on your WordPress website.
Enable the WooCommerce Integration
The first step is to activate the WooCommerce module within your FluentAffiliate settings. Once Woocommerce is running on your site, you can connect it to FluentAffiliate.
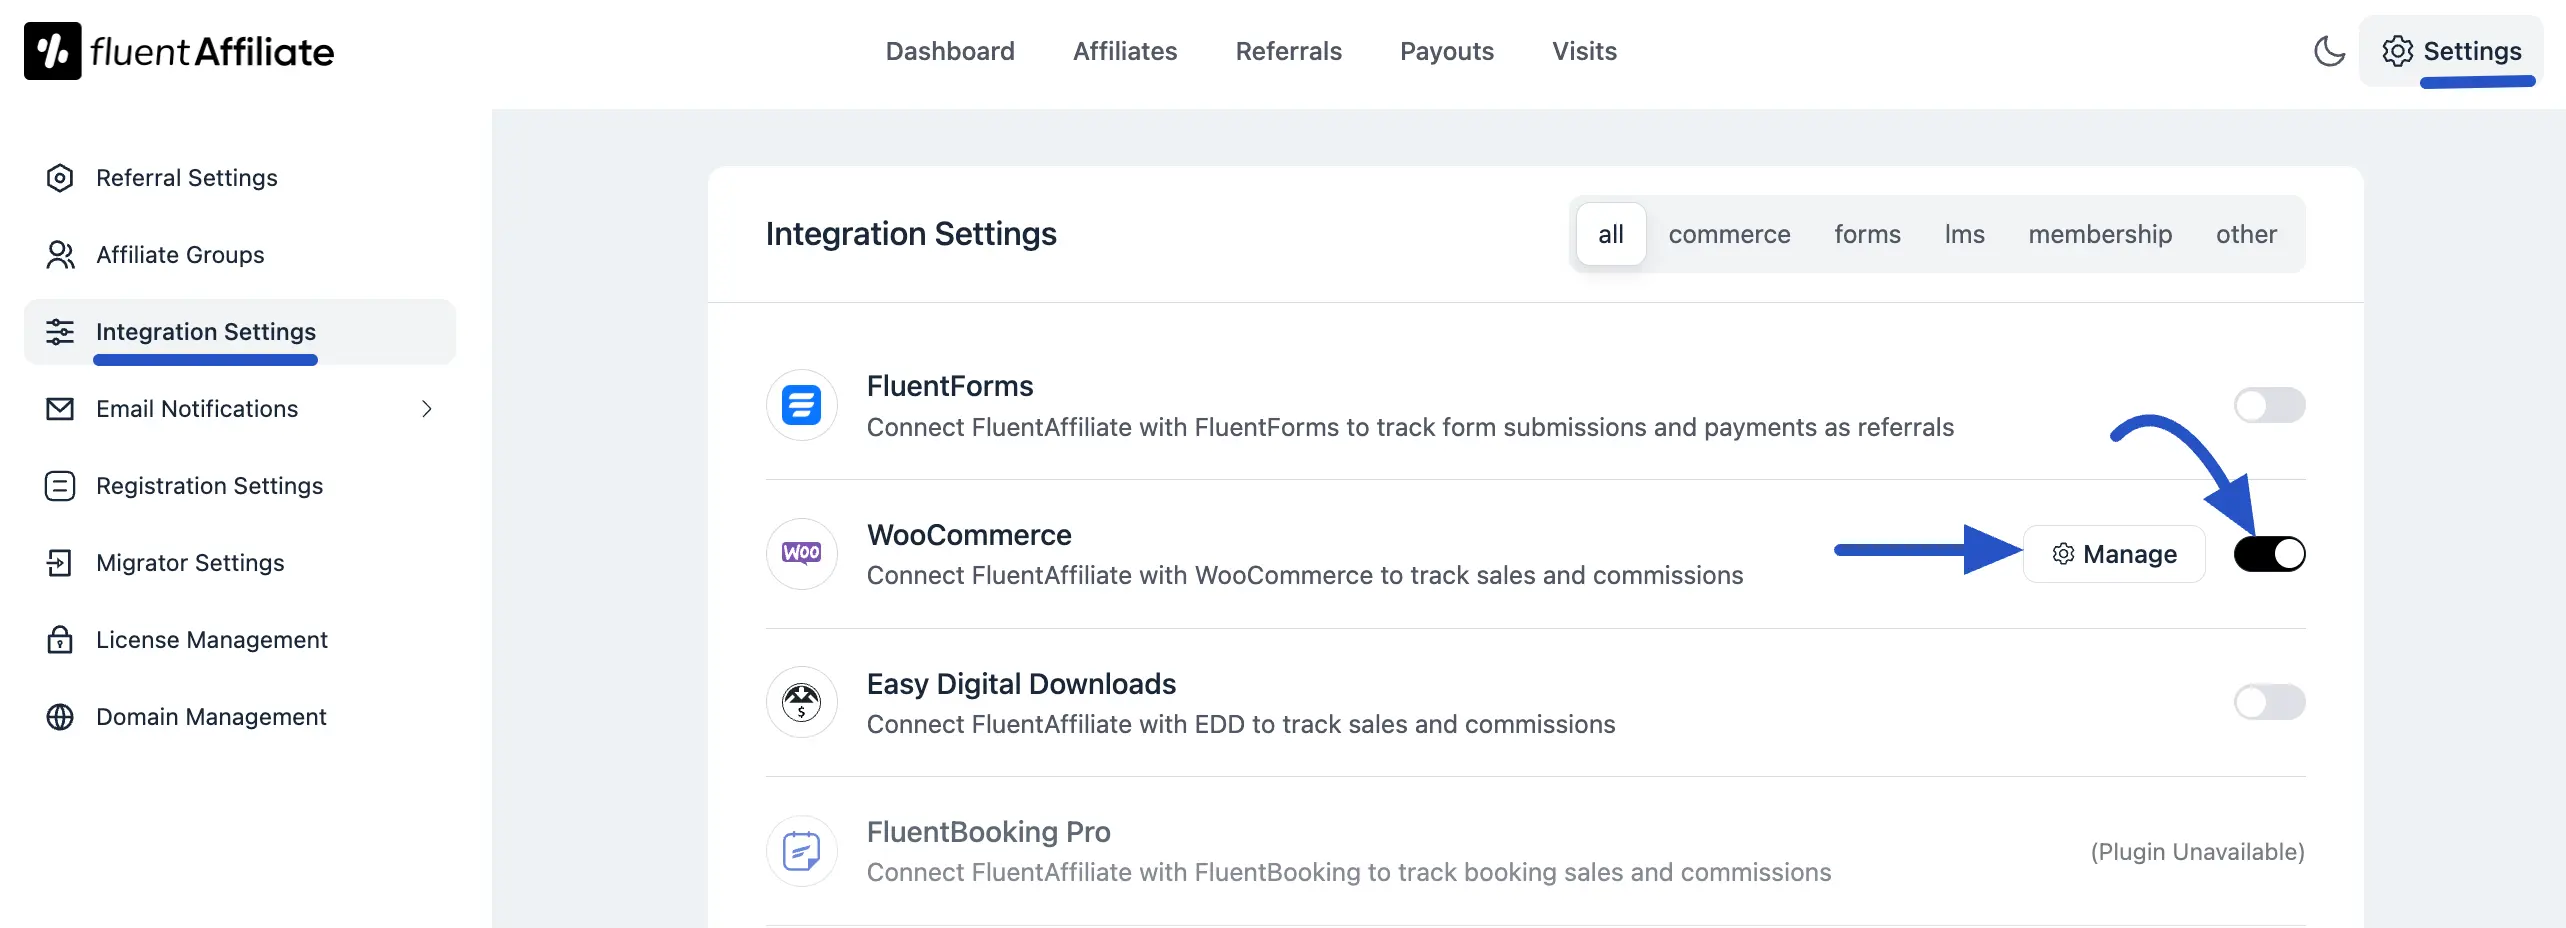
- Go to your FluentAffiliate Dashboard and click on the Settings tab in the top menu.
- From the menu on the left, select Integration Settings.
- You will see a list of available integrations. Find WooCommerce and click the toggle button next to it to turn it on.
Your WooCommerce integration is now active, allowing affiliates to earn referral commissions on your products.
Once the toggle is active, a Manage link will appear. Click this link to configure your WooCommerce-specific affiliate settings.
Configure WooCommerce Settings
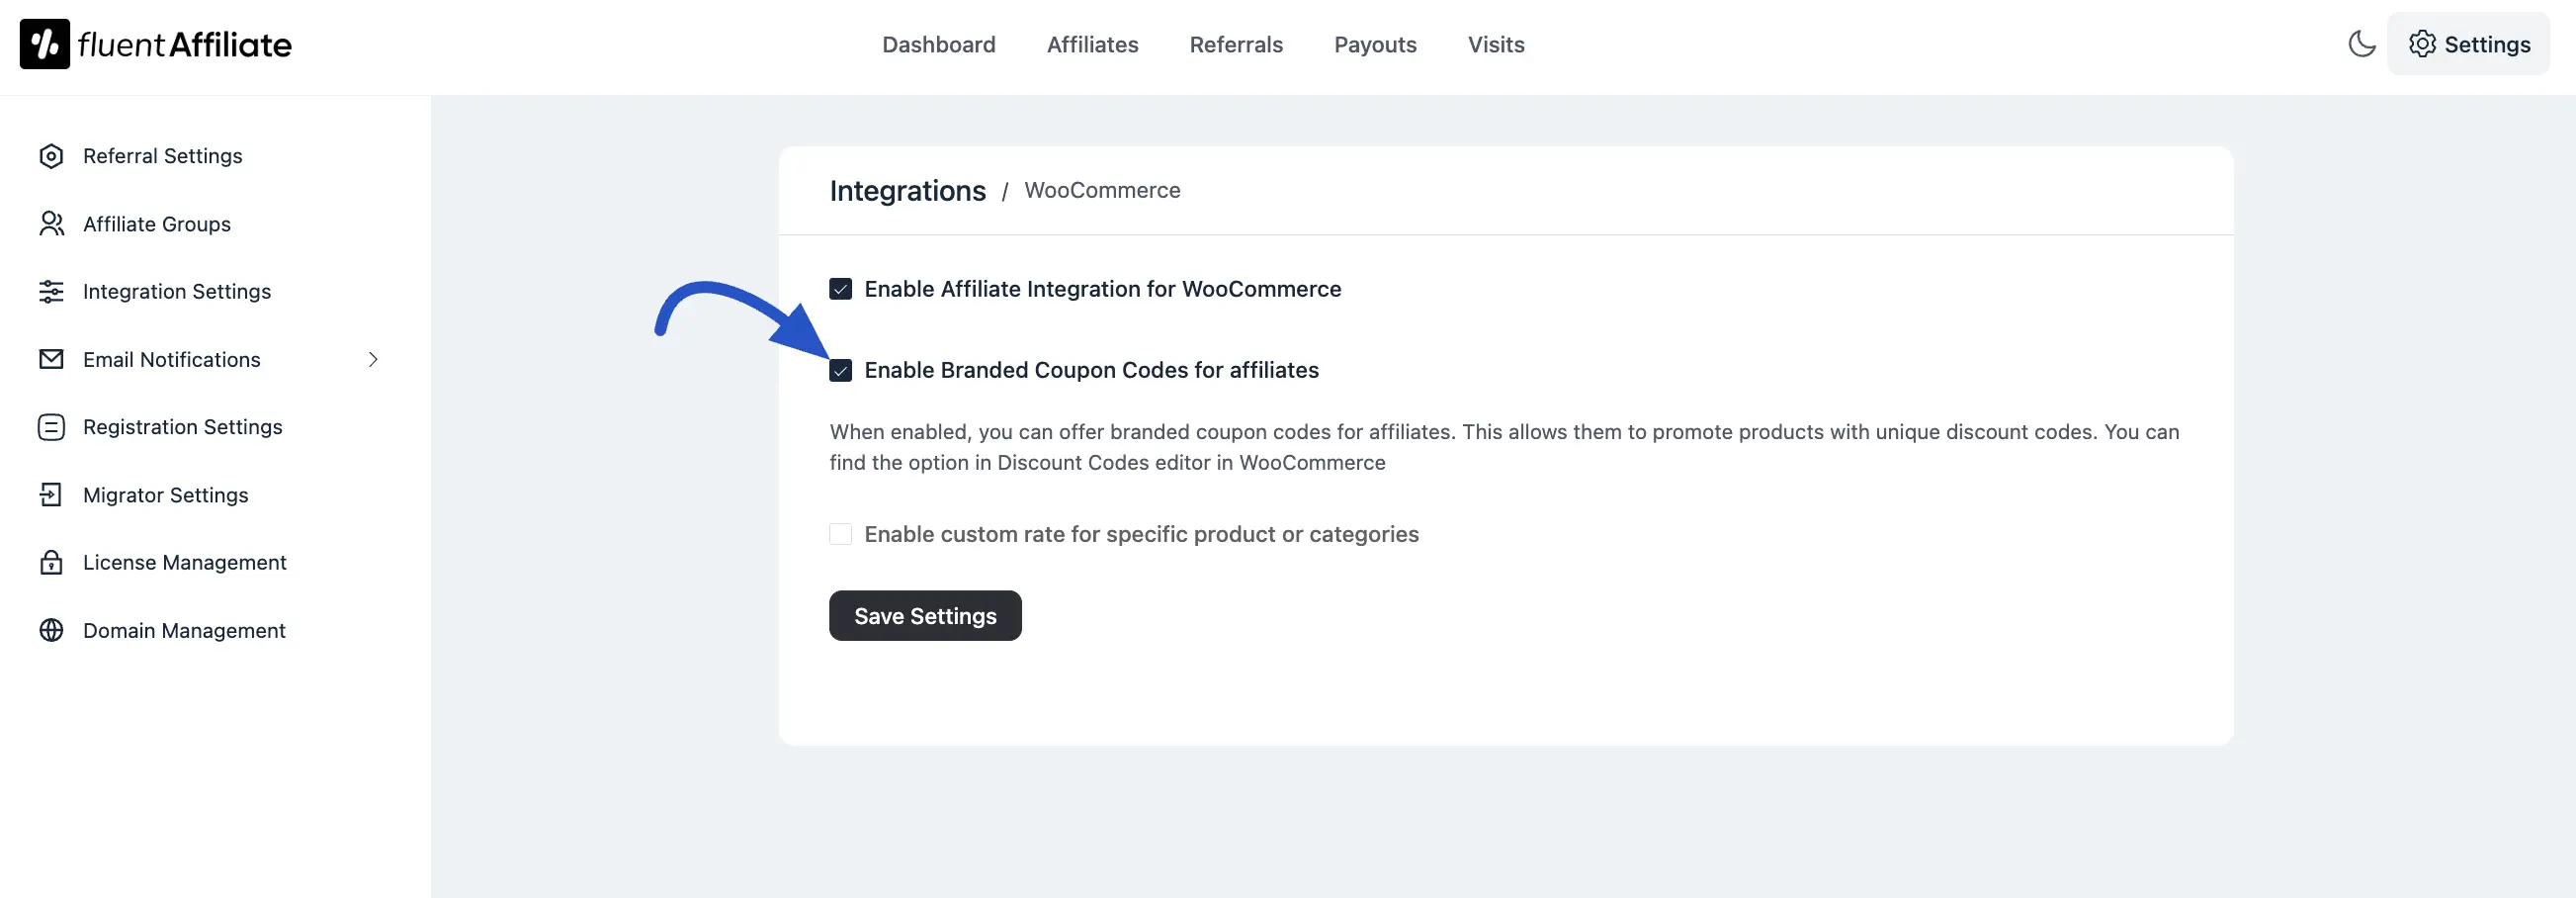
In the management panel, you can fine-tune how commissions work for your WooCommerce store.
Here are the available options:
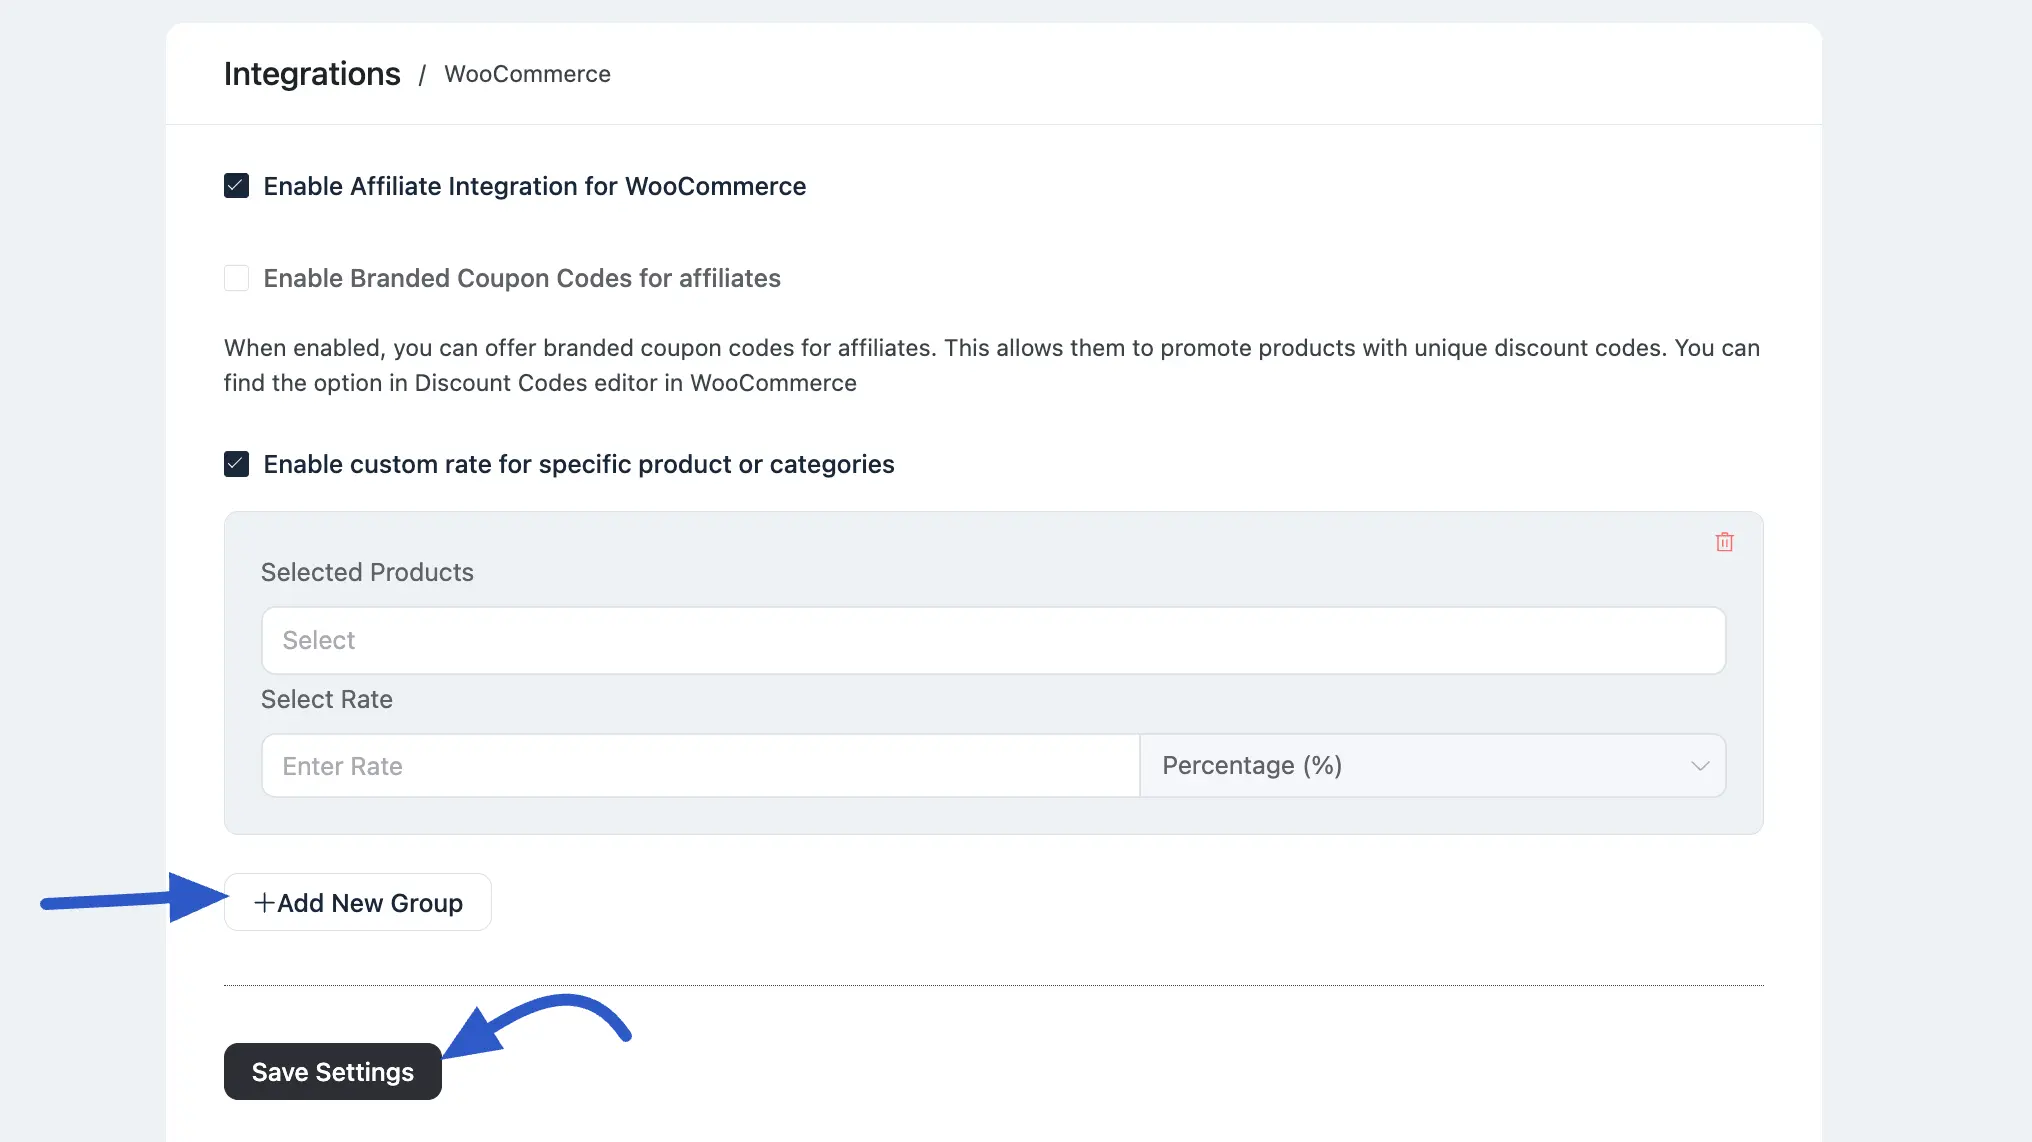
- Enable Affiliate Integration for Woocommerce: This checkbox acts as the master switch for the integration. Ensure it is checked.
- Enable Branded Coupon Codes for affiliates: When you enable this, you can offer branded coupon codes to your affiliates. This allows them to promote products with unique discount codes, giving them another powerful marketing tool. You can manage these codes in the Discount Codes editor in WooCommerce.
For example, this is perfect if you want to give a special coupon code to a social media influencer who is also one of your affiliates.To assign a coupon to a specific affiliate, follow these steps:
From your WordPress dashboard, navigate to Marketing > Coupon Data.
You can either create a new coupon or edit an existing one.
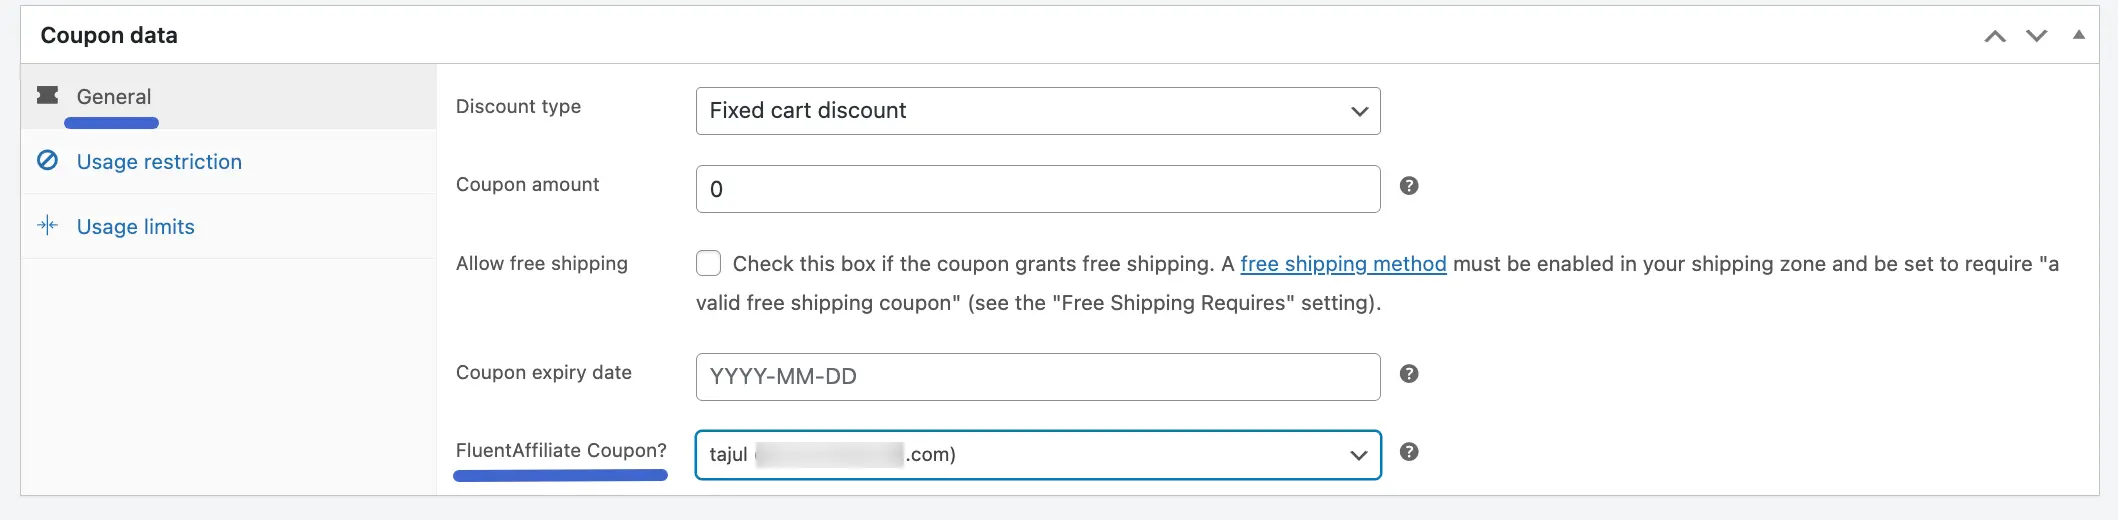
On the coupon editor page, scroll down to find the FluentAffiliate Coupon section.
Click on the dropdown field and select the affiliate's name from the list.
Save the coupon. Now, when this coupon is used for a purchase, the selected affiliate will automatically be credited with the referral.
NOTE
Before you can assign a coupon, the user must already be an approved affiliate in your FluentAffiliate program.
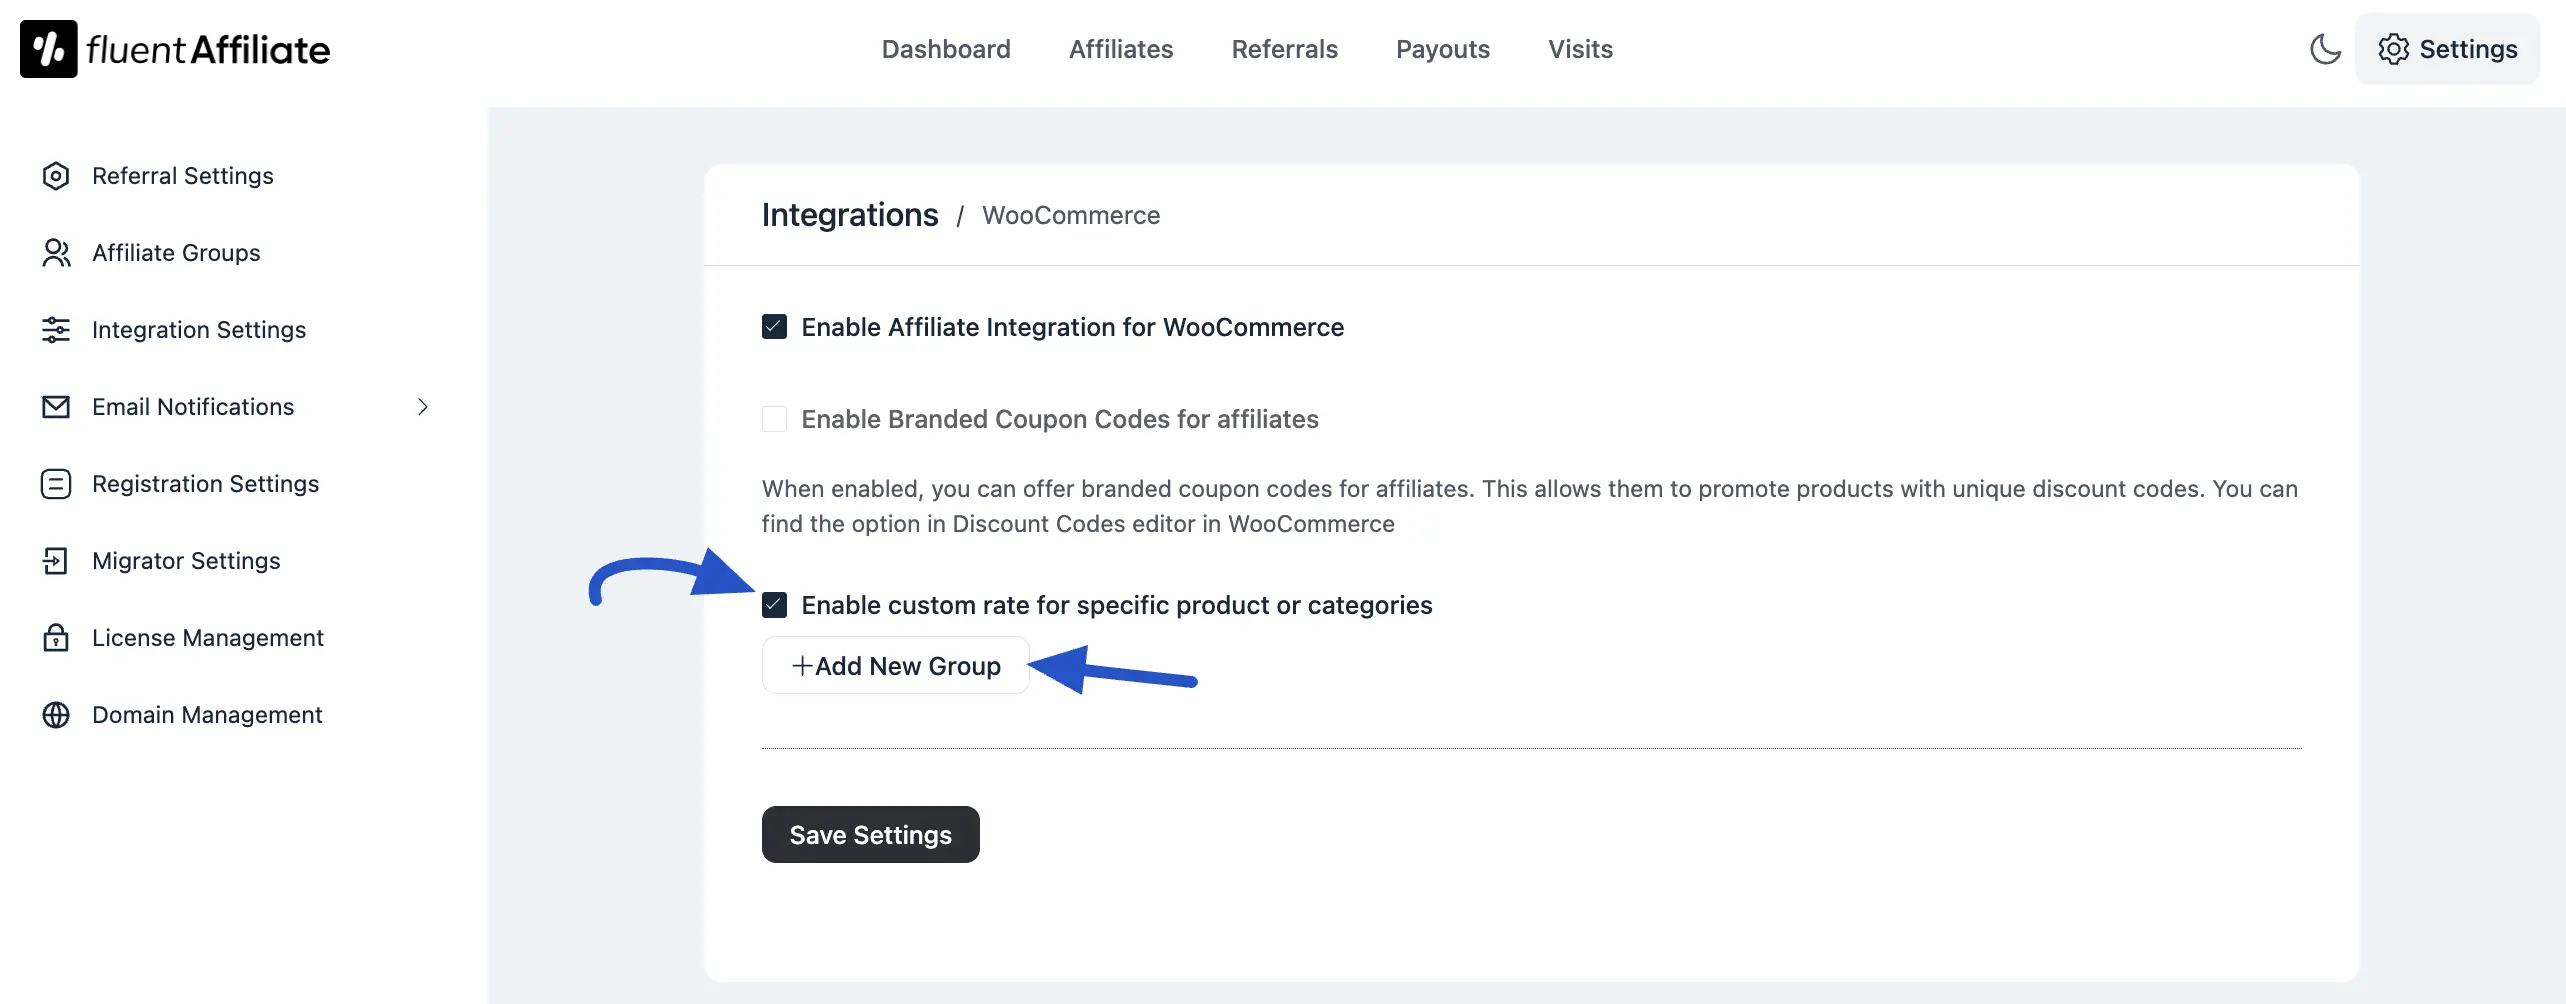
- Enable custom rate for specific product or categories: This is a powerful feature that lets you override your default commission rate. Check this box if you want to set special commission rates for specific products or entire product categories.
After that, click on the +Add New Group button. You will find options to choose how you want to apply this custom rate. You can set it for specific individual products or for entire product categories.
NOTE
This feature gives you the flexibility to offer different commission rates for different products. For example, you could offer a higher commission on a new product as an incentive for affiliates to promote it more heavily.
Select Products: In the Select field, begin typing the name of the product you want to set a custom rate for and choose it from the list.
Select Rate: Enter the new commission value (e.g., 20 for 20% or $20). Next, use the dropdown menu to choose if the rate is a Percentage (%) of the sale or a Fixed dollar amount.
Save Settings: Once you have configured all your custom rates, click the Save Settings button to make them live.
You can select multiple custom rate types for products or categories by clicking the + Add New Group button. Also, you can delete the affiliate rates by clicking the delete icon in the top right corner.
Generate an Affiliate Link
Once you've finished setting up your Woocommerce product settings, it's time to generate your affiliate link.
Whenever a customer makes a purchase through this link, the affiliate will earn a commission based on the rates you’ve set up.
Troubleshooting Common Issues
If you encounter any issues, here are some solutions to common problems:
Affiliate Links Not Generating: Verify that the product URL you are using is correct and the page is publicly accessible.
Conflicting Rates: If a product-specific rate isn't being applied as expected, review your rules to ensure there isn't an overlap with a category-wide rate that might be taking precedence.