Appearance
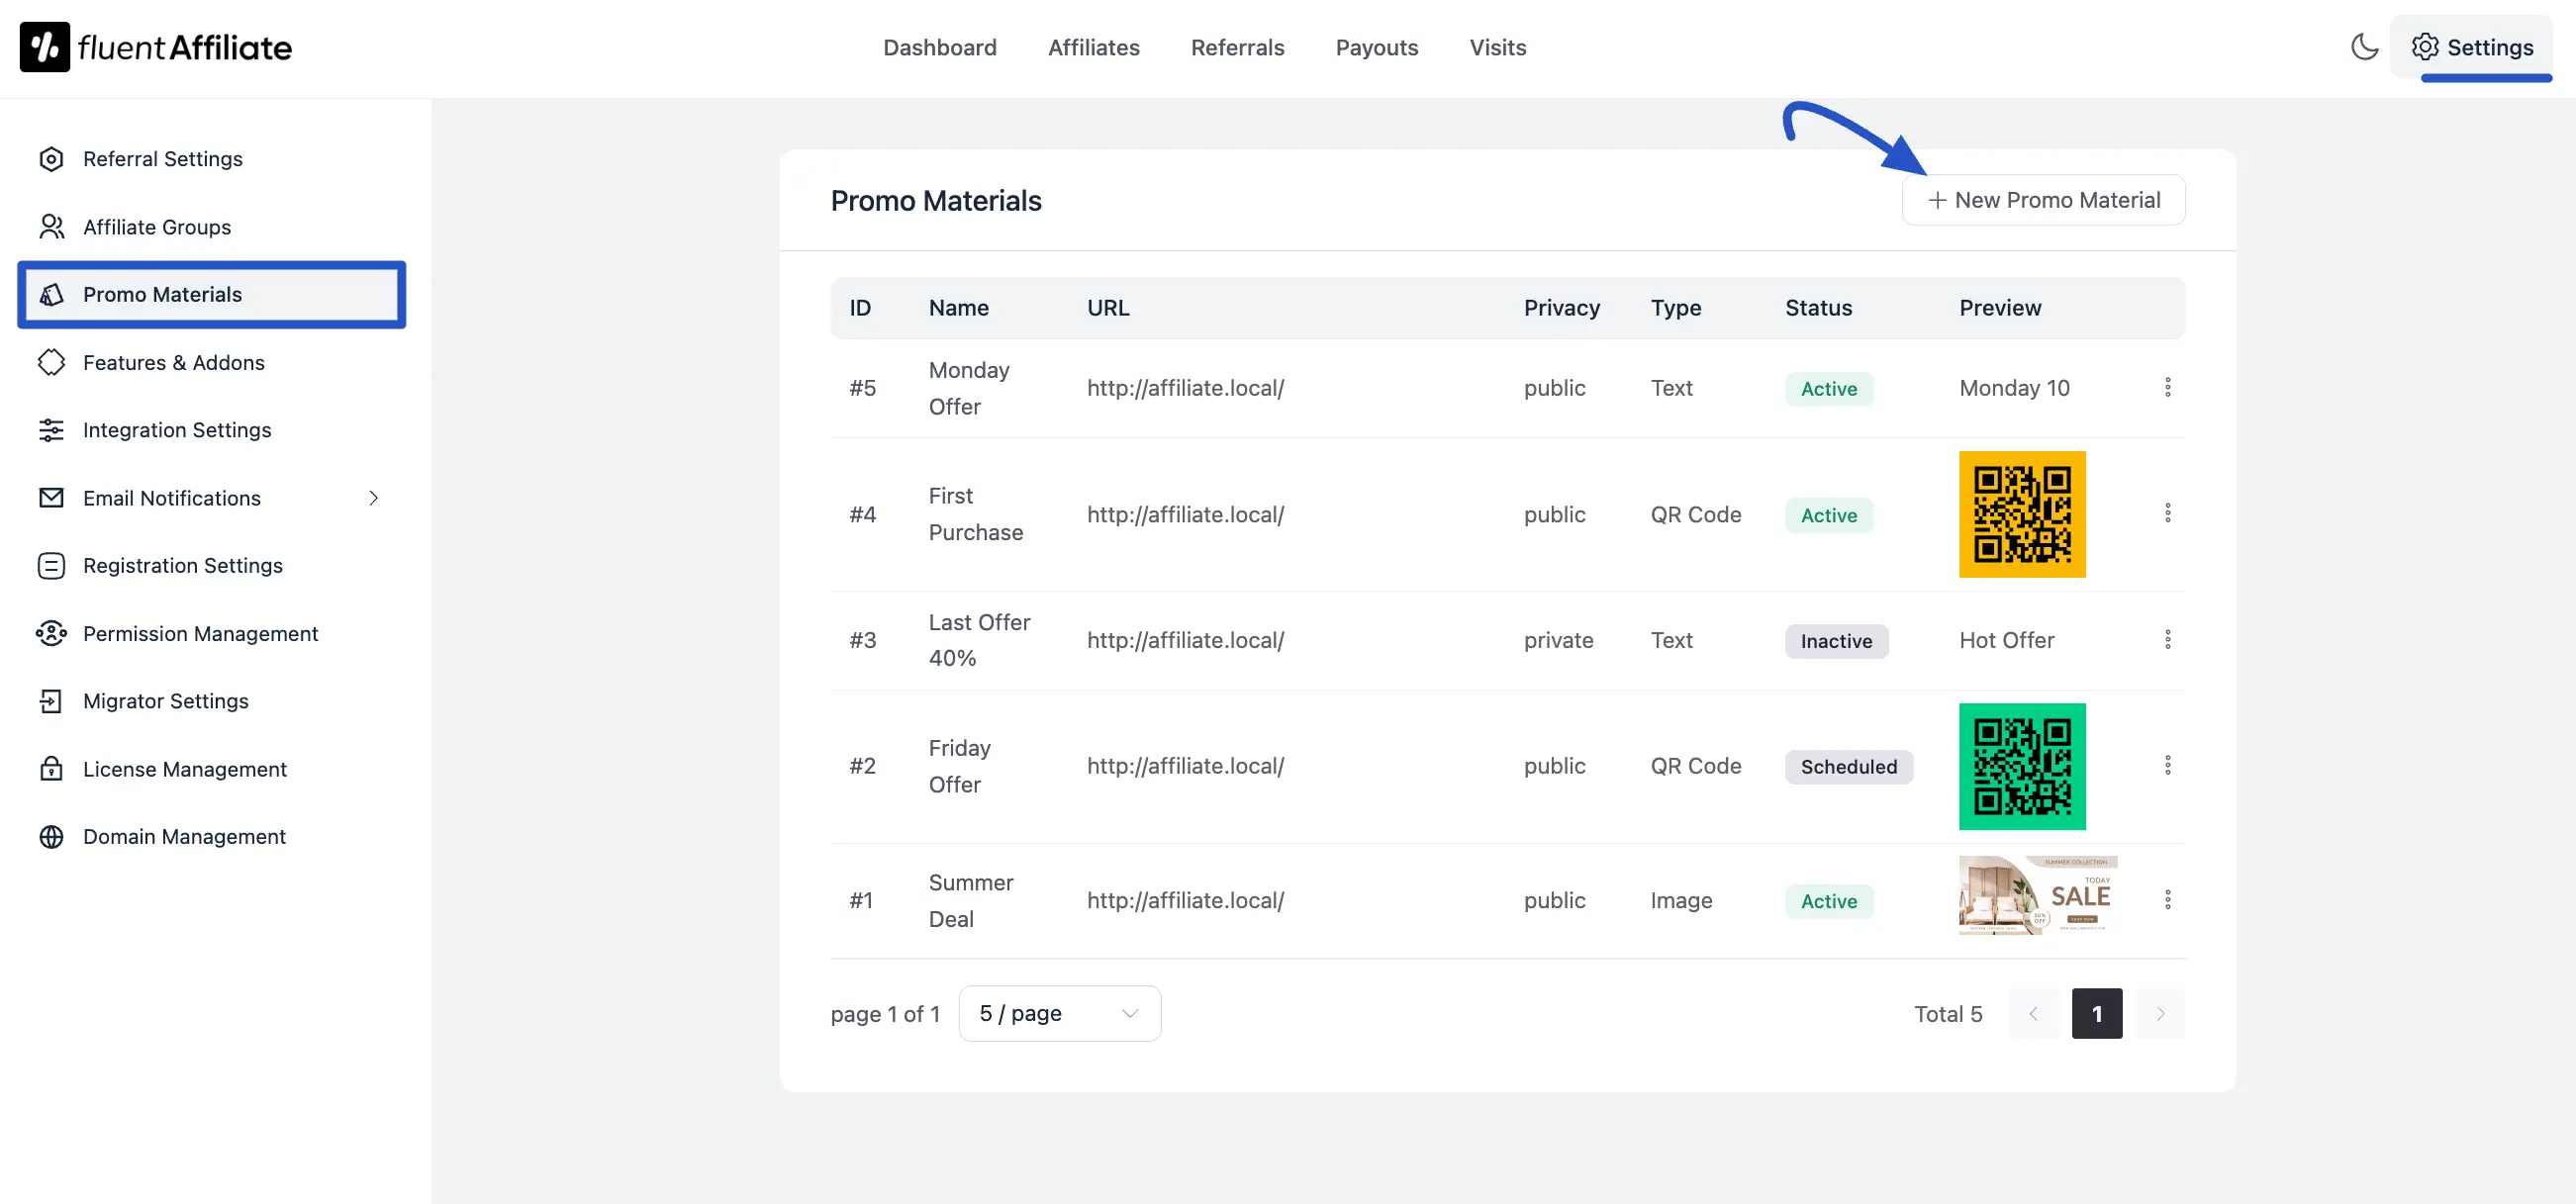
Promo Materials
The Promo Materials feature is like a toolbox where you can store all the promotional items you want to give to your affiliates. Instead of sending things like banners, ads, or links to each person one by one, you just add them to this single spot.
When your affiliates log in, they can find these ready-made items. They just need to copy a text link, an image, or a QR code to share with their audience. We automatically include their special tracking link, so you'll always know they get credit for any sales they send your way.
Accessing Promo Materials
You can find this new feature right in your FluentAffiliate settings.
- Go to your WordPress dashboard.
- Navigate to FluentAffiliate → Settings.
- Click on Promo Materials from the left-hand menu.
Here, you'll see a dashboard where all your created assets will be listed.
Creating a New Promo Material
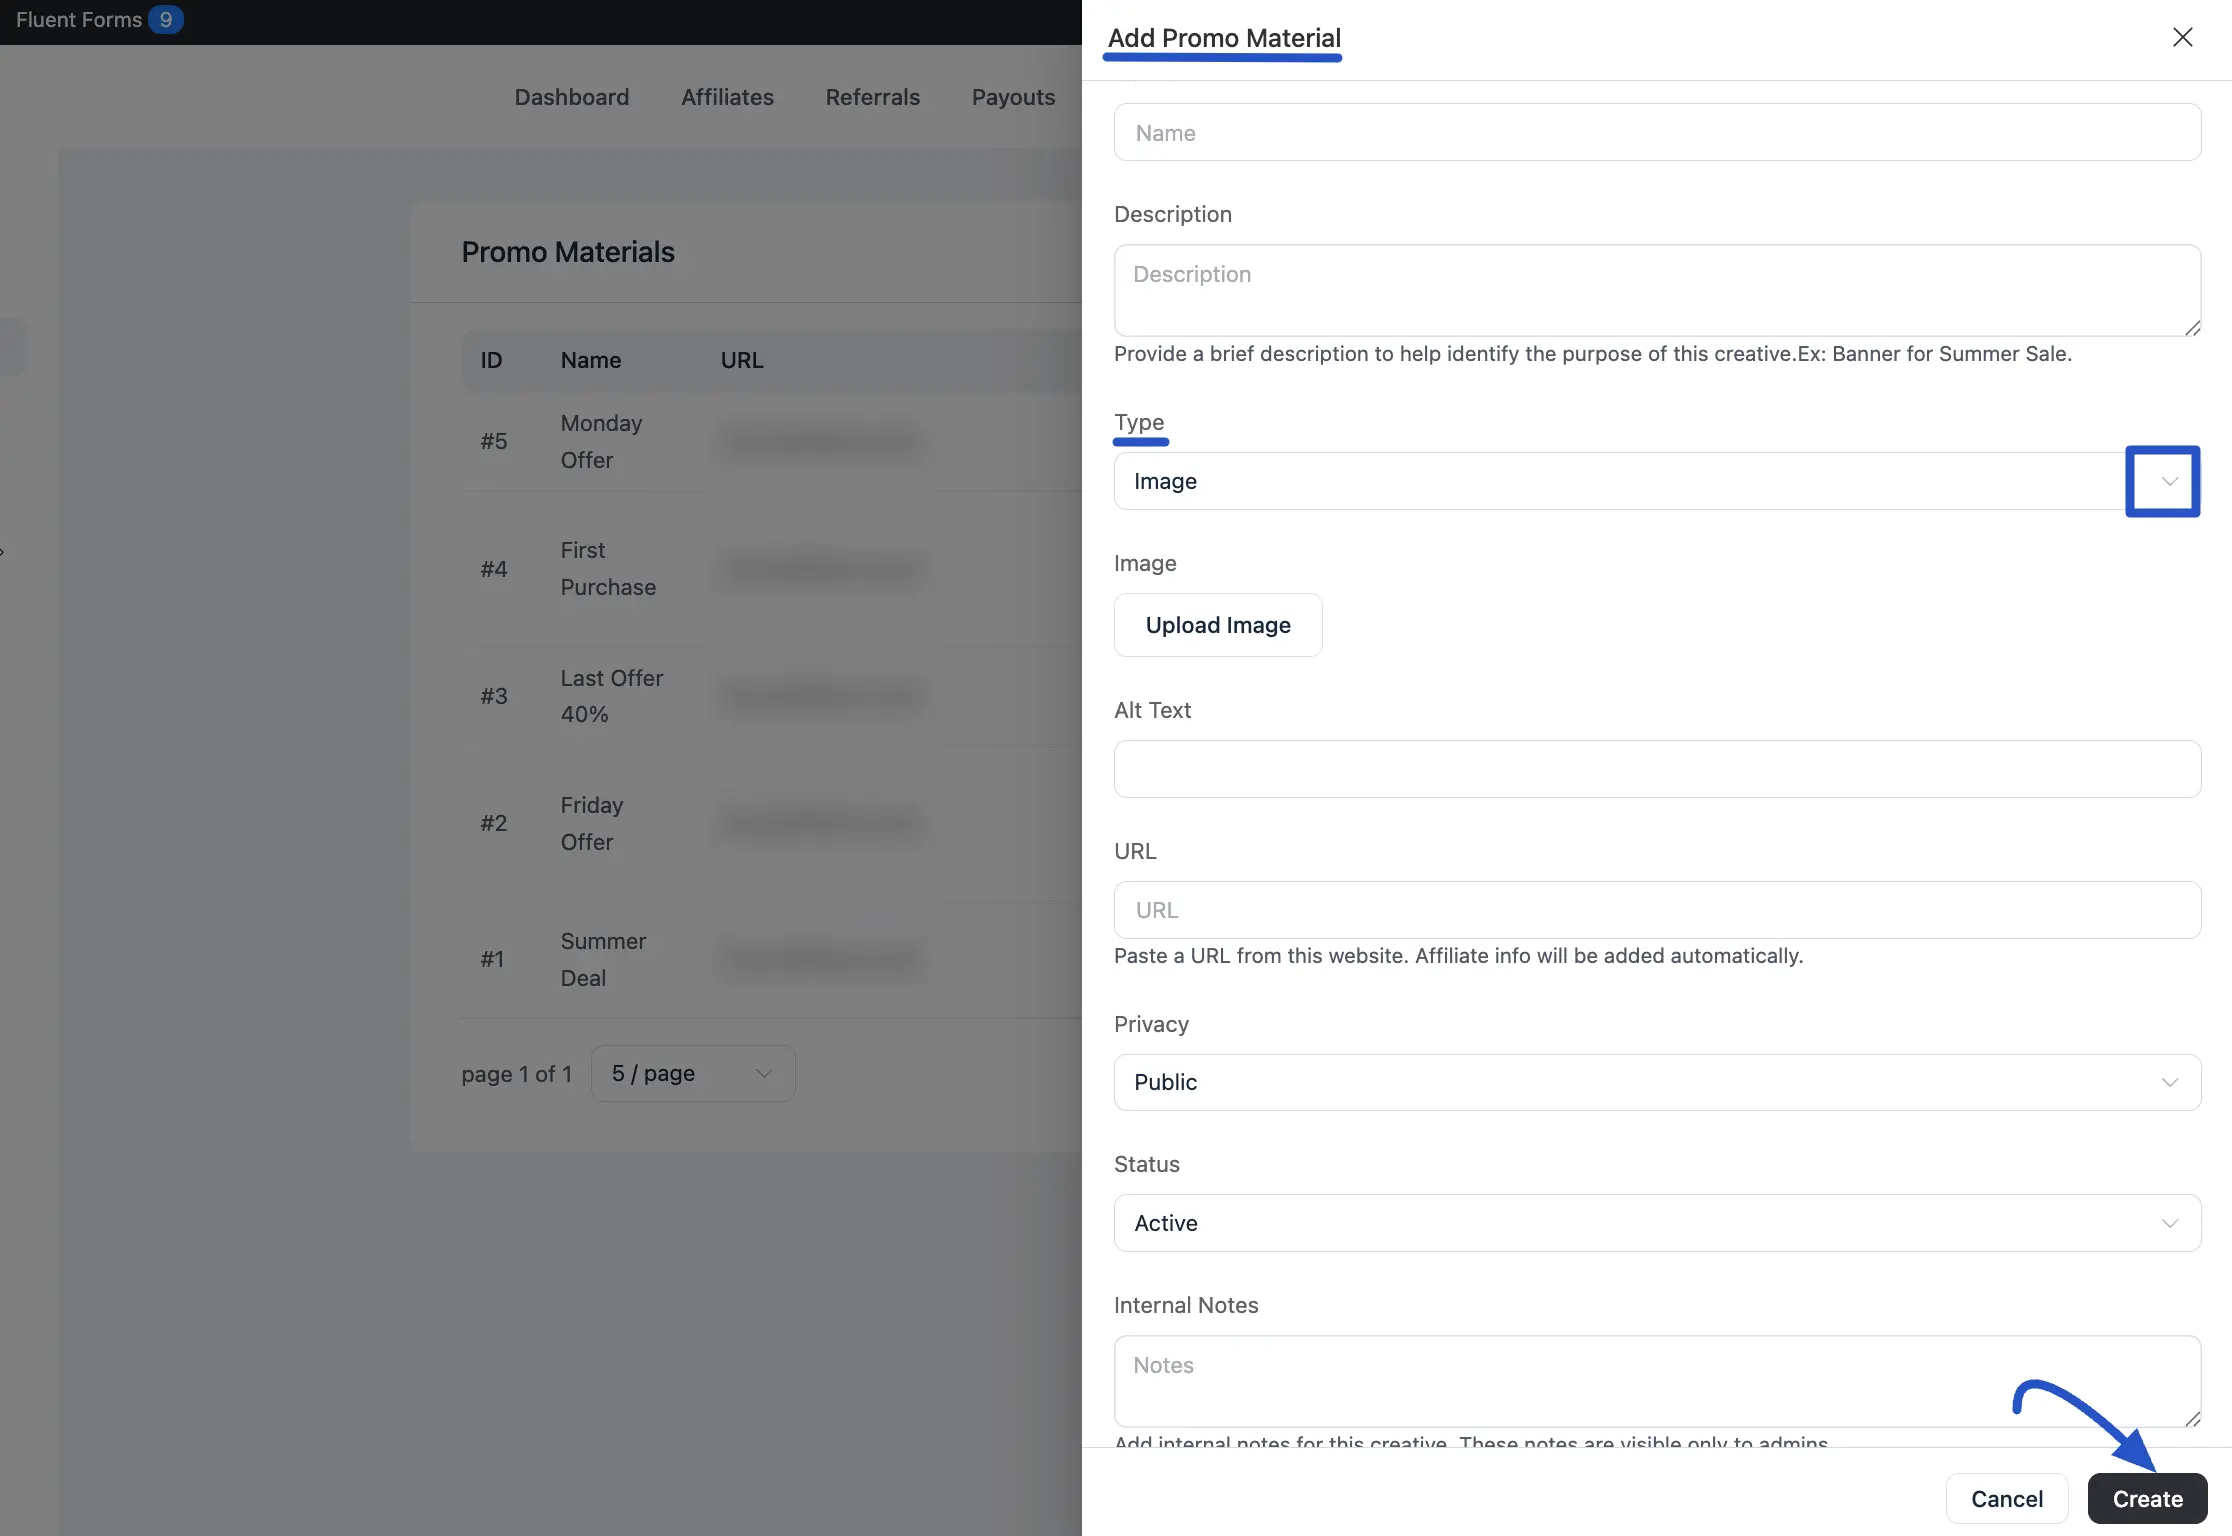
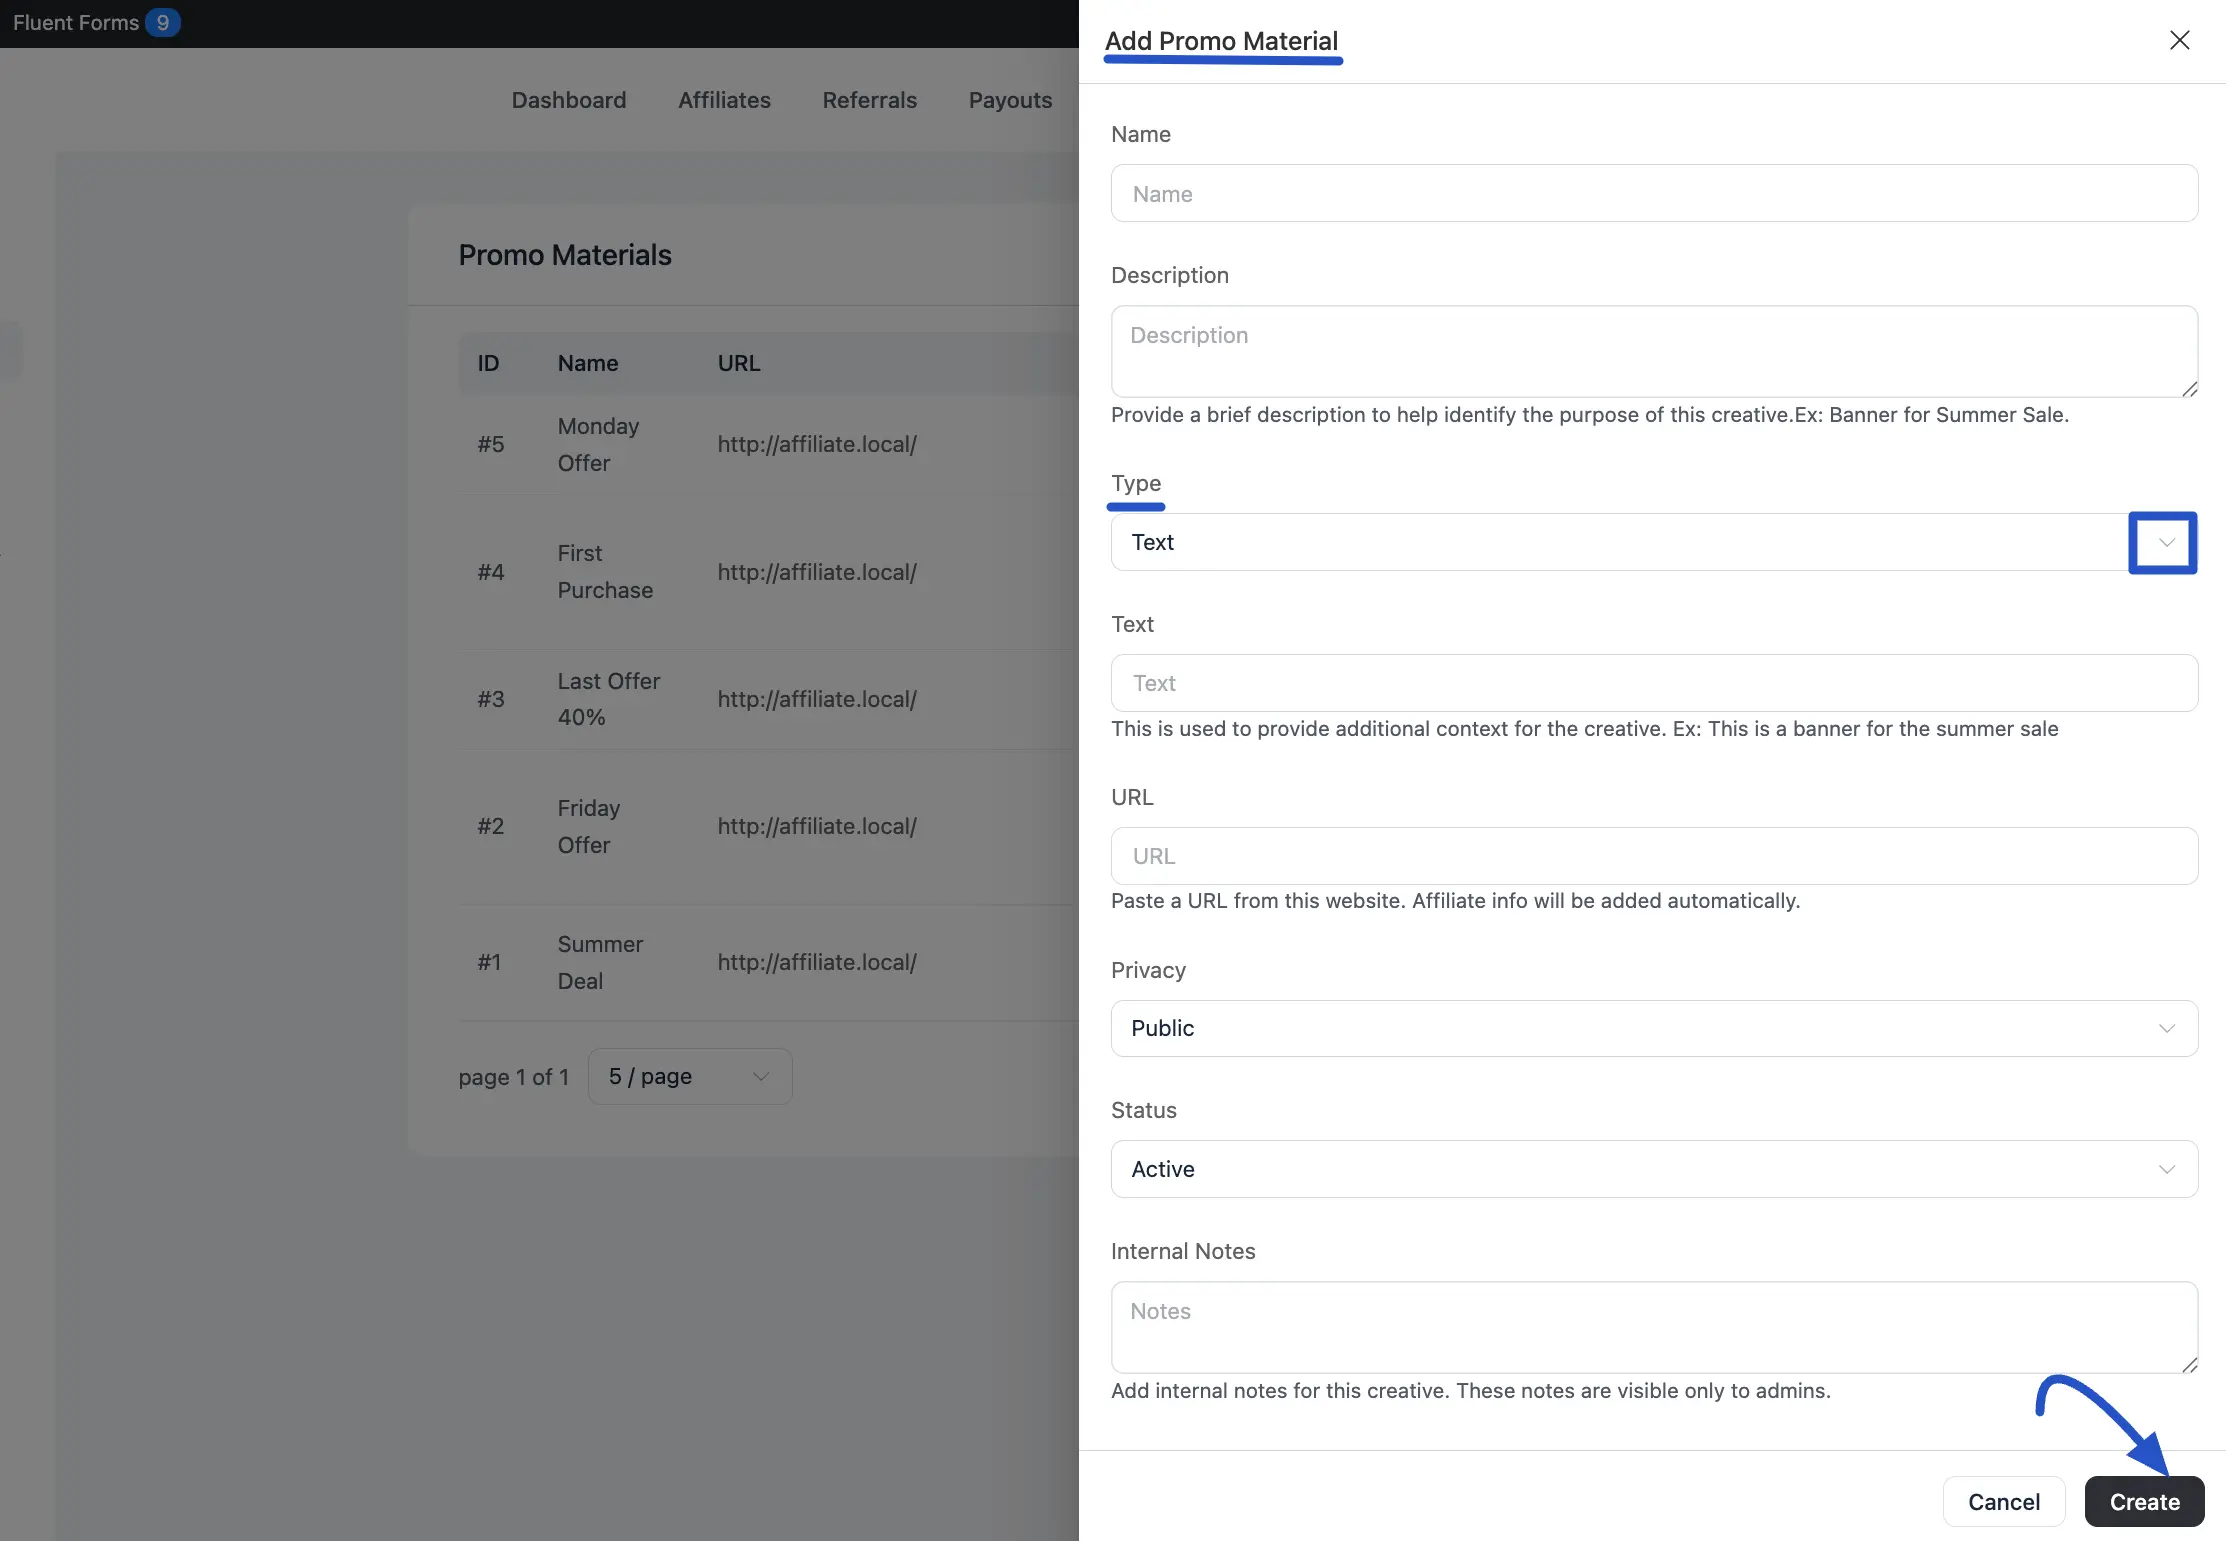
To get started, simply click the + New Promo Material button. A form will slide in from the right where you can set up your new promotional material.
Here’s a breakdown of the fields:
- Name: Give your creative a clear, recognizable name (e.g., "Summer Sale - Text Link" or "Ebook Launch QR Code").
- Description: Add a short description to let your affiliates know what this creative is for.
- Type: Choose the kind of creative you want to make. You can select from the dropdown options like Image, Text, or QR Code.
Image Type
When you select Image, a couple of new options will appear:
- Image: Click here to upload your banner or promotional graphic from your media library.
- Alt Text: Describe the image. This is important for accessibility and helps search engines understand what the image is about.
Text Type
Under Type, select Text from the dropdown menu. A new Text field will appear. Here, you can enter the text you want the link to display, for example, "Summer Sale".
QR Code Type
From the Type dropdown menu, select QR Code. As soon as you do, a QR code will be instantly generated for you.
Next, you can customize its appearance to match your brand:
- QR Code Color: Click the color plate to open a color picker and change the color of the QR code itself.
- Background Color: Click this plate to change the background color.
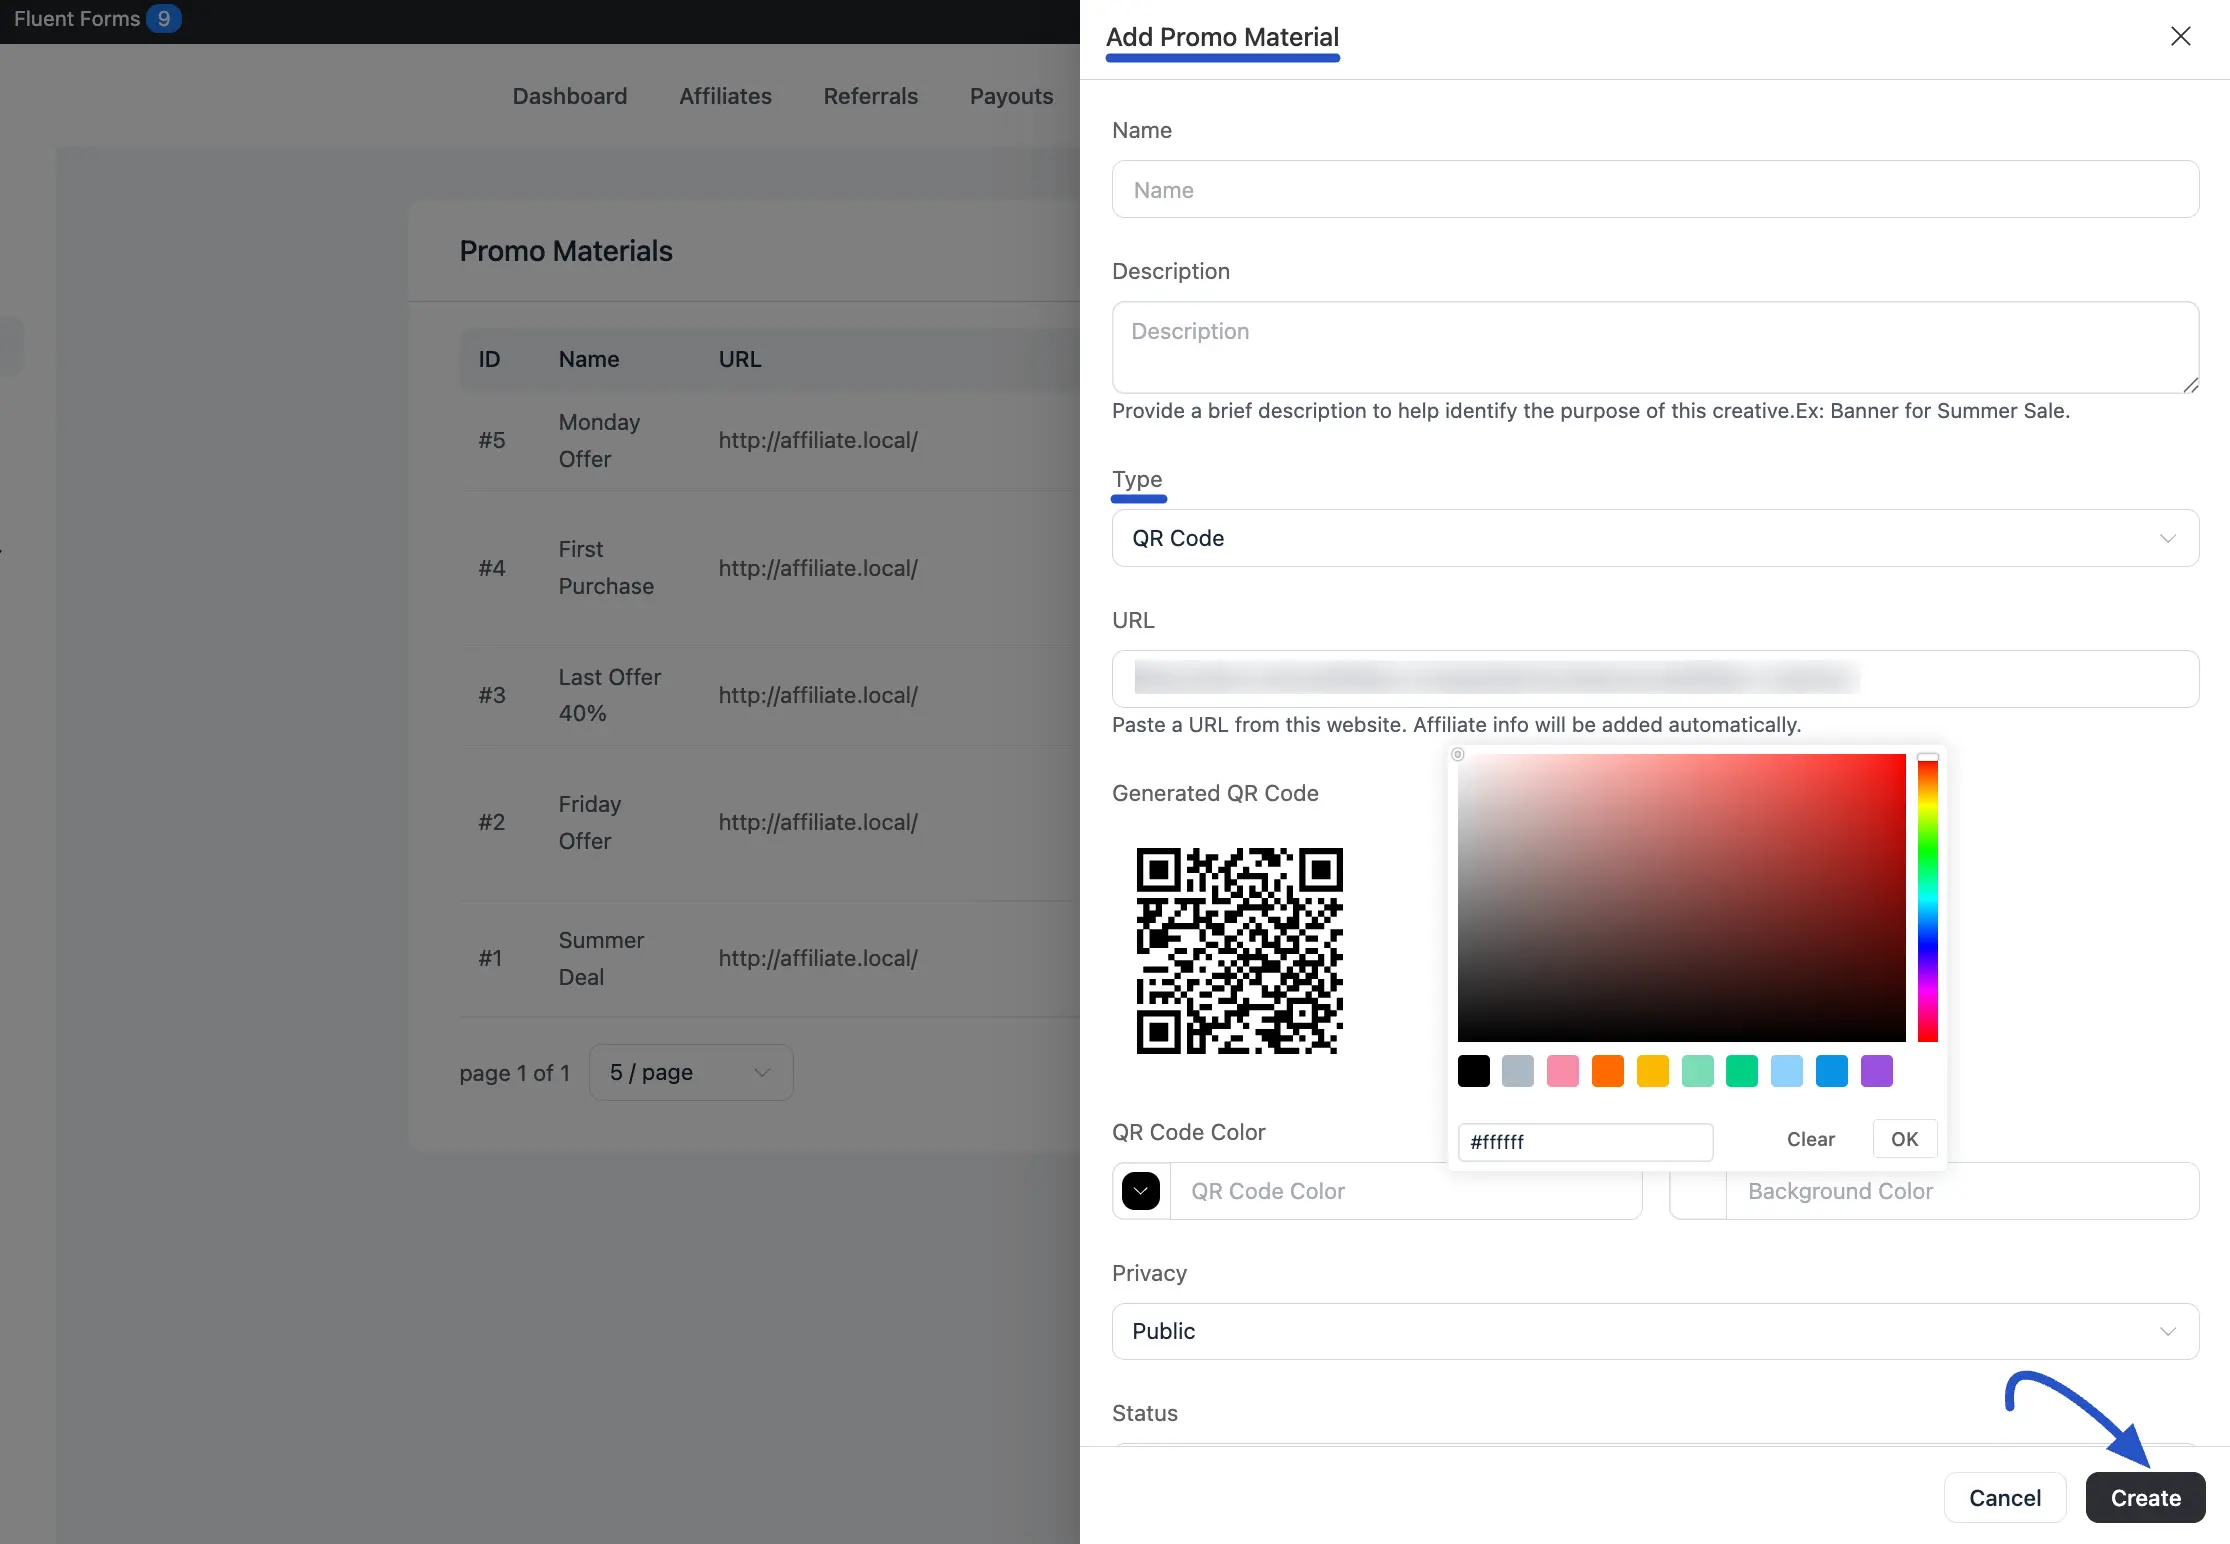
URL: Enter the destination link. This is the webpage where customers will land after clicking or scanning the creative.
Privacy: This is a key setting that controls who can see and use this creative. You have two options:
- Public: The promo will be available to all of your affiliates.
- Private: The promo will only be visible to specific affiliates or to affiliates within a selected group. When you choose ‘Private,’ new fields will appear where you can select the group or individual affiliates you want to share it with.
Status: Set the creative to Active to make it available, or Inactive to hide it.
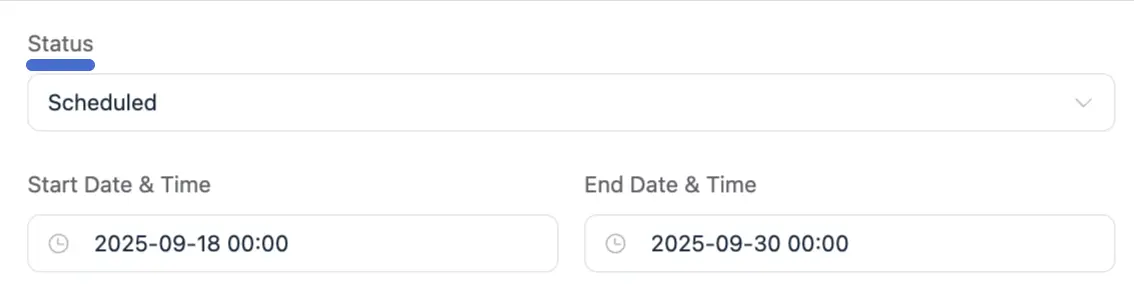
Schedule Your Promo Materials: Do you have a special promotion that runs for a limited time, such as a holiday sale or a product launch? You can schedule your promos to become active and inactive on specific dates automatically. This helps ensure your affiliates are only promoting offers that are currently available. To set a schedule for a promo, follow these simple steps:
- Set the Status: First, find the Status dropdown menu and select the Scheduled option.
- Choose a Start Date & Time: Once you select "Scheduled," a Start Date & Time field will appear. Click on it to open a calendar and choose the exact date and time you want the creative to become visible to your affiliates.
- Choose an End Date & Time: Next, click on the End Date & Time field. This is when the promo will automatically be hidden from your affiliates' dashboards.
- Internal Notes: Add any private notes for yourself or other admins. These are not visible to affiliates.
Once you’ve filled everything out, click the Create button to save it.
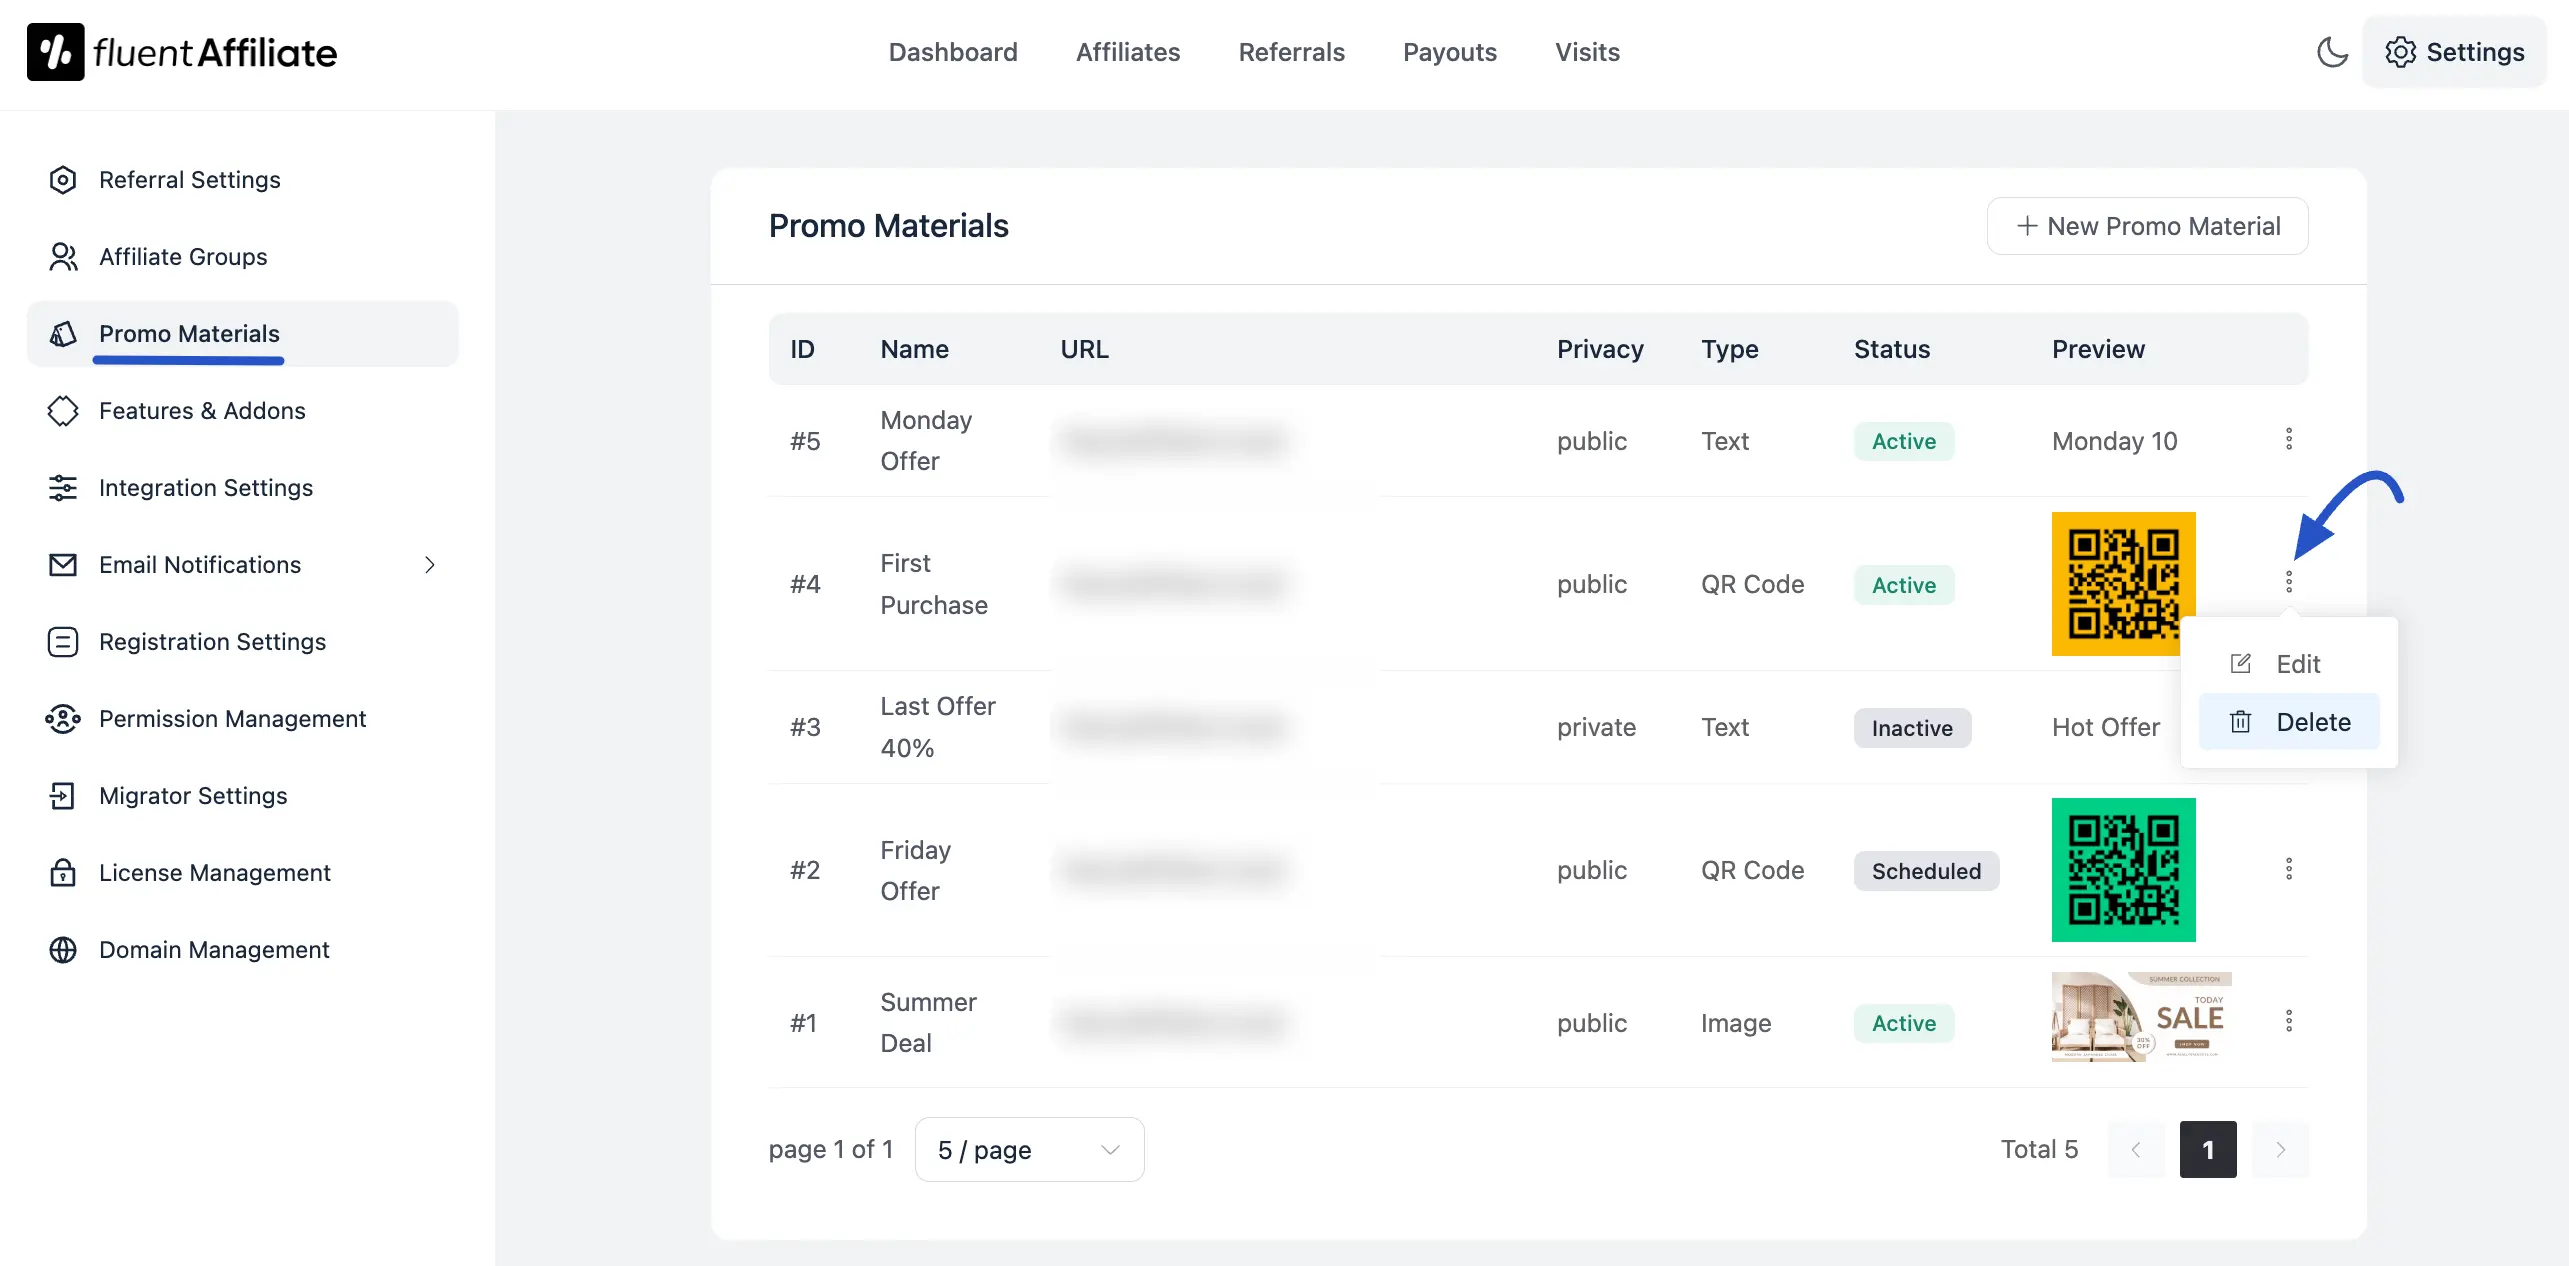
Managing Your Promo Materials
After you create items, they will appear in a list on the main Promo Materials page. From this table, you can see all your assets at a glance, including their ID, Name, URL, Privacy, Type, Status, and a Preview.
- Edit or Delete: To make changes or remove an item, click on the three dots at the end of the row and select Edit or Delete.
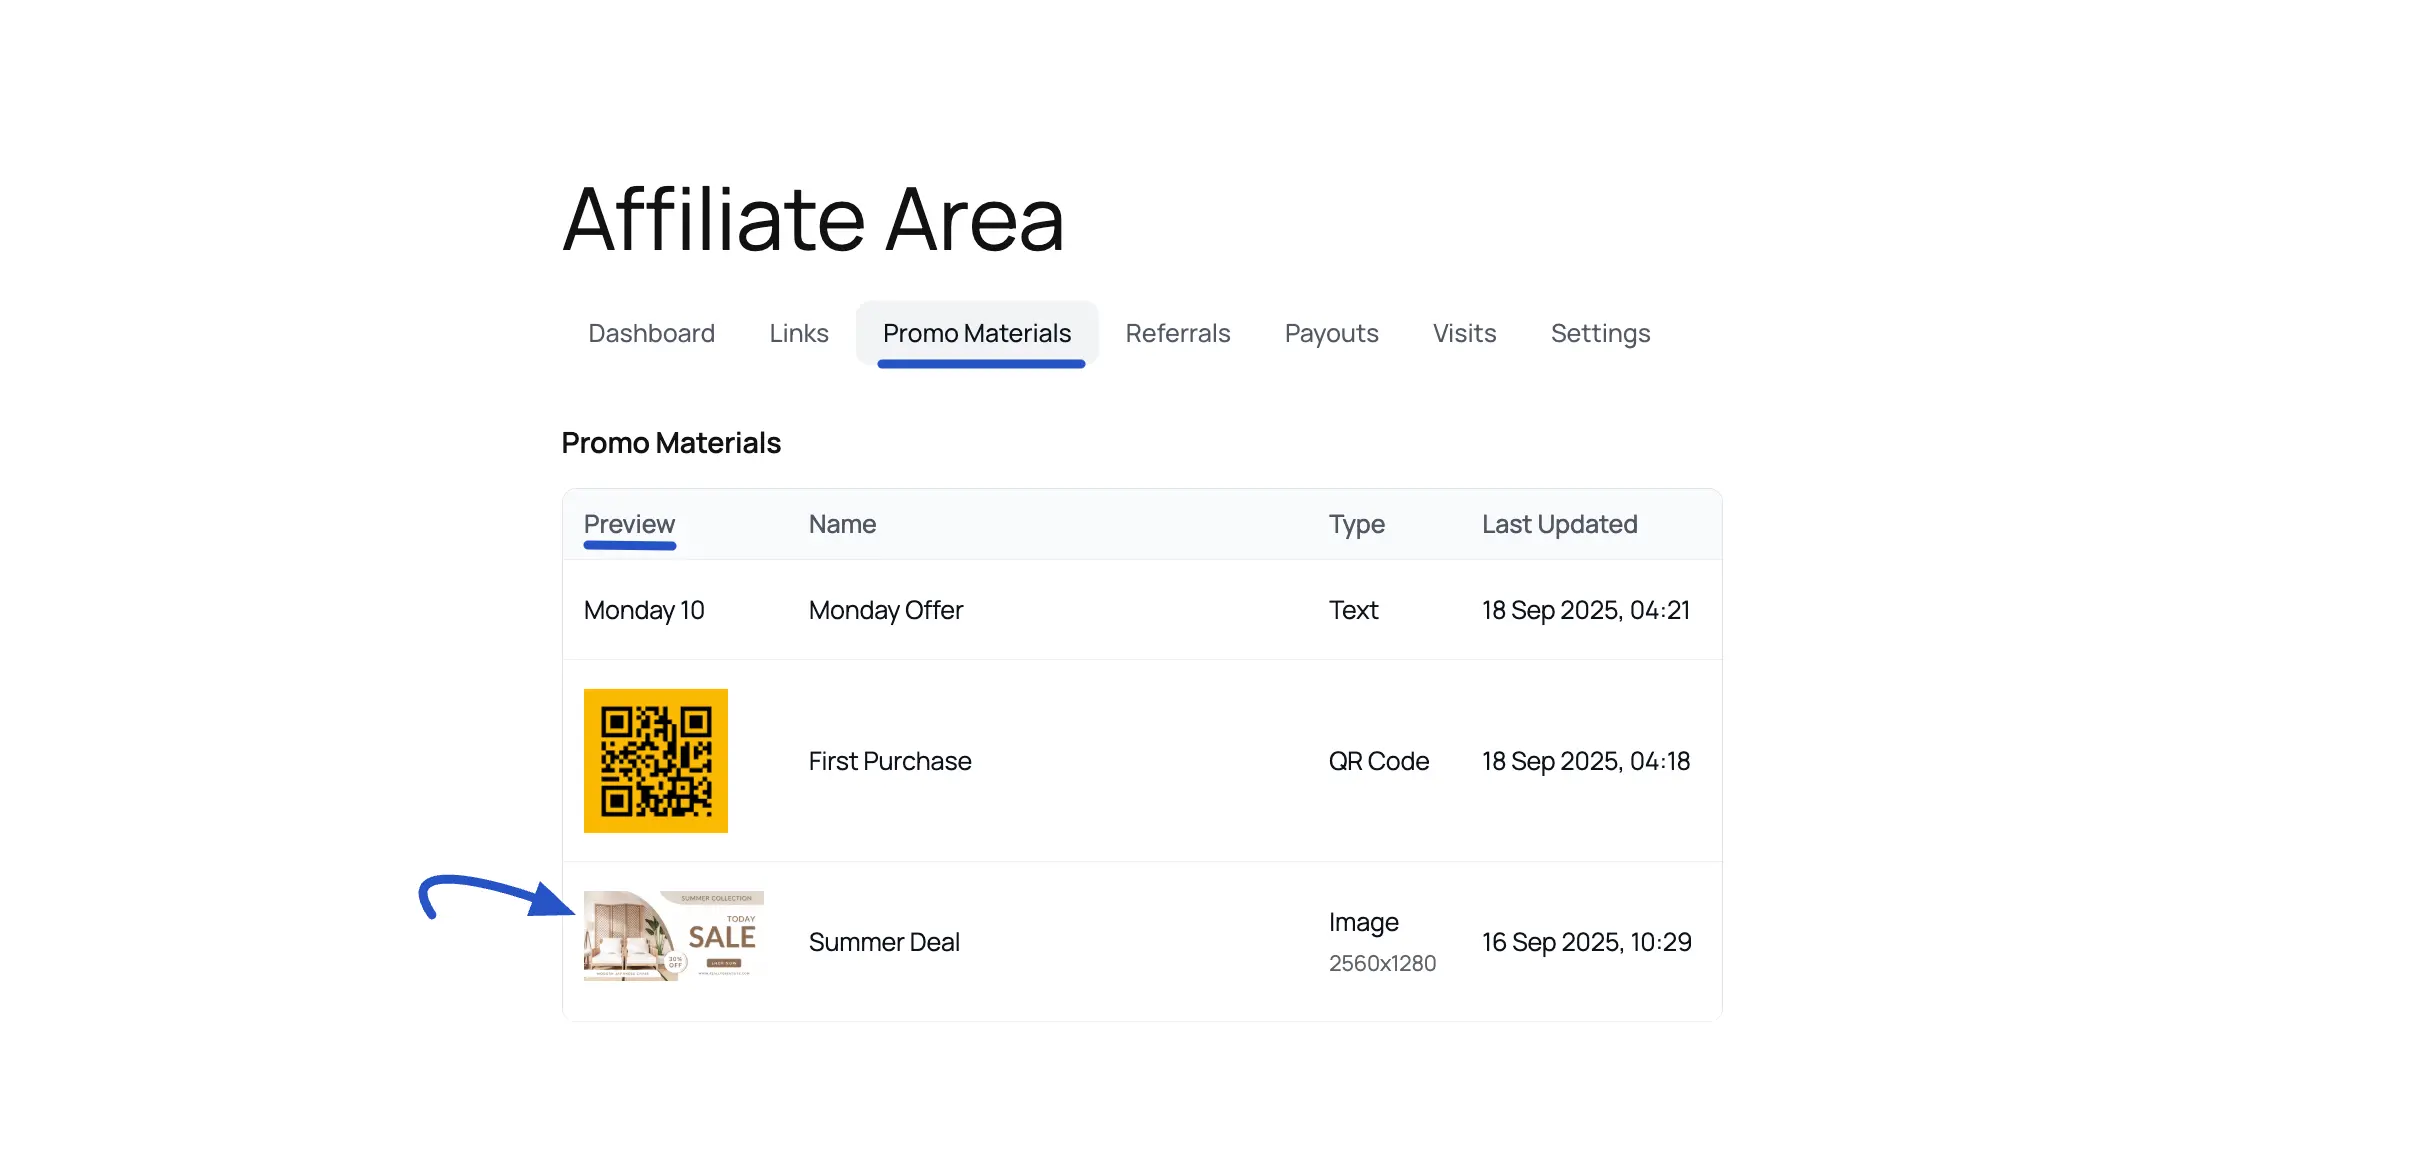
Viewing and Using Promo Materials (Affiliate View)
As an affiliate, you have access to ready-to-use materials prepared by the site owner.
- Go to the Promo Materials Section: Log in to your affiliate account in the Affiliate Area and click on the Promo Materials tab.
- Choose an Item: On this page, you will see a list of available materials with a Preview, Name, Type, and when it was Last Updated.
- Get the Code or Image: Click on the name or preview of the material you want to use.
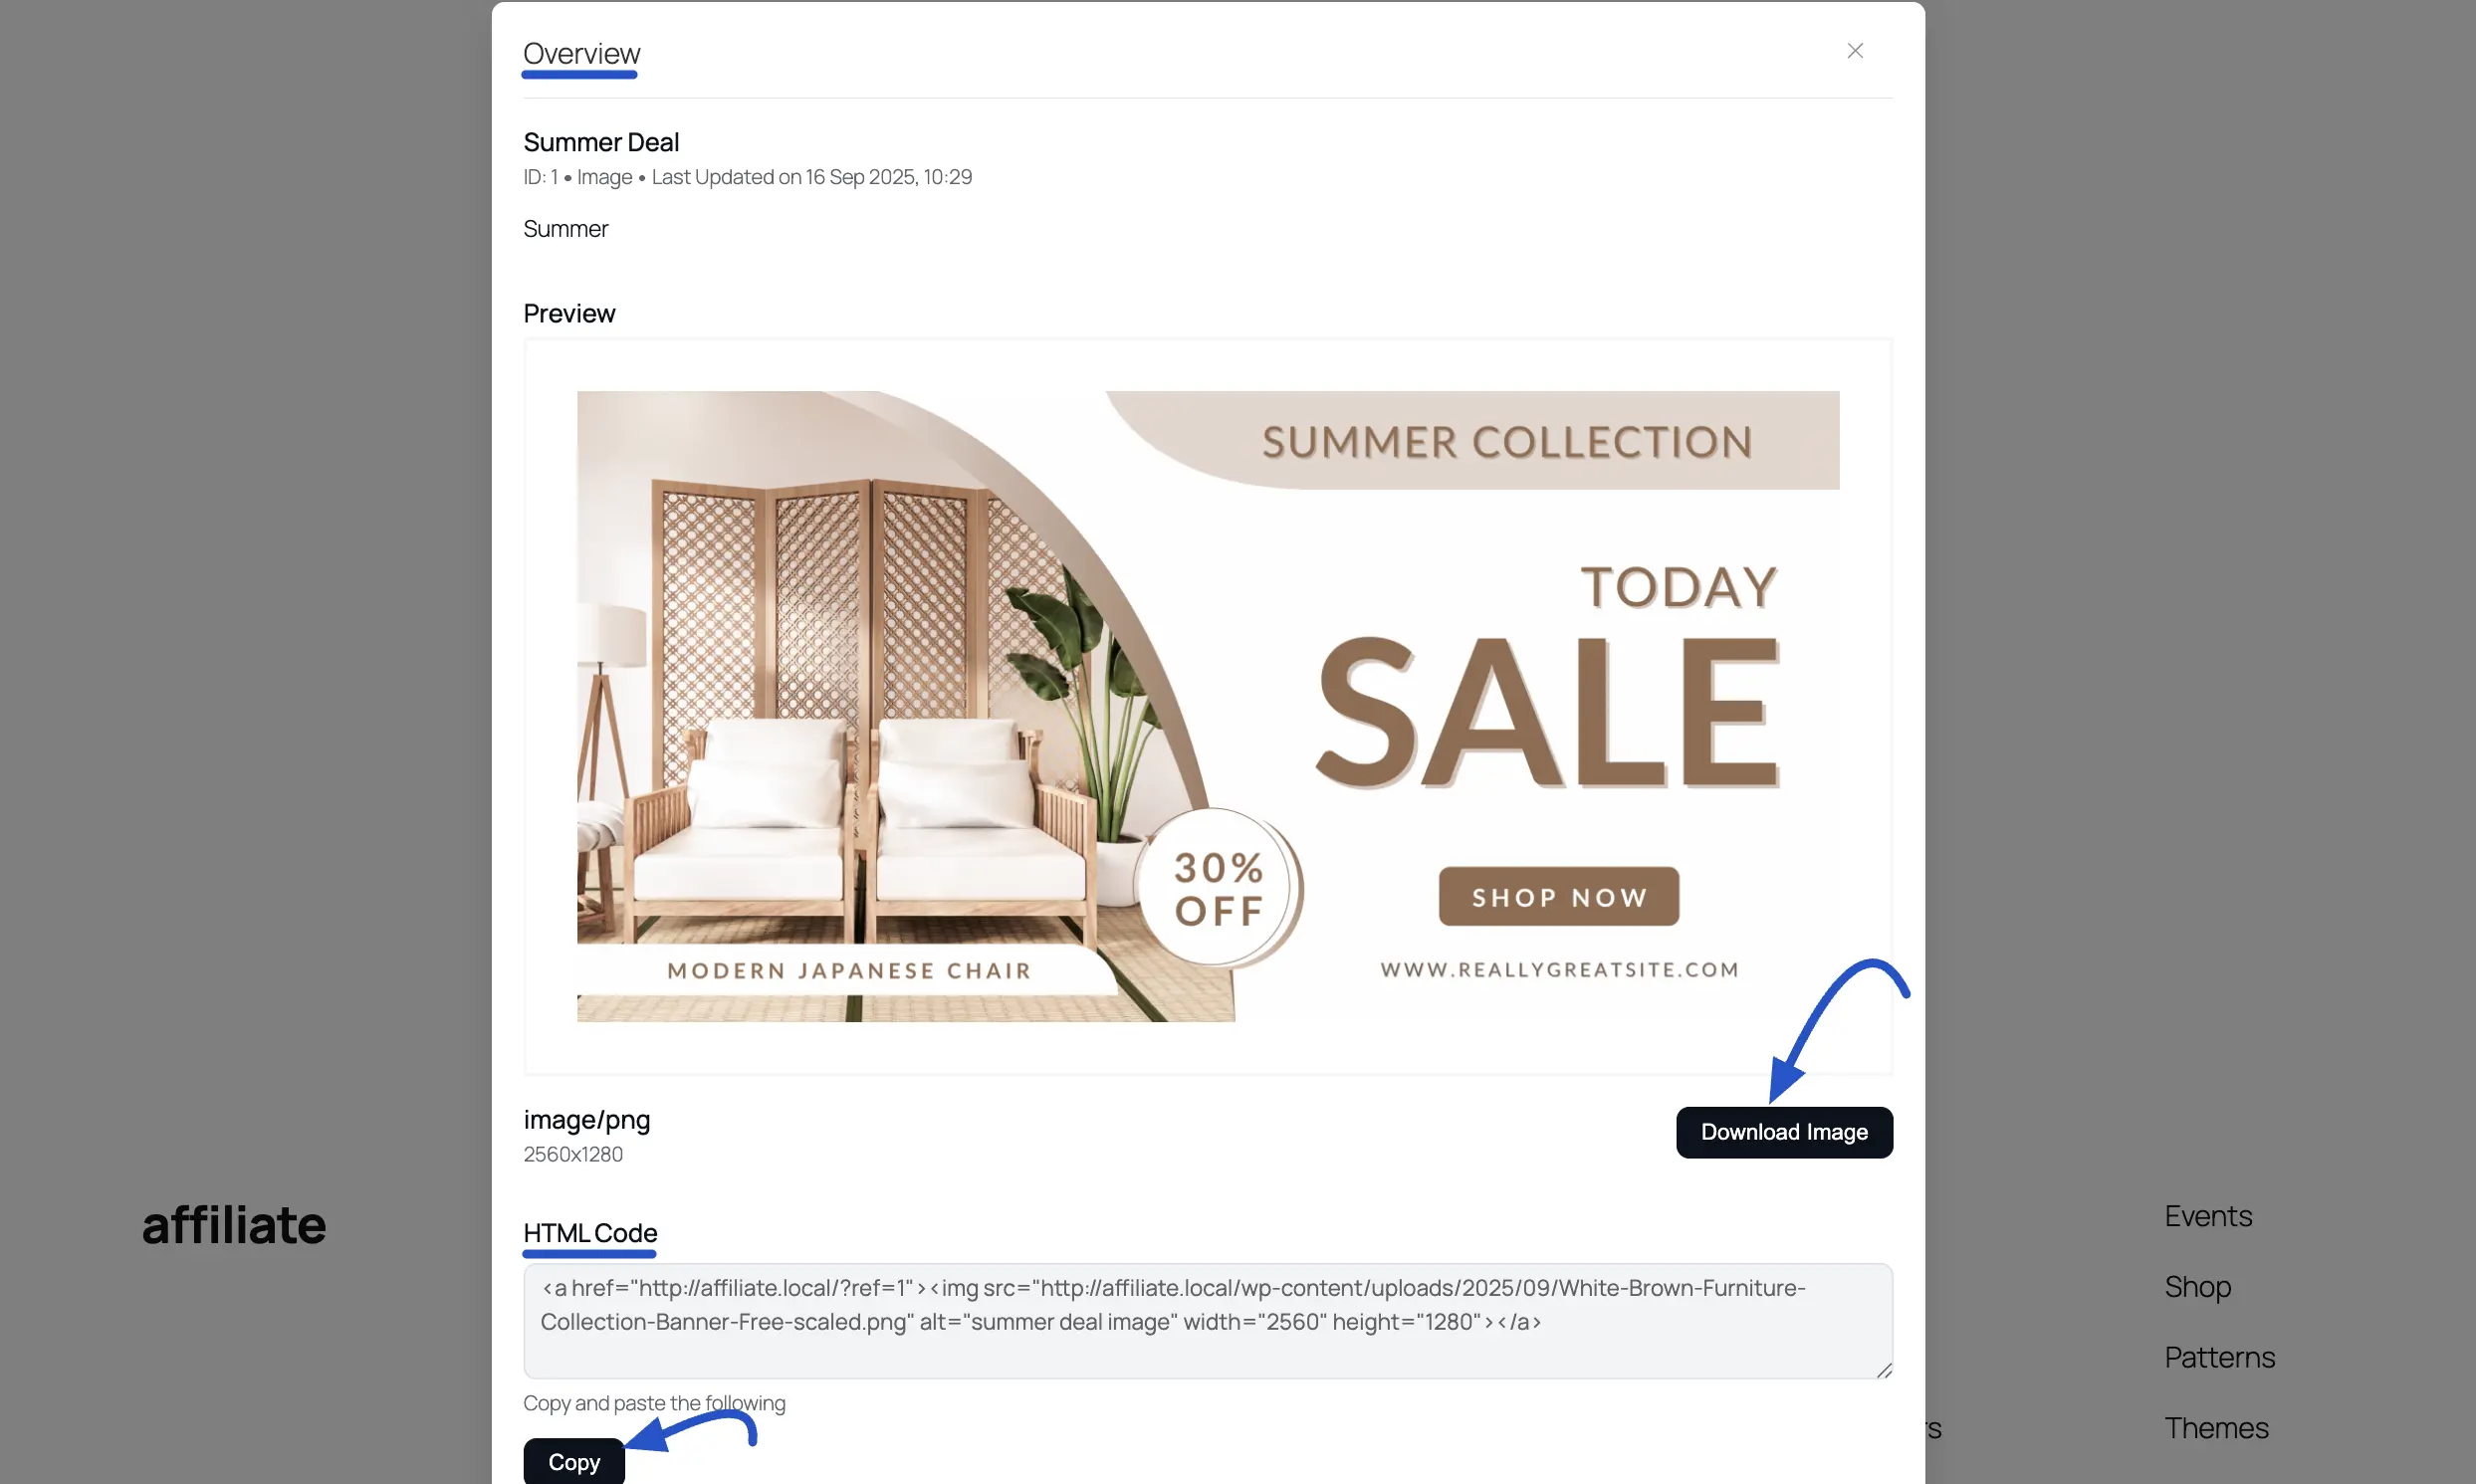
For Image Materials::
When you click on an image, you'll be taken to a new page showing a full preview.
HTML Code: Below the preview, you will find a box labeled HTML Code. This code includes both the image and your unique affiliate tracking link. Click the Copy button and paste this code directly into your website or blog. When a visitor clicks this image on your site, you get affiliate for the sale!
Download Image: You can also click the Download Image button to save the image to your computer.
For QR Code Materials:
Using a QR code is even simpler. Just click on the QR code creative from the list and download the image. You can then share this QR code anywhere, on flyers, social media posts, or even in person. Anyone who scans it will be directed to the site through your affiliate link.
This makes it simple to keep track of all the promotional materials you've provided to your affiliates.